Latest news about Bitcoin and all cryptocurrencies. Your daily crypto news habit.
 Photo by Harrison Broadbent on Unsplash
How to Setup a Headless Raspberry Pi
Operate Raspberry Pi Wirelessly through your Linux System.
Want to operate your Raspberry Pi without buying extra keyboard, mouse, monitor, etc ? Then this guide is for you.
Below methods are successfully tested on Raspberry Pi 3B and Raspberry Pi Zero W, using Arch Linux as Host OS. Moreover, this tutorial can be used for Microsoft Windows too as Windows supports Linux terminal. Use the terminal and follow steps.
If you find this blog helpful, please click the 👏 button and share to help others find it!
How to setup Pi?
So, Let’s Start
Step 1 : Fulfill Requirements
You will need following resources:
- Raspberry Pi and its power adapter
- Micro SD Card (8 GB or more)
- Wireless Router (You can even use the Hot-Spot of your smartphone)
- A Linux System.
- Active Internet.
Step 2 : Download Raspbian
To go to official download page, click here.
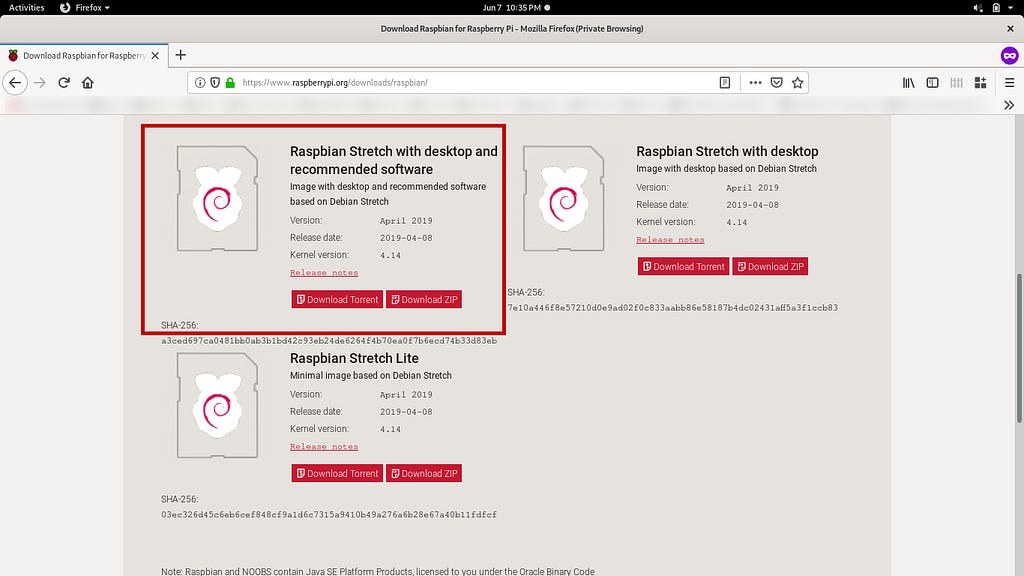
Download “Raspbian Stretch with desktop and recommended software”. This ISO contains ssh server, vnc server and other required tools.
Step 3 : Burn the ISO to Micro SD Card
First of all, connect the Micro SD Card to your Linux System.
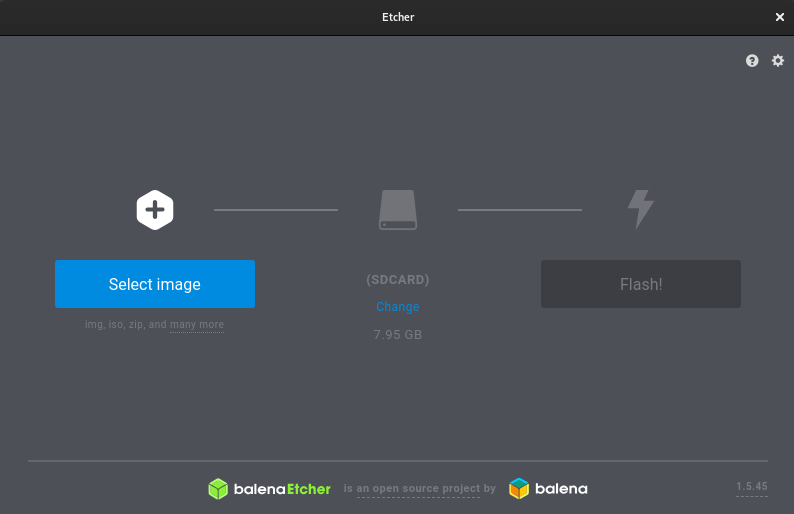
Use Balena Etcher to burn the Raspbian to SD Card. Etcher is an open source, very handy and easy to use, tool for burning Linux Images. (Raspbian is also Linux based). Download it from here.
Run it.
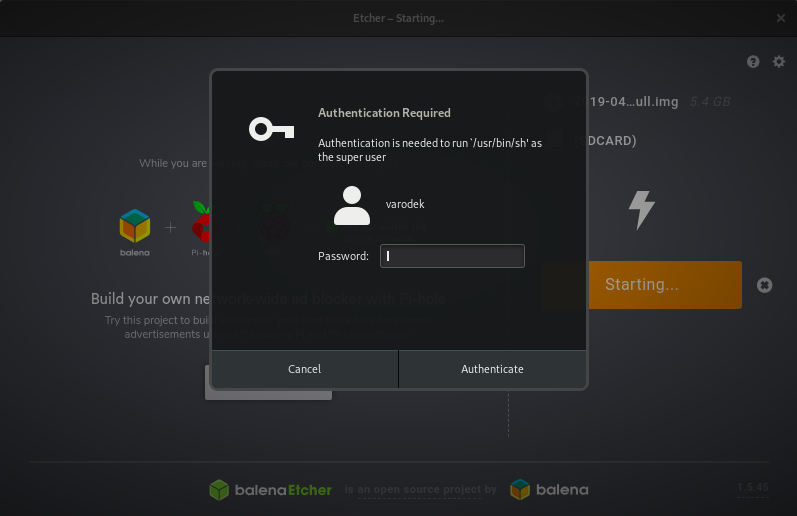
Select the path to Raspbian ISO, then select your SD Card to be burned and click Flash!. It will ask for authentication.
Enter your Password. It will take some time, till then have your coffee break. :).
Step 4 : Enable SSH
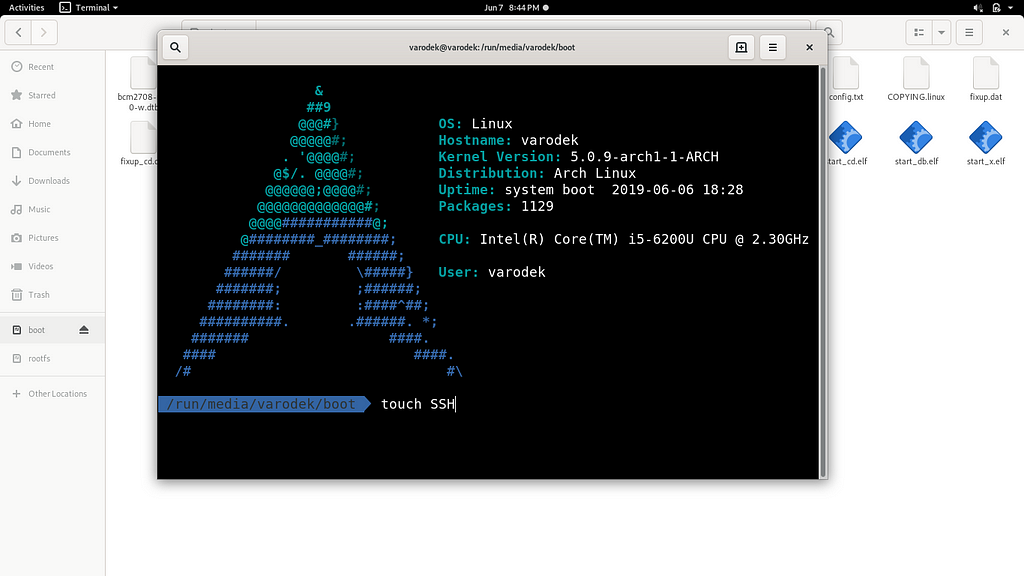
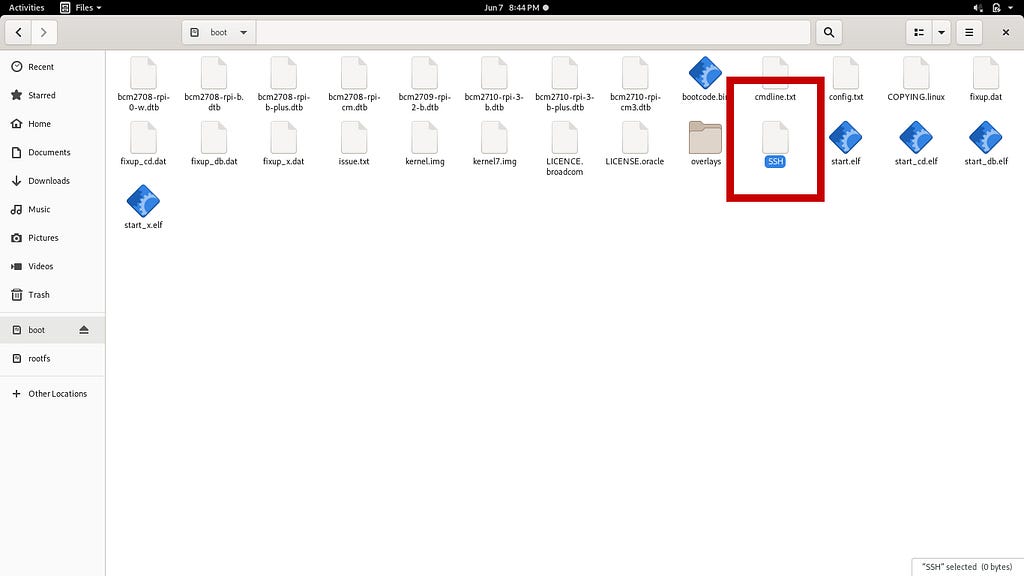
Open the boot partition of your SD Card in your File Explorer. Now run the terminal in same working directory and create an empty file with name SSH . This has to be done only for the first-time-boot, this will enable SSH sever on your Pi, hence it can be controlled via network.
Run the following command:
$ touch SSH
Step 5 : Feed Wifi password in your Pi
The WiFi connection can be provided either by a wireless-router or a Smartphone-HotSpot.
This is necessary as we are setting up a headless Pi, we need it to connect to a network as soon as it boots. Connect it to the same network with which your Linux System is connected. This will create a local area network.
Again it has to be done only for the first-time-boot.
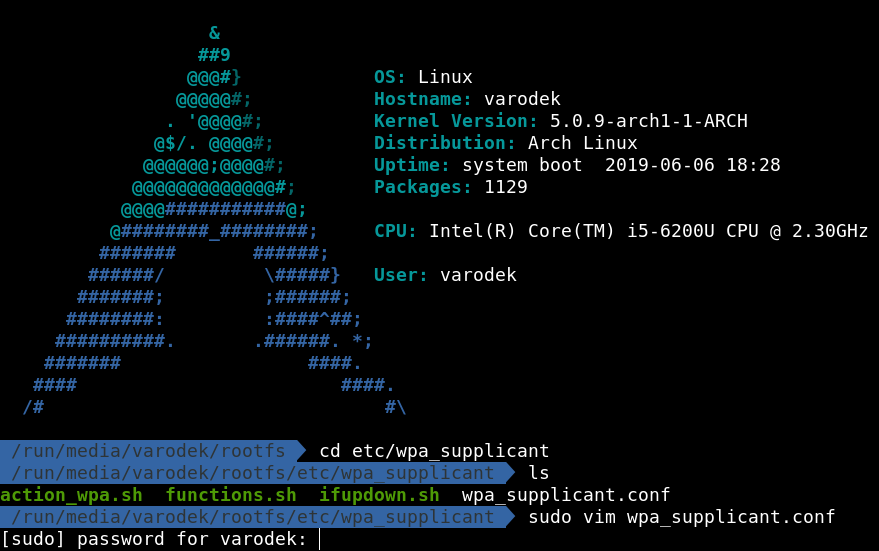
Open rootfs partition of your SD Card in your File Explorer. Now run the terminal in same working directory.
Now move to the etc/wpa_supplicant directory and edit wpa_supplicant.conf file.
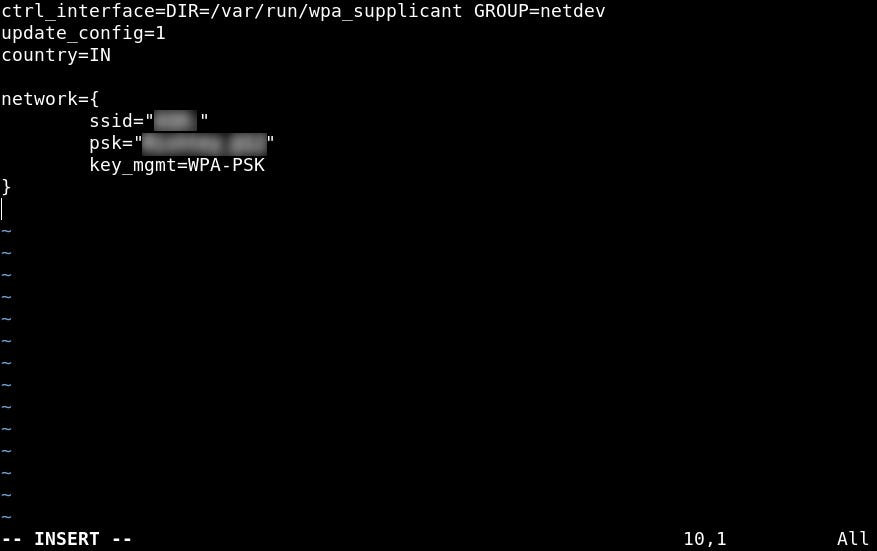
Now modify it with the following content.
country=IN is for your country. Here in my code, IN stands for India.
Your wpa_supplicant.conf file will look like this.
Step 6 : Find IP of your Raspberry Pi and access it using SSH.
(Note: We can skip this troublesome if we use static IP. But it will make this tutorial very tricky.)
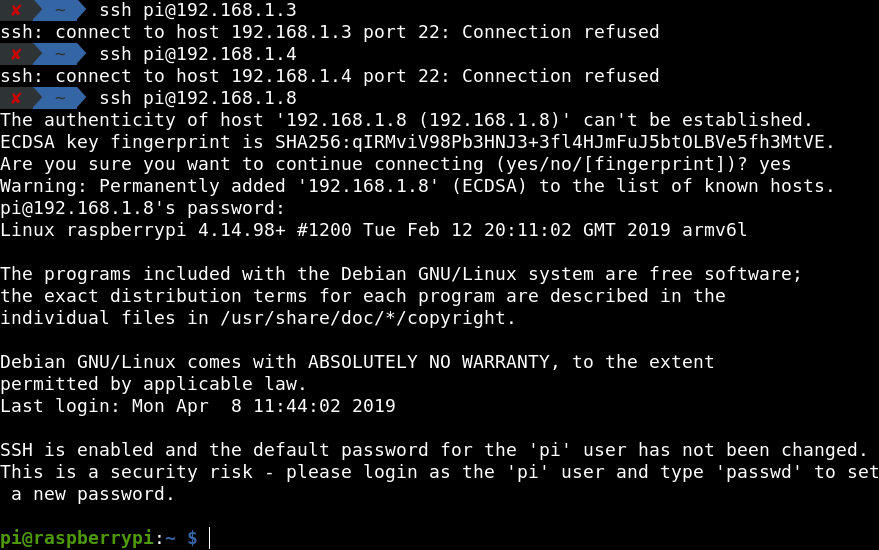
If your router supports MDNS, (All smartphones with Andoird < 9 support MDNS through their HotSpot), simply login into your pi using command ssh pi@raspberrypi or ssh pi@raspberrypi.local . It asks for password, which by default is raspberry .
We are going to operate Pi with our Host Linux System. And to establish a communication between two systems we need IP addresses. This is why we connected our System and Pi to the same router/smartphone-hotspot, so as to create a local network.
We are using router/smartphone-hotspot just as a 3rd party device to provide our system and Raspberry Pi with their IP addresses.
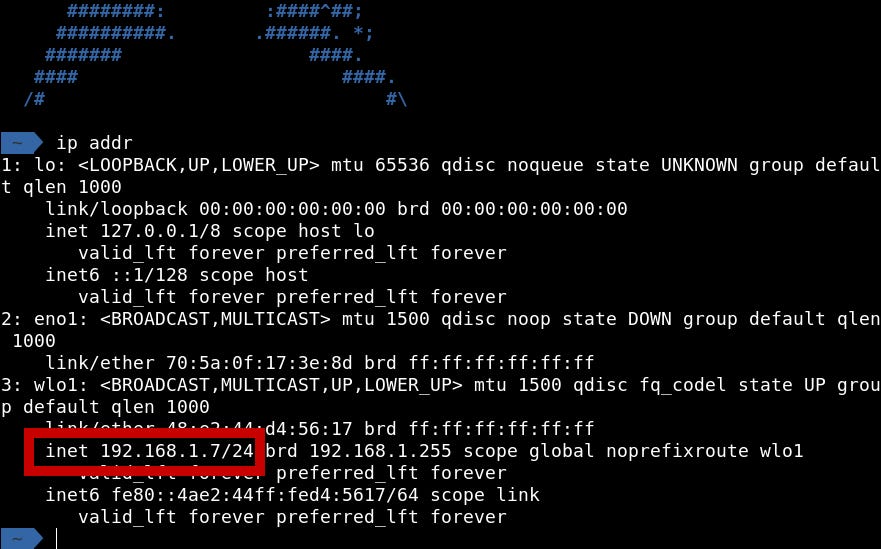
So let’s find the IP address of our Pi. To do this first we need to find IP address of our system. You can run any of the following command:
- ifconfig
- ip addr
- ip address show
As you can see , from the line inet 192.168.1.7/24 , its obvious that my IP address is 192.168.1.7 .
And as my Linux system and Raspberry Pi are connected to same network, my Raspberry Pi is going to have an IP address of form 192.168.1.xx where xx is any whole number between 1 to 255.
We need nmap . Install it on your system.
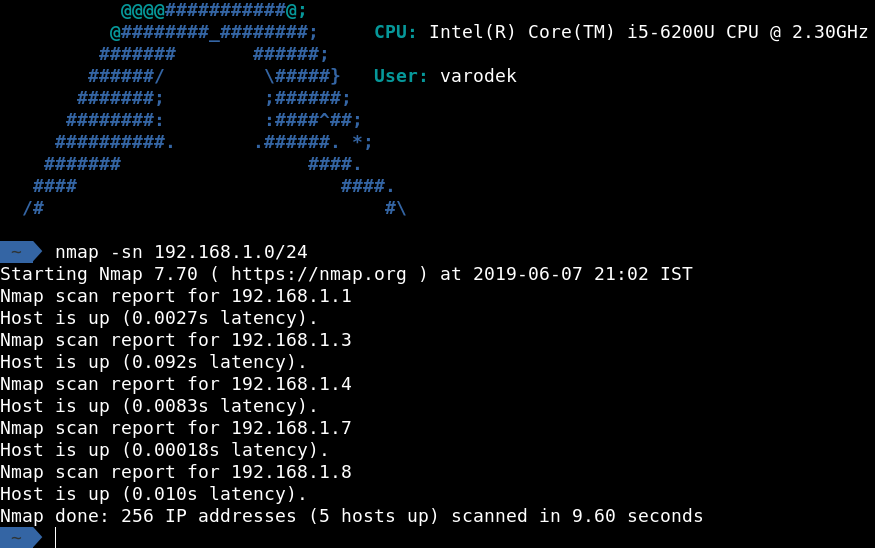
As my IP is 192.168.1.7 , I will run the following command (modify the command according to your IP):
$ nmap -sn 192.168.1.0/24
Now all the IP addresses you can see in the screenshot of my terminal, are of the devices connected to my Wifi Router.
Check which one is of your Pi.
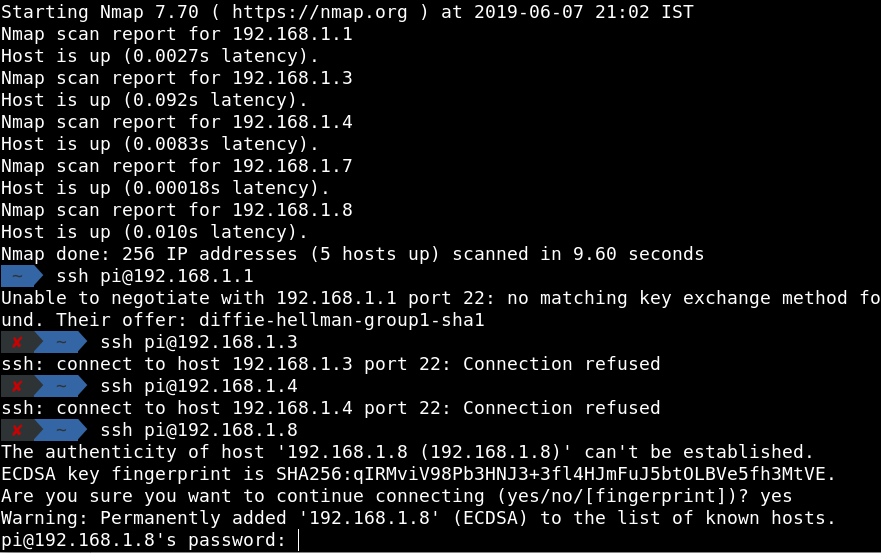
Run the command with the IP addresses you got:
$ ssh pi@<ip-address>
Hence found, 192.168.1.8 is the IP address of my Pi.
The default password for your Raspberry Pi is raspberry .
Hurray! Congratulations. You have setup your Headless Pi.
Sometime running sudo nmap -sn 192.168.1.0/24 instead of just nmap -sn 192.168.1.0/24 displays Hostname of devices connected. For example:
sudo nmap -sn 192.168.1.0/24
Starting Nmap 6.40 ( http://nmap.org ) at 2014-03-10 12:46 GMTNmap scan report for hpprinter (192.168.1.2)Host is up (0.00044s latency).Nmap scan report for Gordons-MBP (192.168.1.4)Host is up (0.0010s latency).Nmap scan report for ubuntu (192.168.1.5)Host is up (0.0010s latency).Nmap scan report for raspberrypi (192.168.1.8)Host is up (0.0030s latency).Nmap done: 256 IP addresses (4 hosts up) scanned in 2.41 seconds
Th above output is from https://www.raspberrypi.org/documentation/remote-access/ip-address.md
Access the desktop of your Headless Pi
Step 1 : Enable VNC on Pi
Access your Pi ussing SSH and run the following command:
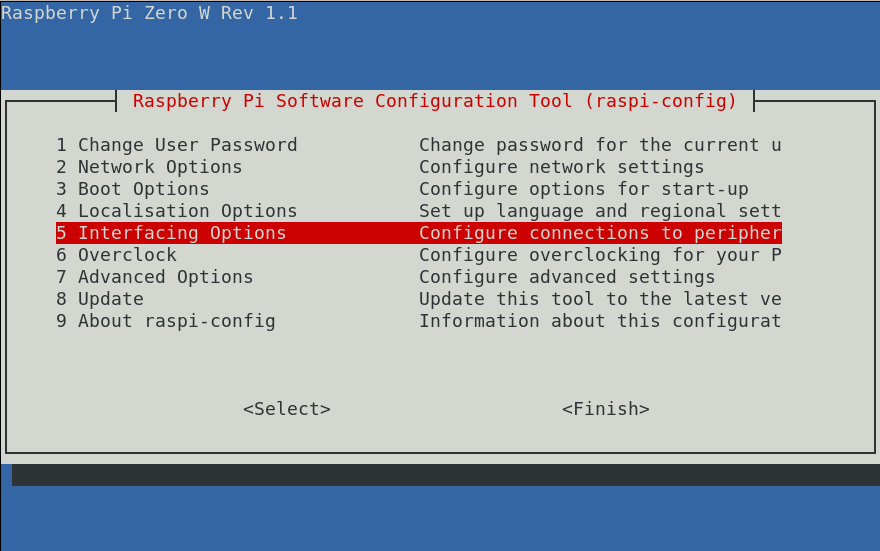
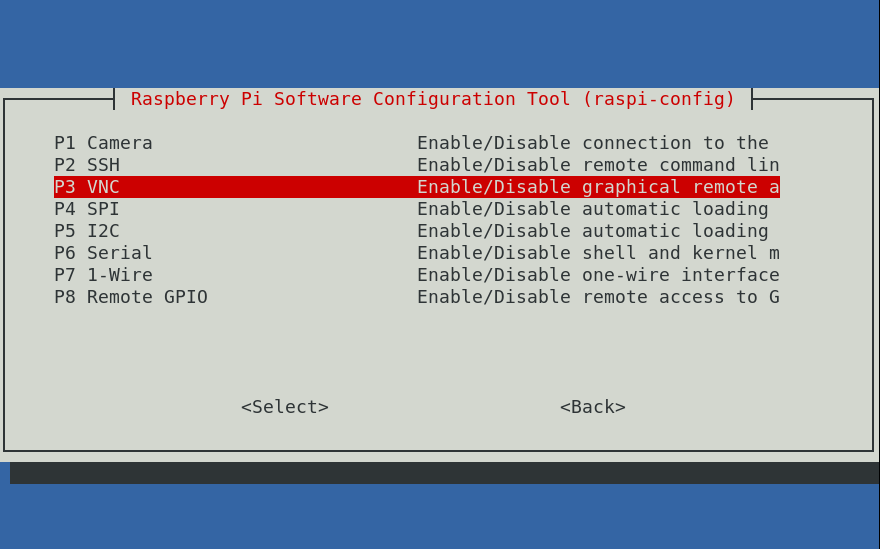
$ sudo raspi-config
Using arrow keys, go to the option for Interfacing Options. Press Enter.
Using arrow keys, go to the option for VNC. Press Enter. Follow all options to enable it.
Finally Finish it.
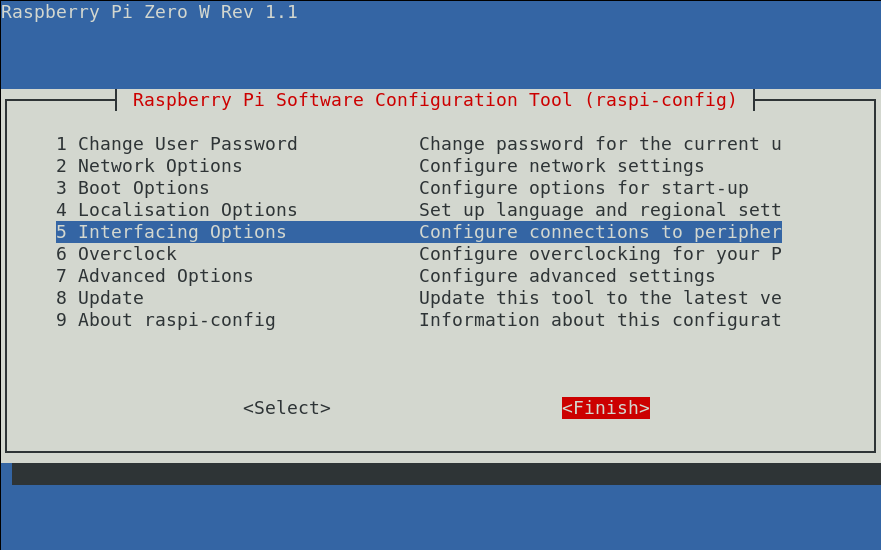 Screenshot of my TerminalStep 2 : Download VNC Viewer
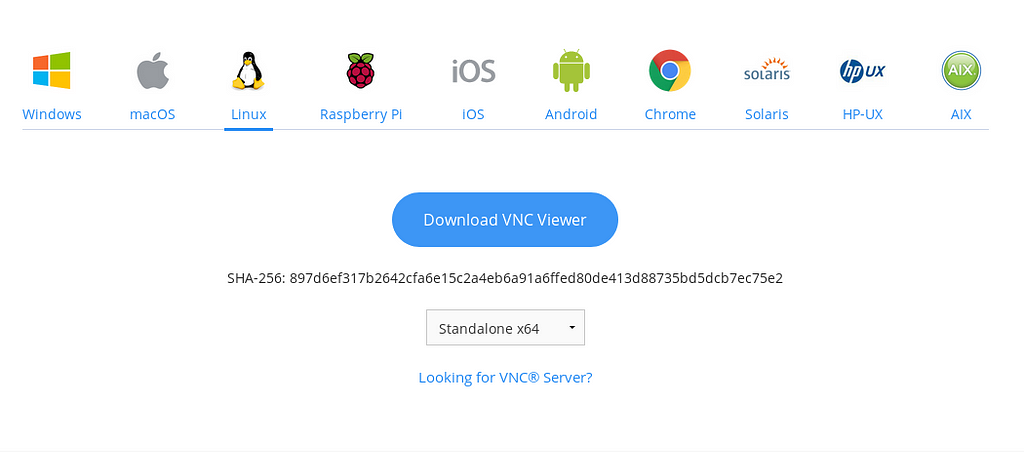
We will need VNC Viewer for this. Download it from here.
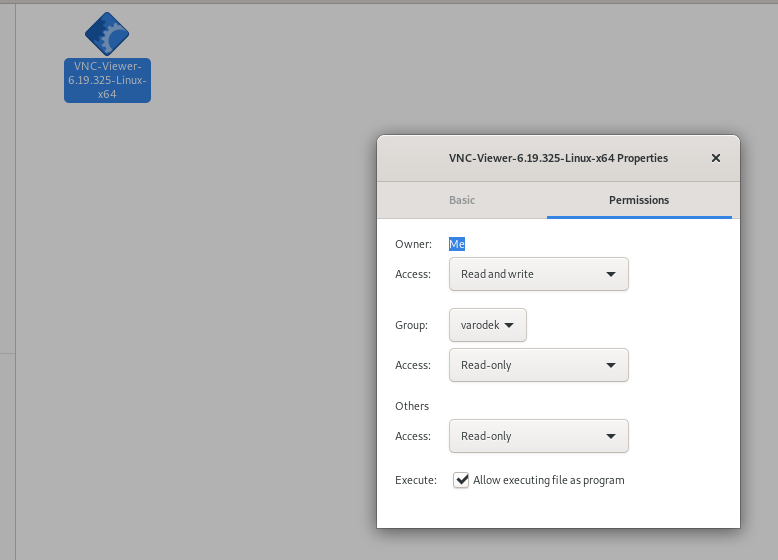
Unzip the File, if you have downloaded the Standalone version. Right-click on it and check the box for “Allow executing file as program”.
 Step 3 : Access desktop of Pi using VNC Viewer
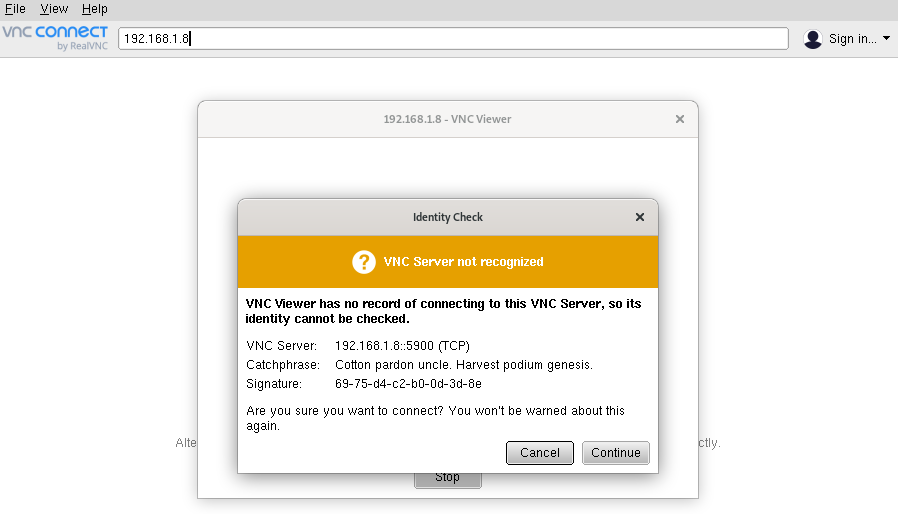
Run VNC Viewer and enter the IP address of your Pi. It will ask for confirmation. Click Continue.
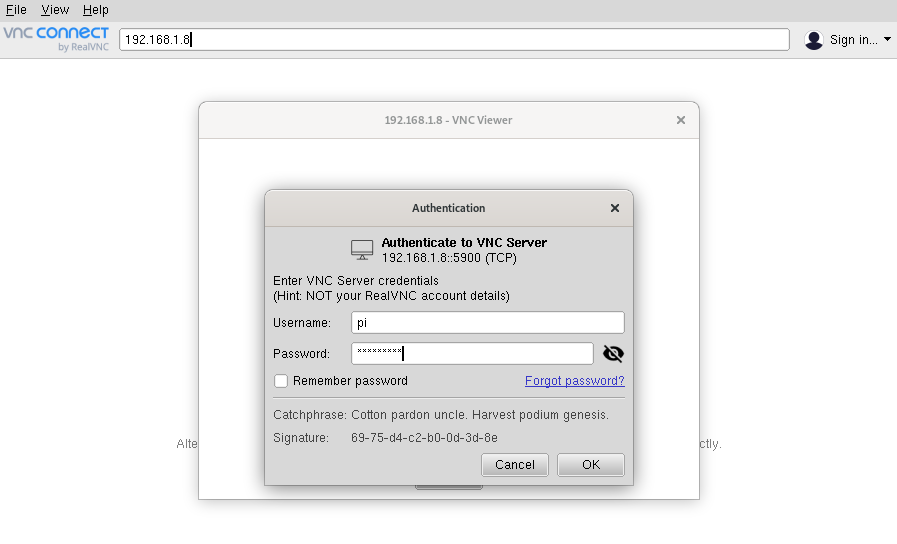
Now enter username and password.
Username is : pi
Password is : raspberry
Click OK.
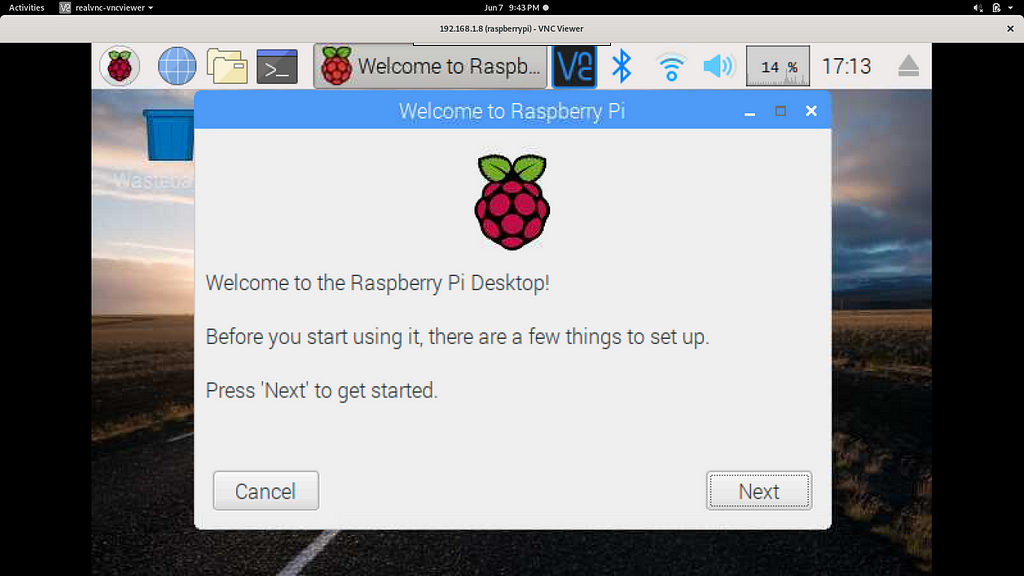
Hurray! Congratulations. You have accessed the desktop of your Headless Pi.
About me
Hello, my name is Vaibhav Gupta. An OS/Kernel Enthusiast | GSoC ’19 (RTEMS Project) | Developer | Mentor | Blogger | Sketch Artist | Archer.
- For my other projects, my GitHub Link- https://github.com/VARoDeK
- My other featured blogs- https://medium.com/my-gsoc-2019-journey/my-pre-gsoc-journey-2c528033b66d
Let’s get connected
For any queries, ping me on LinkedIn or Facebook. Follow me on:
- My LinkedIn Profile- https://www.linkedin.com/in/varodek/
- My Facebook Profile- https://www.facebook.com/vaibhav.gupta.1004837
- My Twitter account- https://twitter.com/varodek
- My Medium account- https://medium.com/@varodek
If you find this blog helpful, please click the 👏 button and share to help others find it! Feel free to leave a comment 💬 below :).
How to Setup a Headless Raspberry Pi was originally published in Hacker Noon on Medium, where people are continuing the conversation by highlighting and responding to this story.
Disclaimer
The views and opinions expressed in this article are solely those of the authors and do not reflect the views of Bitcoin Insider. Every investment and trading move involves risk - this is especially true for cryptocurrencies given their volatility. We strongly advise our readers to conduct their own research when making a decision.
