Latest news about Bitcoin and all cryptocurrencies. Your daily crypto news habit.
DIY — Build Your Own Decentralized Thermostat
In this blog post, we’ll be exploring how to build a “decentralized” thermostat and, in the process, we’ll be exploring the concept of decentralized IoT.
Decentralized IoT is, in its most basic definition, IoT that doesn’t rely on centralized cloud services or middlemen for its communication.
In the past few years there has been work on building P2P messaging networks that are entirely decentralized. Decentralized messaging networks include Whisper, Swarm PSS, and Bitmessage.
Once a decentralized messaging network matures to become scalable and reliable, it can offer a number of benefits compared to centralized devices, including the following:
- It’s serverless. You won’t have to setup a server or some intermediary to communicate with your device.
- You have constant access to your device. Since you’re relying on a P2P network rather than a server (a single point of failure), your uptime is significantly higher and without the overhead of maintaining a server.
- Your communication can be completely private, including metadata. A number of decentralized messaging networks, like Whisper, use dark routing and encryption to support private communication with no reliable way for an outsider to trace metadata.
Mind you, all decentralized messaging networks are still very nascent, and are still missing some core features for them to be reliable and scalable (an incentivization layer, for instance). But, hey, we’re hackers, and if we’ll not be messing around with experimental tech, then who will?
Without further ado, let’s move on to building our highly experimental decentralized thermostat.
Strictly speaking, decentralized thermostats have existed for quite some time. Here’s a classic example of one:
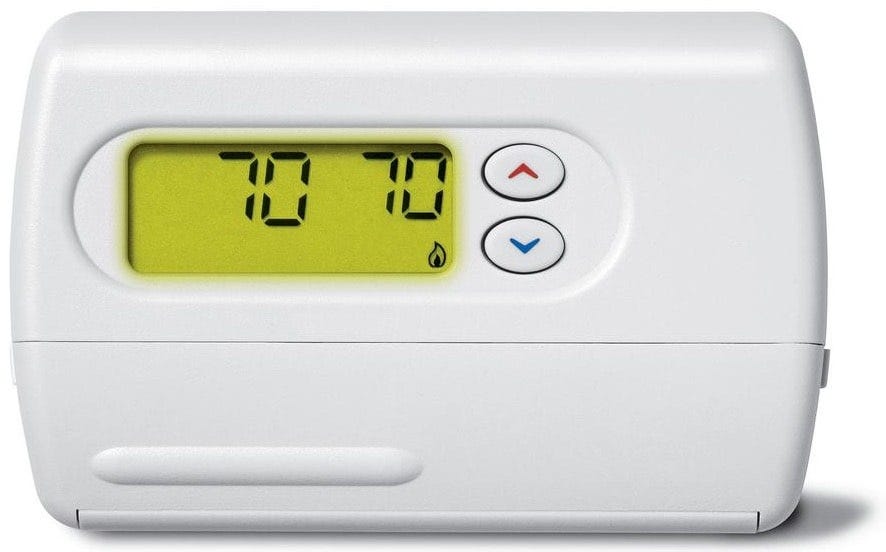 A classic “decentralized” thermostat
The above thermostat is decentralized in every sense of the word. It doesn’t rely on any centralized cloud services or middlemen, and communication with it is private including any metadata (unless you don’t trust your household).
But, in this blog post, we’re more interested in building a smart decentralized thermostat. At the very least, we want to be able to control it remotely via our phone. Here’s a rough sketch of the functionality we want to provide:
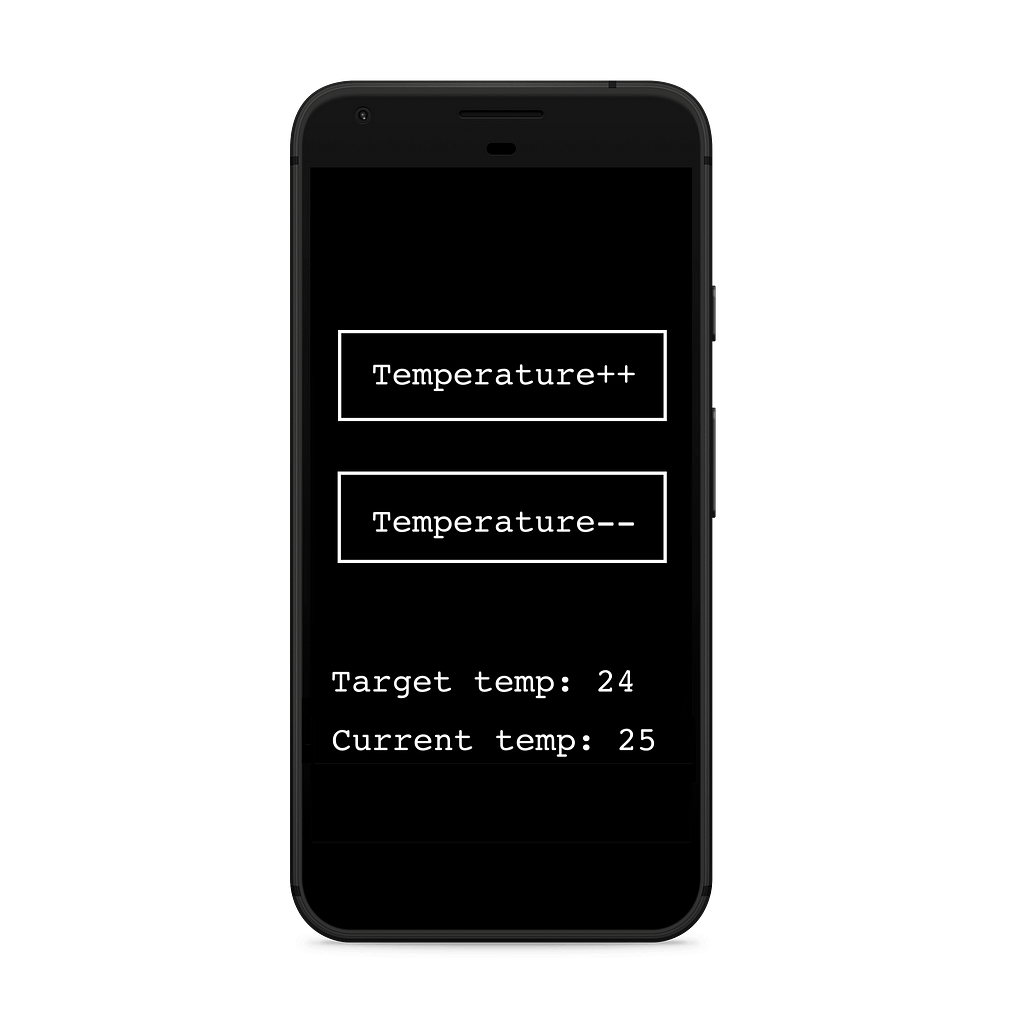 A mockup interface for the functionality/data we want to expose to the phone from the thermostat.
The above is a very basic mockup for the functionality we want to build. Specifically, we want to be able to do the following:
- Set the target temperature.
- Display the target and actual temperatures.
We’ll now explore two possible implementations of the communication layer between the thermostat and the phone using decentralized technologies. The focus of our discussion will solely be on the communication layer and not on the internals of the hardware.
Implementation #1: Whisper
Whisper is Ethereum’s decentralized messaging protocol and, if you’re familiar with Ethereum, it comes bundled with geth . Normally, you’d have to setup a Whisper node on your hardware, tune it so that it doesn’t consume too much of your hardware’s resources, generate keys for communication, gracefully handle any crashes, set up auto start on boot, etc.
Alternatively, you can use Elk. Elk is a hardware development board for building decentralized and blockchain-connected devices, and it provides support for Whisper out of the box. It handles key management and generation, and it provides an Arduino-like SDK without the hassle of setting up a Whisper node on an embedded device.
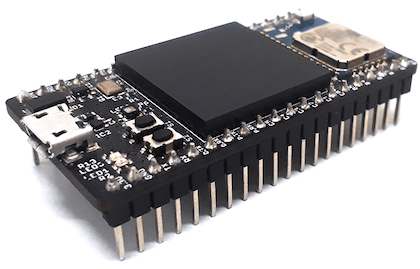 Elk: A hardware development board for building decentralized and blockchain-connected devices.
Here is the outline of our thermostat code (also known as sketch) written using raw Whisper and Elk’s SDK. If you aren’t familiar with the Arduino way of coding, you can learn more about it here.
/* Initial target temperature (in Celsius) */unsigned int targetTemperature = 23;
// 1. Setting a topicString TOPIC = "0x11223344";
void setup() { // 2. Listening to incoming Whisper messages. Whisper.subscribe(TOPIC, &handleMessage);}void loop() { // logic related to running the thermostat goes here}void handleMessage(WhisperMessage message) { // 3. Handling incoming whisper messages. if (message.payload == "increaseTemperature") { targetTemperature += 1; setTemperature(targetTemperature);// Send acknowledgement that message is received. Whisper.send(message.from, TOPIC, "ack");
} else if (message.payload == "decreaseTemperature") { targetTemperature -= 1; setTemperature(targetTemperature);// Send acknowledgement that message is received. Whisper.send(message.from, TOPIC, "ack");
} else if (message.payload == "currentTemperature") { // Respond with current temperature Whisper.send(message.from, TOPIC, readTemperature()); } else if (message.payload == "targetTemperature") { // Respond with target temperature Whisper.send(message.from, TOPIC, targetTemperature);}}
/* Stub of setting target temperature. */void setTemperature(unsigned int target);
/* Stub to read current room temperature from temperature sensor. */float readTemperature();
Let’s examine the above code more closely:
- Setting a topic. Whisper relies on topics to make its routing more efficient. This is essentially 4 bytes of arbitrary data that you set and both the sender and receiver need to communicate using the same topic. You can learn more about topics here.
- Listening to incoming Whisper messages. Elk provides key management and automatically uses its auto-generated Whisper key (which you can override if you wish). The device essentially listens to any message sent to the topic that it’s able to decrypt.
- Handling incoming Whisper messages. This part of the code is self-explanatory and it defines an interface used for turning messages the device receives into functionality.
The code above is an outline of a working implementation of a smart thermostat that we can use to set and monitor the temperature remotely using Whisper. There are a number of issues though with the implementation above:
- There’s no authentication. Anyone can send commands to the thermostat. One easy way to resolve this is to check that the message is encrypted by you.
- Message delivery in Whisper isn’t guaranteed, which isn’t ideal when it’s a hot Summer day and you’re trying to tell your thermostat to cool the house down on your way home.
- You’ll need to build out a mobile app or some other UI to use this. Whisper is a low-level protocol and doesn’t have a UI.
Implementation #2: Elk Protocol + App
The absolute easiest way to build the communication layer of the thermostat is using Elk along with the Elk protocol and mobile app. The Elk protocol extends Ethereum’s Whisper protocol to simplify communication with IoT devices. It offers the following advantages compared to Whisper:
- It includes authentication out of the box.
- It includes a mechanism for retries and timeouts.
- It automatically generates a mobile interface to communicate with your device. The Elk app generates a basic UI for you to get started using your devices quickly.
Below is the code you’d need to communicate with your thermostat using the Elk protocol:
/* Initial target temperature (in Celsius) */unsigned int targetTemperature = 23;
void setup() { // Define a name for the sketch to be used in the Elk app Elk.setName("Thermostat"); // Exposing variables Elk.expose("Current Temperature", &readTemperature); Elk.expose("Target Temperature", &targetTemperature); // Exposing functions Elk.expose("Temperature++", &increaseTemperature); Elk.expose("Temperature--", &decreaseTemperature);}void loop() { // logic related to running the thermostat goes here.}void increaseTemperature() { targetTemperature += 1; setTemperature(targetTemperature);}void decreaseTemperature() { targetTemperature -= 1; setTemperature(targetTemperature);}/* Stub of setting target temperature. */void setTemperature(unsigned int target);
/* Stub to read current room temperature from temperature sensor. */float readTemperature();
The code above is all we need to implement the communication layer of the thermostat. The code exposes two functions for increasing and decreasing the target temperature, as well as two variables for the target temperature and current temperature. I stubbed out the hardware related functionality for brevity.
What happens when we deploy the sketch above to the board? You can now download the Elk app, scan the QR code of the board, and voilà! The Elk app communicates with the board using Whisper, fetches metadata about your sketch, and generates an interface for the functionality we exposed in the sketch.
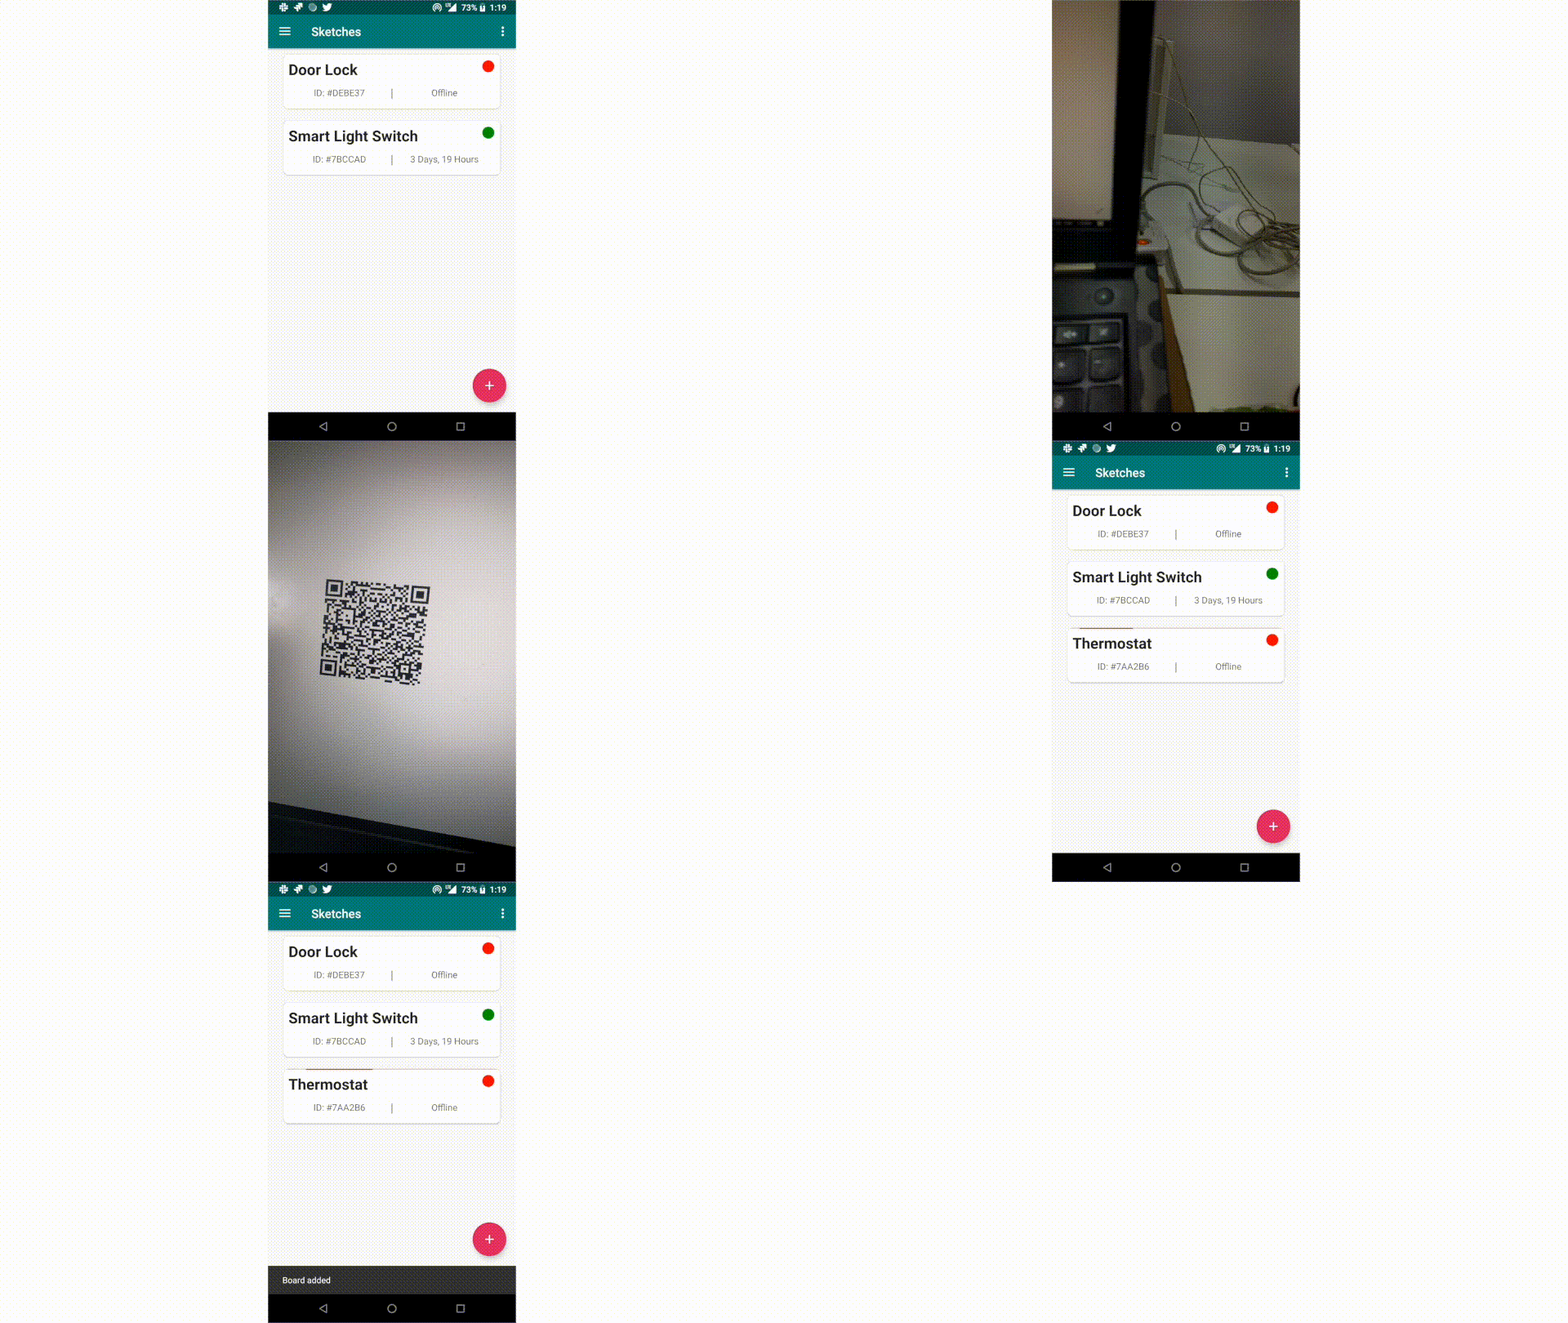 Adding a sketch to one’s phone with the Elk app and the Elk board’s QR code.
The interface also provides feedback that a message has been received successfully by the thermostat.
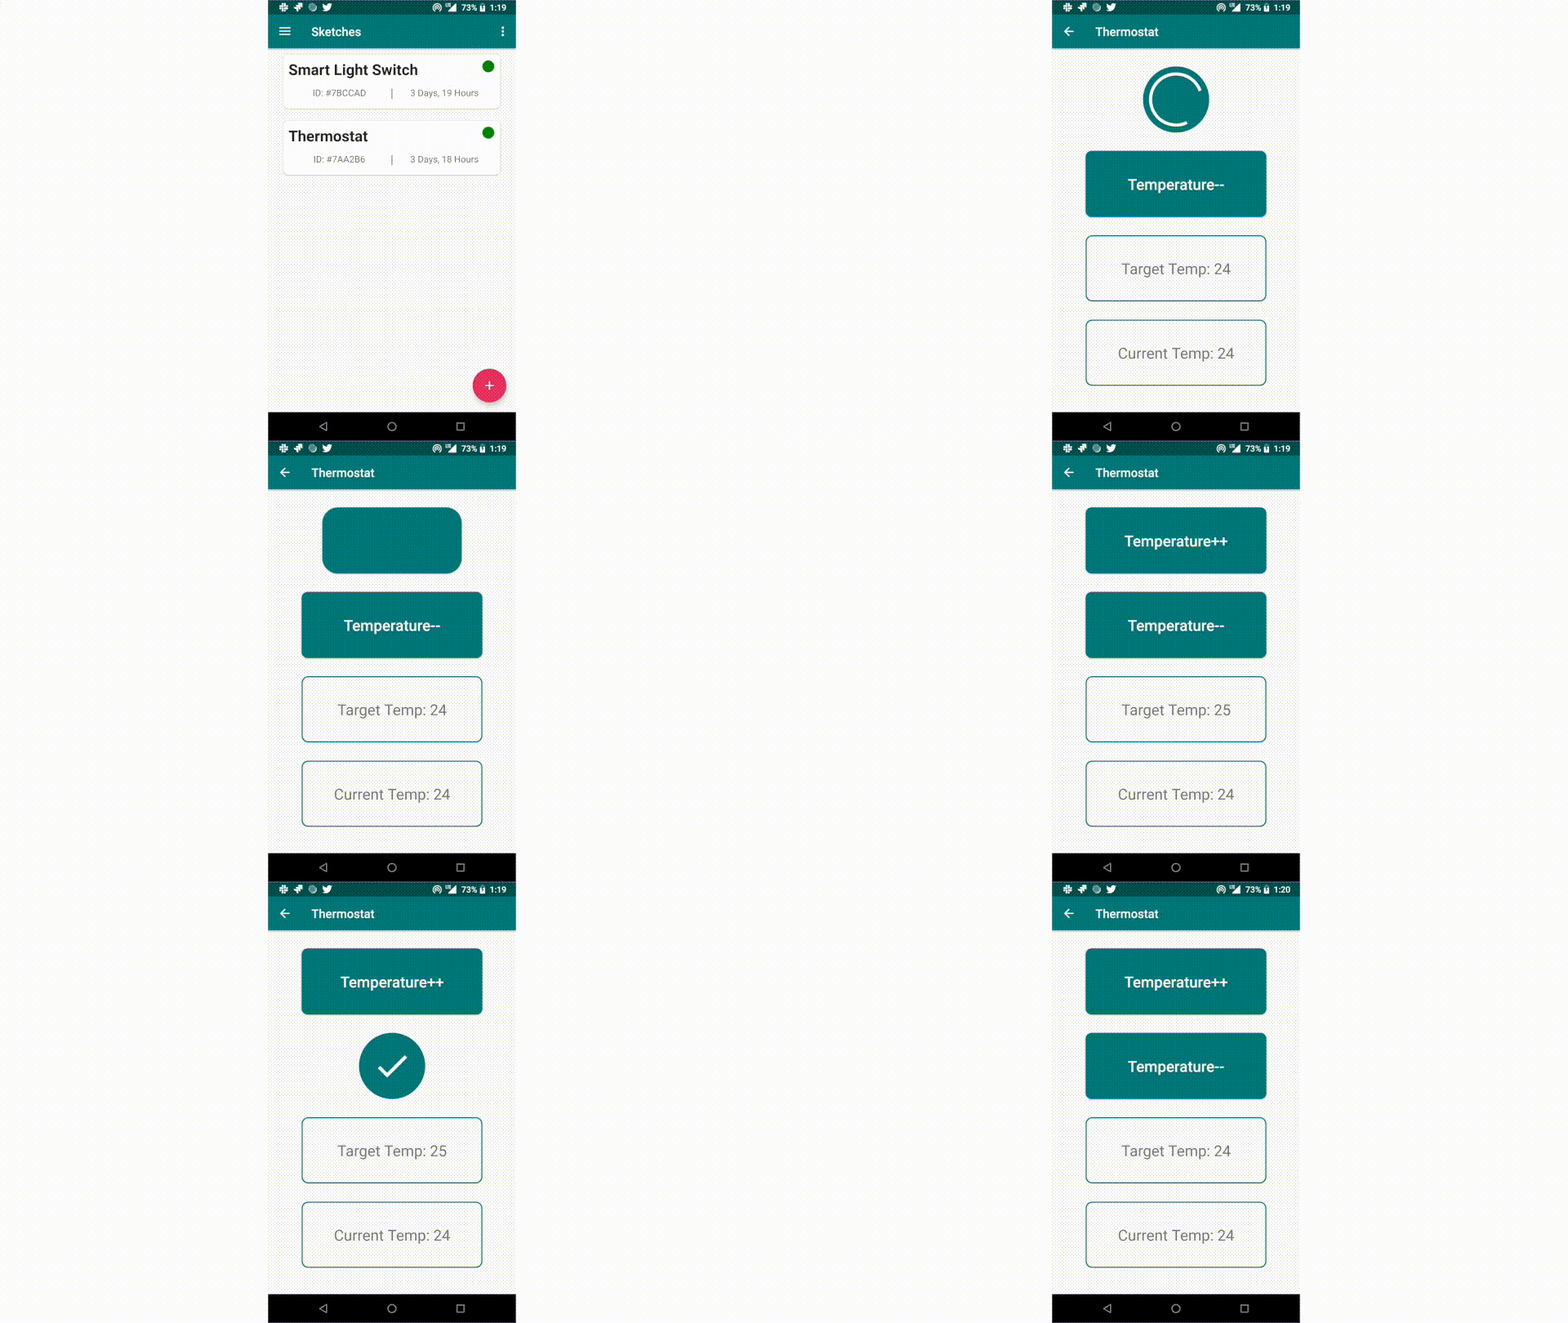 The interface generated by the Elk app from our sketch. The interface is dynamically generated without having to code anything. Variables like target and current temperatures are updated in real-time.
Note that the current implementation allows anyone to communicate with your device. For security, you can easily whitelist only yourself as the user of the board through its IDE config.
That’s it! We are now able to control our thermostat using a decentralized messaging network — no middlemen or servers required. Wasn’t that easy?
At Elk, we’re on a mission to bring decentralized technologies into the physical world and to make its development experience 10x better. If that’s something that interests you, check out our development board.
DIY — Build Your Own Decentralized Thermostat was originally published in Hacker Noon on Medium, where people are continuing the conversation by highlighting and responding to this story.
Disclaimer
The views and opinions expressed in this article are solely those of the authors and do not reflect the views of Bitcoin Insider. Every investment and trading move involves risk - this is especially true for cryptocurrencies given their volatility. We strongly advise our readers to conduct their own research when making a decision.