Latest news about Bitcoin and all cryptocurrencies. Your daily crypto news habit.
In my last post, I looked through various aspects on developing Actions (or apps) for Google Assistant. You can once again go through that article for refreshing the topics (https://goo.gl/DJhyKZ). In this post, we can develop a simple action for the Google Assistant using the pre-built templates available.It will be good if you can use a PC instead of your smartphone.We will be building a simple quiz app using the templates.
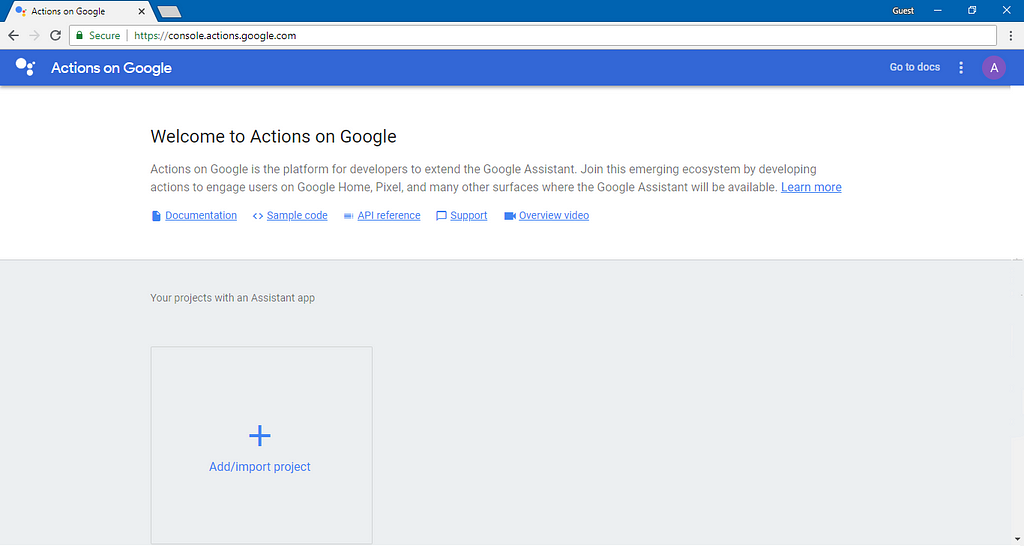
- At first, you need to visit the Actions Console (https://console.actions.google.com/). You will need to use your google account to sign in. After that, you will reach a page like this one.
Here, you will see options to go to Documentation, sample code, overview video, etc. You can read about the same thing in the documentation, but in a different way. You can also watch the over view video. Obviously, those video lectures are great to watch.
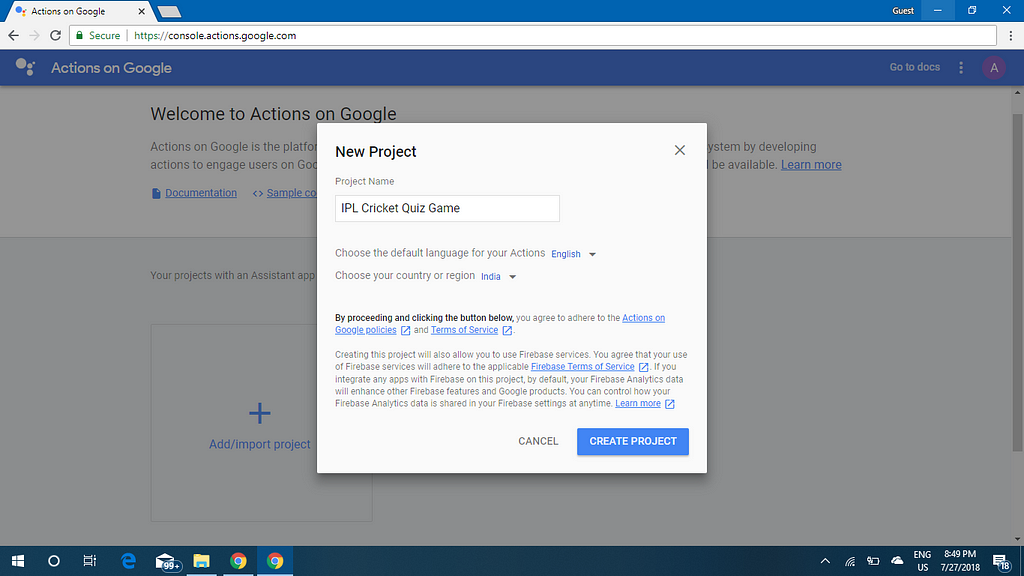
2. Now, you have to click on, Add/import project. In the popup that appears, you have to give a name to your project (or app) that can be used as the name of your app.(You can assign the name later). After providing the name, choose the language. It will be in English by default and there is no need to change it since we are using the templates. After that, select your country.
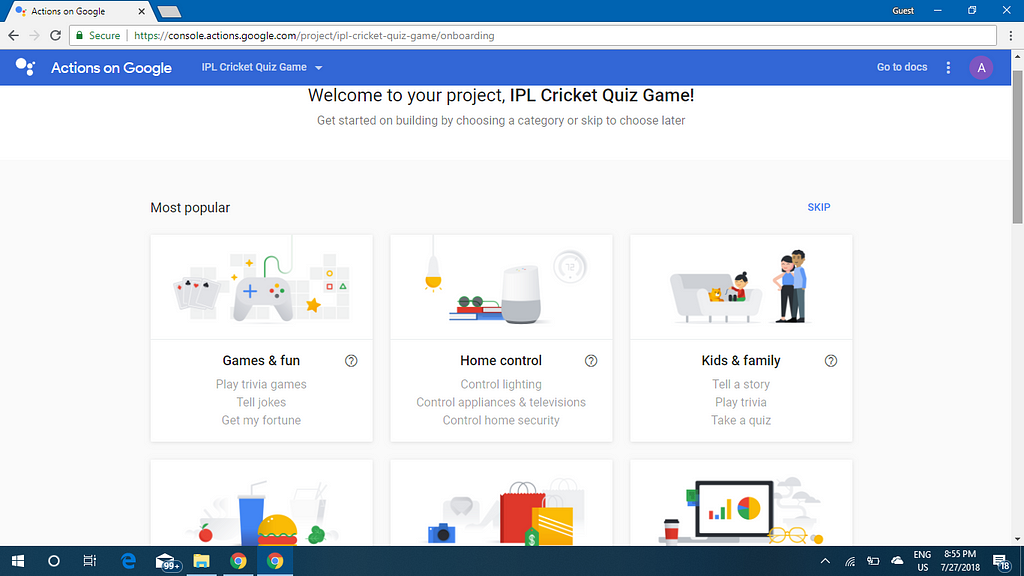
3. Now, click on Create Project. You will be directed to a page like the one shown below.
Here, you will find various themes for developing different apps. Since we are building as quiz app, we can select Games & Fun (first option) since that defines our app (Kids and family also defines our app, but the user reach will be quiet low). Now, go on and select Games & Fun.
4. Now you will see 4 options. From that select Trivia Quiz (You may also select Flash card. It will be better to select the Trivia). When you click on that, you will be directed to a page shown below.
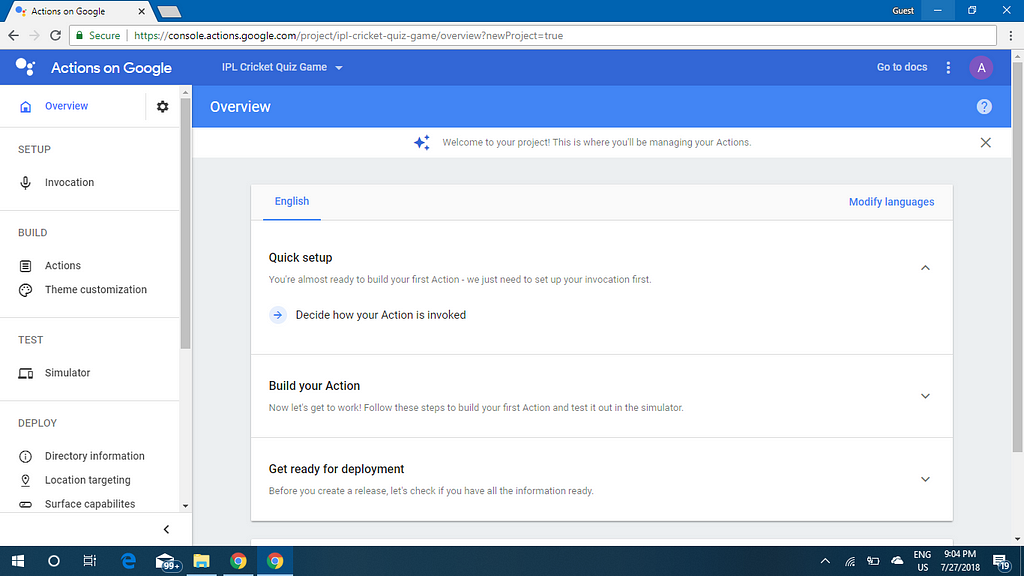
Now, we can get familiarized with various options present in the page. This our development page. Through this page, we can manage our action/app before or after it is published.
We are now standing in the overview section. From here we can see the status of our action. In the left, there are many options like, invocation (used to invoke your app through Google Assistant), Actions (to create the main content of the action), theme customization (where you can customize the voice of your action), simulator (where you can test your action before it is released), directory information (where the details of the action must be entered, Location targeting (where the the location for the action to be available can be provided), surface capabilities (where you can select whether your action can be used on mobile devices and Google home or only on any one), etc.
Now we can move back to the development of our very first action for the google assistant.
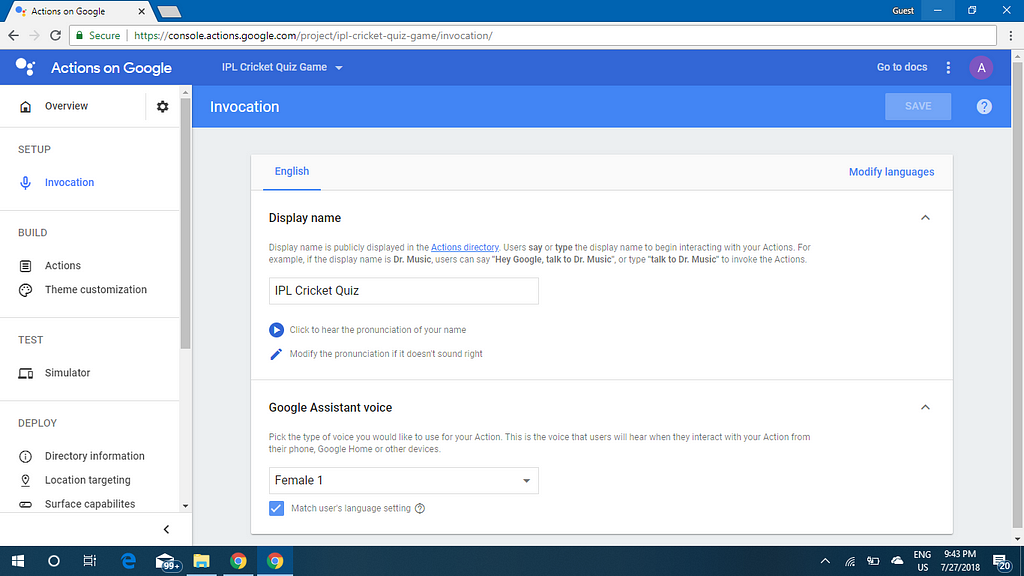
5. Click on ‘Decide how your action is invoked’ below quick setup. You will be directed to a page where you will be asked to provide a Display name. You can give a name for your app here. Try to keep your name short. This name will be used to invoke your app as well. I’m providing the name of my app as ‘IPL Cricket Quiz’.
6. Below that, you will find an option to change the Google assistant voice. There 4 models, two of which are male voice and the other two are female voice. You can select anyone.
7. Now, to the top right corner, you will find a button named ‘save’. Click on that to save your information entered. If you provided a name that has been already used by some one else, an error message will be shown. If that occurs, change the display name of your action.
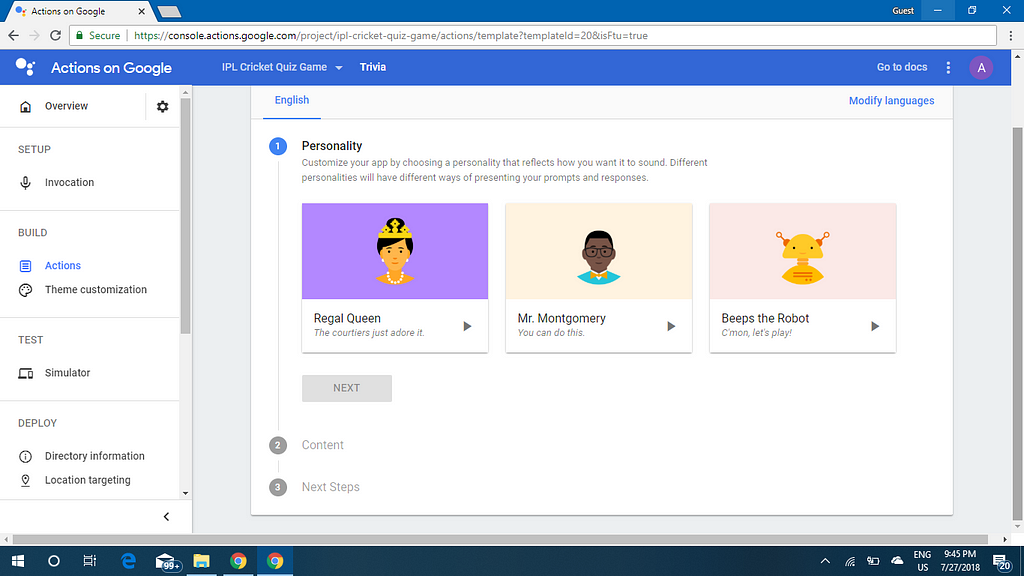
8. Now go back to the overview page. Click on Add action(s) under Build your Action. You will be asked to select a personality for your action. You can try the 3 different options available by clicking on the play icon. You can chose whichever personality you like the most. Select that and click on Next.
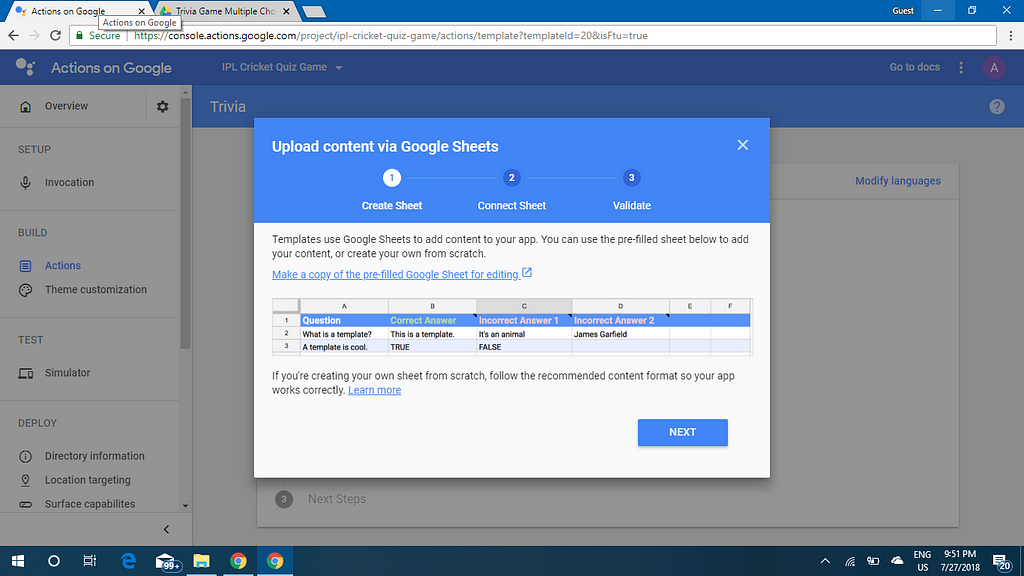
9. Now you will be asked to bulk upload content via Google Sheets. This will be the content of your app. We have to provide the content trough Google Spreadsheet. Click on ‘bulk upload the content’. Now, a popup will appear and some instructions will be shown. Among them, a link will be provided to create a copy of a pre-built spreadsheet. Click on that.
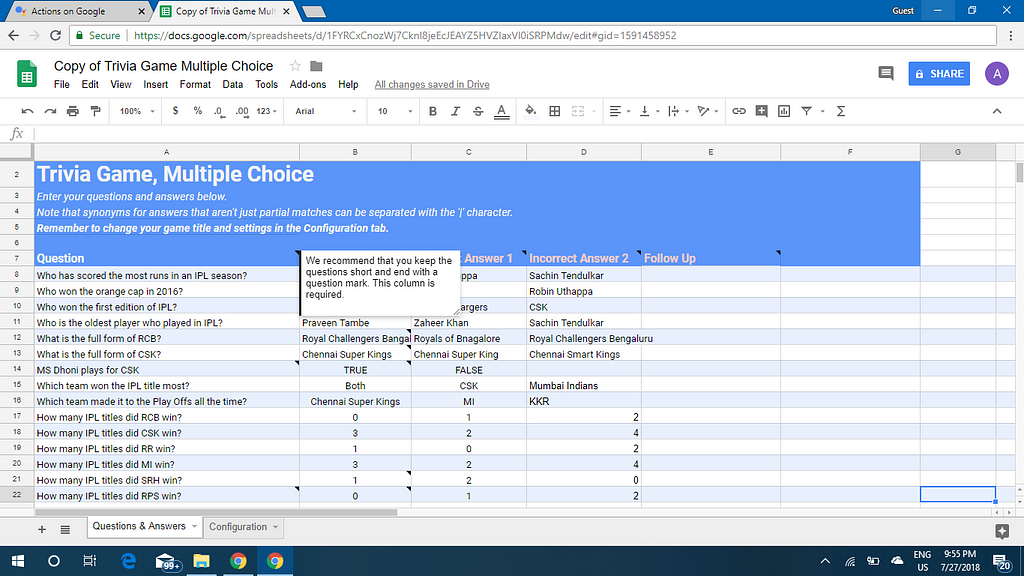
10. When you click on the link, you will be directed to a page where, a spreadsheet document will be present. We should not make any changes to the first 7 rows. You can delete everything after that and fill it with your own content. Be sure to include at least 50 questions, or else the same question will be repeated frequently. All the changes that you make will be automatically saved.
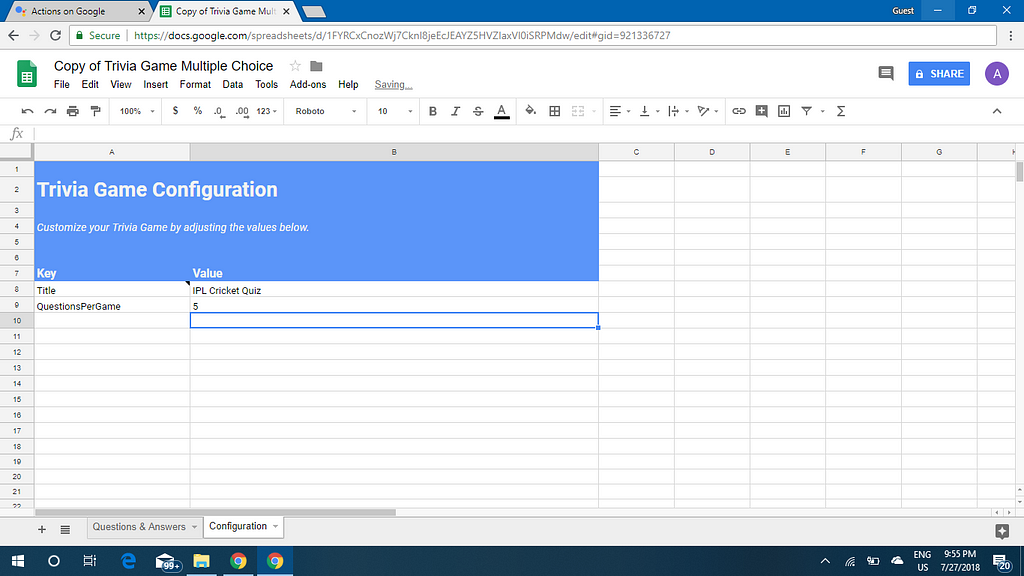
11. If you look at the bottom of the sheet, you will find an option to switch to another page named as configuration. Go to that page. You will find 2 rows there. Change the name provided there to the display name of your action. You can also change the number of questions to be asked during a game. I usually choose 5, since it is neither long nor short. It can ask up to 10 questions per game. (Include as many questions you can. Or else, same question will be repeated). Every details will be automatically saved.
12. On the top right corner, you will find an option to share the document. Click that, and get a shareable link.
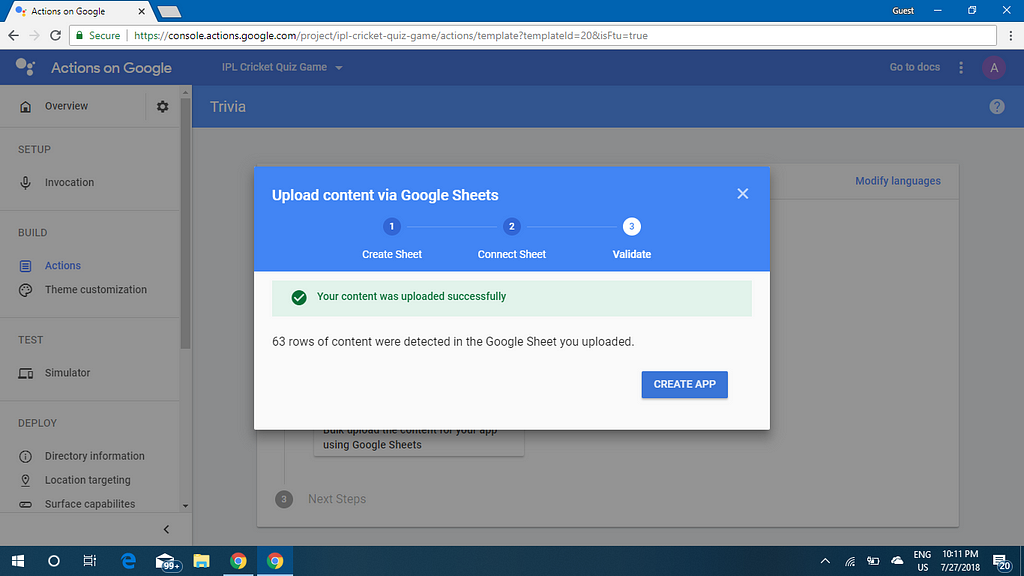
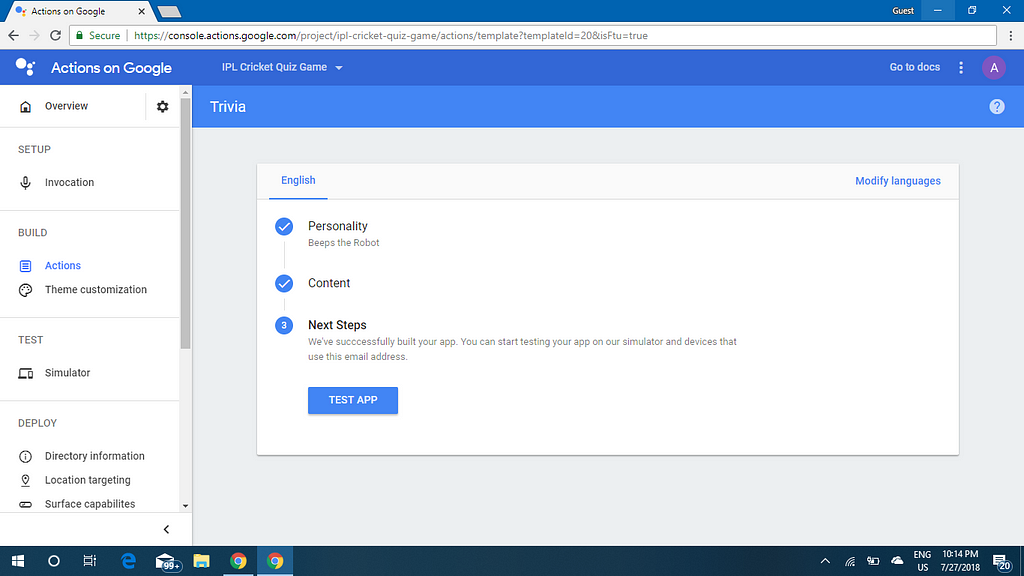
13. Now come back to Actions Console. Click next and paste the link that you just copied to the space provided. Click upload. If there are no errors in your spreadsheet, you will be asked to click on ‘create app’ button. Click on the button. After 10–20 seconds, your app will be created (if there are no errors) and will be taken back where you can test your app using a simulator.
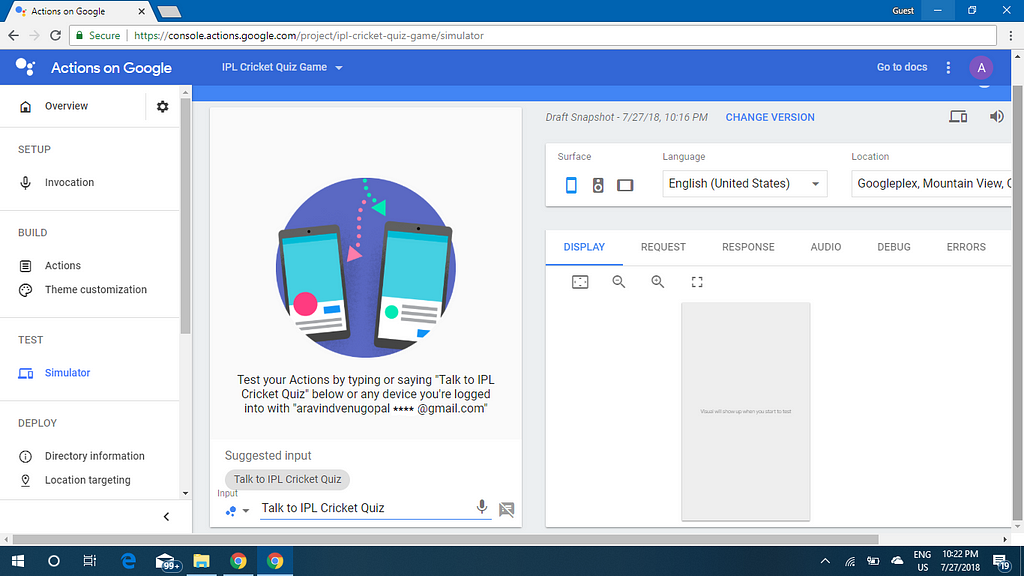
Now, click on test app, to check whether your action works fine or not. You will be taken to the simulator page where you can test your action. You can also use your mobile phone (it should have Google Assistant app)or Google Home devices, if you have used the same Google account for the Actions Console. You just need to say ‘Talk to my test app’. You can either use your mobile phone, home devices or web simulator. After checking your action, go back to the overview page.
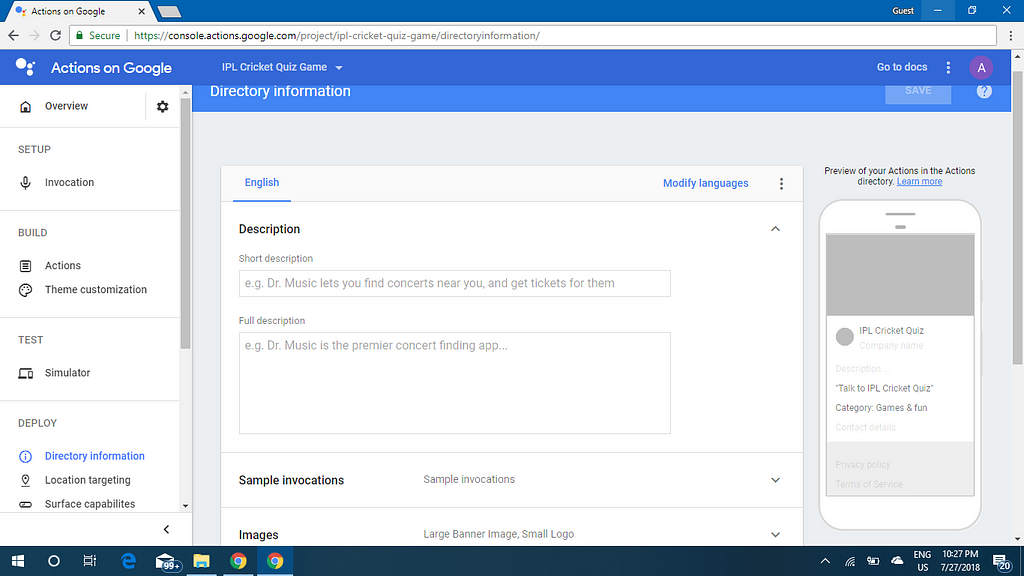
14. Now click on ‘Enter information required for listing your Action in the Actions directory check’ below ‘Get ready for Deployment’. You will be taken to a page, where you can enter introduction, description and other details about your action.
Enter all the details about your action (what it is, why is it useful, etc).
15. Next, you have to enter Sample Invocation. One sample invocation will be present there. You can add up to a total of 5 sample invocations. This is the most important part. There are some specified phrases, and they only can be used. They can be found here : https://developers.google.com/actions/localization/languages-locales
Some of those phrases to start the invocation are, ‘Tallk to $appname’ , ‘Let me talk to $appname’ , ‘Speak to $appname’ , etc.
16. Next, you must provide two images, one for background and one for the icon. The size of the image for background must be 1920 x 1080 and the other should be 192 x 192. If the size requirements are not met, you cannot proceed further. You can create custom images using editors, etc.
17. Next you will be asked to provide the developer details. Just provide your name (it is optional) and your e-mail id, which can be used to contact you.
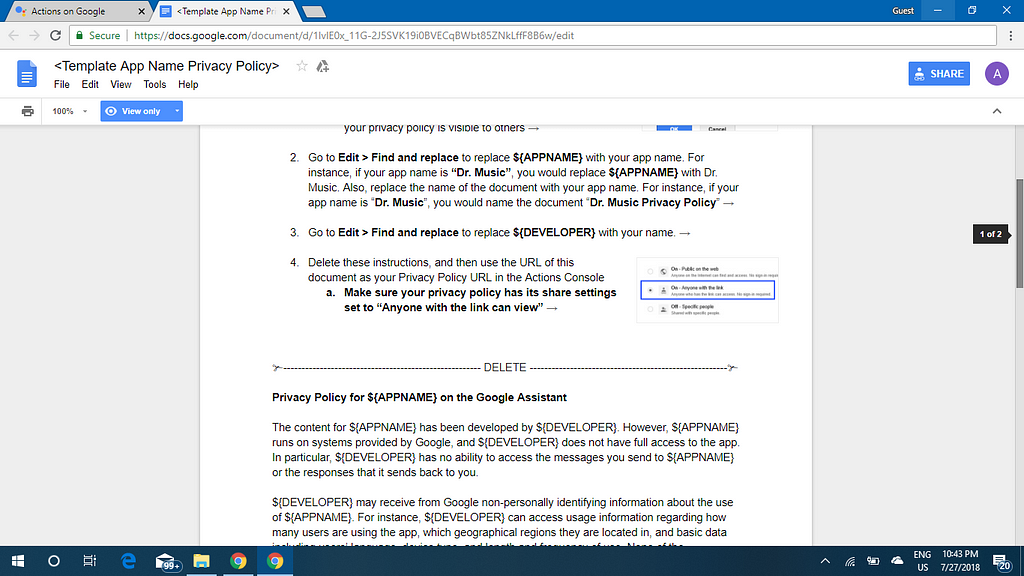
18. After uploading the images, you will be asked to provide privacy details. Click on that. You will be provided with a ‘Learn More’ option. Click on that. Now, a popup will appear. There will be a link which will lead you to a pre-built privacy policy content. Go to the document and copy what is in there after the instructions part.
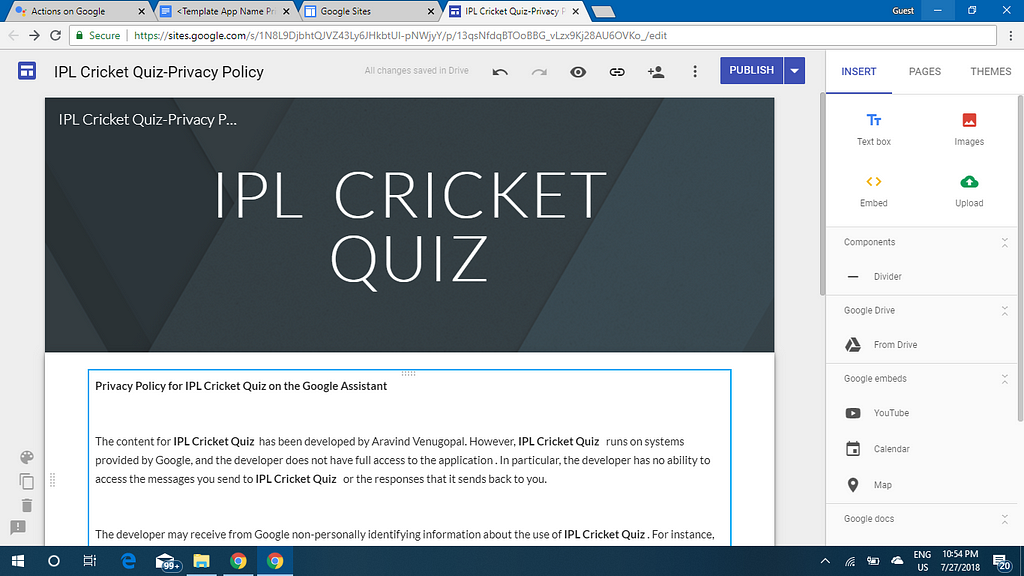
19. You have to create a website to host the privacy policy details. Don’t worry. Creating a website is very easy with the help of Google Sites (https://sites.google.com/). It can be done within 2–5 minutes. Go to Google sites (click on the above link). Towards the left side, you will find an option to create new sites. Click ‘Create’ and then select ‘in new sites’. This will take you to another page. Give the head name, then heading. After that, click on the text tool present on the right side. A text area will be generated. Paste the content which you copied earlier (privacy policy). Now replace ${APPNAME} and ${DEVELOPER} with your action’s display name and your name (put your name at the first place and replace the others with the term ‘the developer’).Now, your site is ready.
20. Now, publish your site and obtain the link for your website. Copy the link.
21. Come back to the Actions Console page and paste the copied link to the place where you are asked to submit the privacy policy. So that part is over.
22. The following parts are Location targeting and and surface capabilities. It will be chosen by default and you do not have to change it. Now all the parts are completed. Now, two more steps are in front of us.
23. The next step is to save all the details. The save button can be found on the top right corner. If you have done everything correctly till now, there will be no error. (If your sample invocations are structured incorrectly, error will be shown. You can correct it by visiting the documentation page. The link will be shown or, you can access it through the link given in the Step 15). Now, the saving part is over.
The final thing in front of us is to submit our app for review (by the staff of Google).
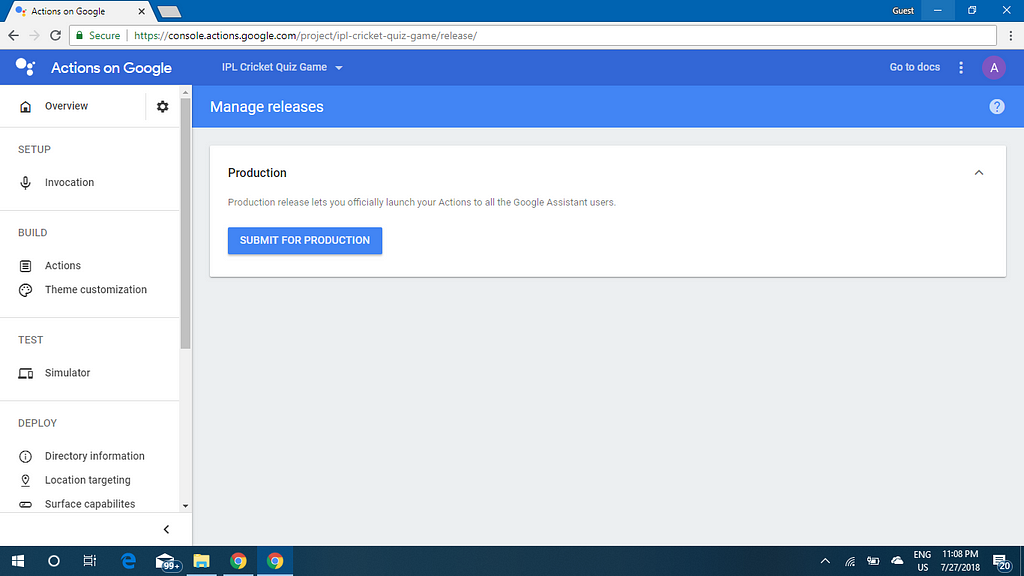
24. Go to the overview page again. You will find Release tab towards the bottom. Click on that tab. You will be directed to a page where there will be a ‘Submit for Production’ button.
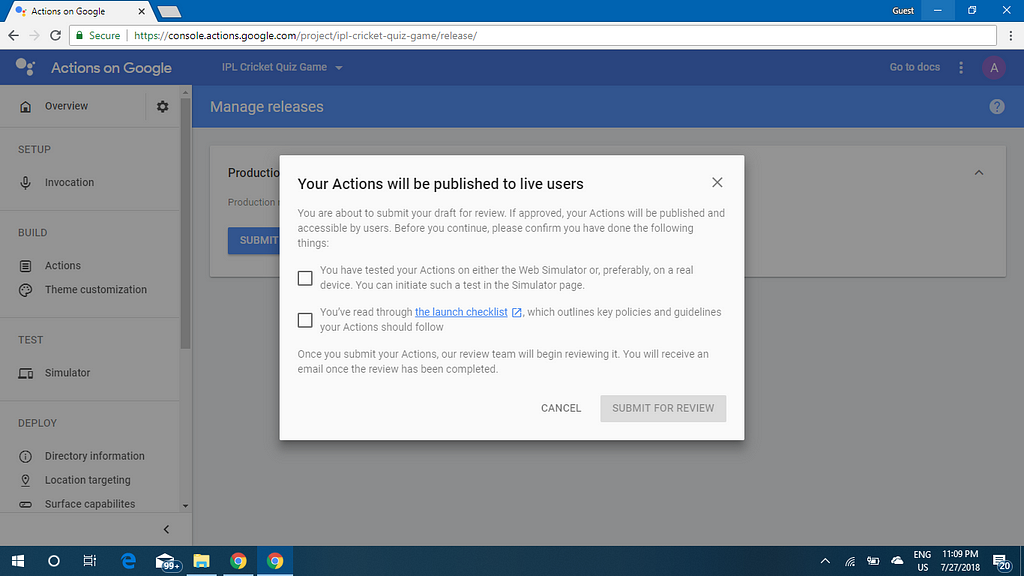
Click on the ‘Submit for Production’ button. A popup will appear, to confirm whether you have checked your action and has gone through the launch checklist. Confirm those two things and click on ‘Submit for Review’.
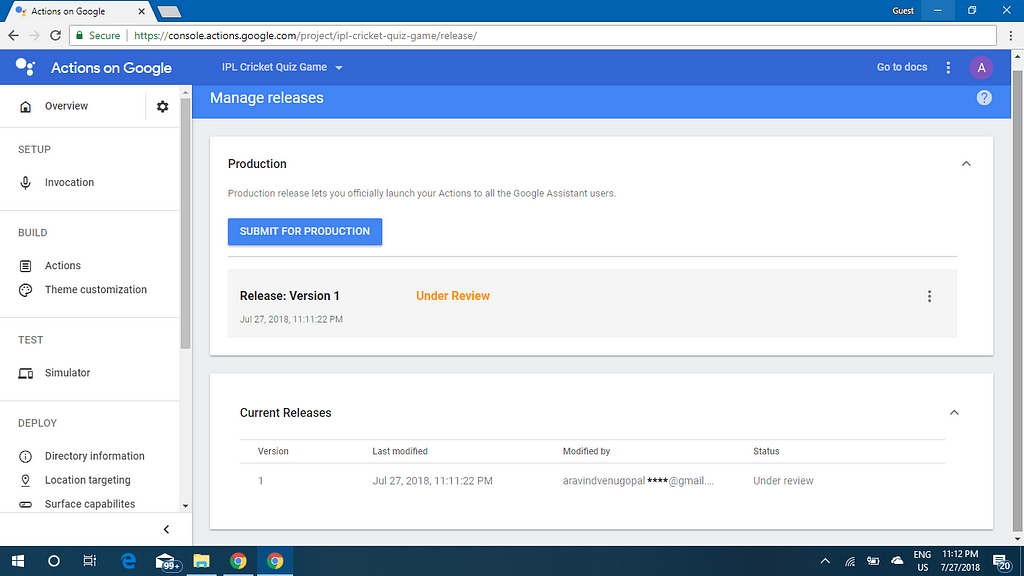
If there is any error in any of the process that we have completed, it will be shown now. If any error is shown, go back to that, clear it, again submit it for review. If there is no error, it will be shown that, your app is under review. You can check the status of the review anytime.
When your app is submitted for the review process, you will receive a mail regarding the review of your action. It generally takes 2–4 days for the review for the first few times.
You will receive a mail about the review results of your app within 2–4 days. It will tell you if it’s approved or not. If it is not approved, there will be more details about why it happened and the method to overcome the error. Even if it is approved, there will also be some tips on how to improve your app.
If your app got submitted for review, then CONGRATULATIONS. 🎊🎊🎊🎊🎊🎊🎊🎊🎊🎊🎊🎊🎊🎊🎊🎊🎊🎊🎊🎊🎊
You have completed the 95% 👍🙌✌👏 of your task. Most probably, there will not be any error, since this is built using template (error can occur in your display name, if your action’s display name is similar to any other action’s name).
If you have done all these, wait 2–4 days. Your app will be published an will be available for over 500 million users out there. Now, don’t forget to watch this video: https://www.youtube.com/watch?v=ua4QGWmDfB8
When your action is approved, don’t forget to share it with your friends. Don’t forget to share it with me. 😊😊😊
If you are interested, you could complete all these within an hour. If you are not truly interested, you will find these, a little difficult. While making this article, I created an app 😁. I have included almost all the steps and I hope that, I was able to make everything clear to you. If not, contact me at aravindvenugopal1444@gmail.com. I will be available to help you anytime. Don’t forget to share this article with your friends. Let them also make some beautiful apps. You can also visit Youtube to find some good videos on all these topics by Ido Green.
I will come up with the other part (building actions using Dialogflow) soon.
Don’t forget to try some of my apps. The invocation names are mentioned here. So, open your Google Assistant app and tell this,
- IPL Quiz- Talk to IPL Quiz
- Mind Reading Wizard- Talk to Mind Reading Wizard
All the Best guys. Now go and try this out by yourselves and share your knowledge with others.
Building Actions for Google Assistant (Using Templates) was originally published in Hacker Noon on Medium, where people are continuing the conversation by highlighting and responding to this story.
Disclaimer
The views and opinions expressed in this article are solely those of the authors and do not reflect the views of Bitcoin Insider. Every investment and trading move involves risk - this is especially true for cryptocurrencies given their volatility. We strongly advise our readers to conduct their own research when making a decision.
