Latest news about Bitcoin and all cryptocurrencies. Your daily crypto news habit.
We live in a new era where everything is connected and we share links more often than before. We also want our customer to reach the desired page, as quickly as possible regardless of the platform they are using. ne
If you are not using Deep Linking you are not having optimal customer experience.
Deep linking does not only mean to have a clickable link which opens up your app but it is a smart way to navigate to the desired page.
What is Deep Link?
Deep linking is a technique that allows an app to be opened to a specific UI or resource, in response to some external event. The “deep” refers to the depth of the page in an App hierarchical structure of pages. This is a very important feature for user engagement, it also makes the app more responsive and capable of navigation to arbitrary content in response to external events like Push Notification, Emails, web links etc.
You must have seen generic linking before like when using mailto:abhishek@nalwaya.com it will open the default mail app with prefill my email. We will implement similar URL schemes in our example which will handle external URIs. Let’s suppose that we want a URI like myapp://article/4 to open our app and link straight into an article screen which shows article number 4.
What problem Deep Link solve?
Web links don’t work with native mobile apps.
If you use your mobile device to open a link to an article, you are taken to the destination in your web browser even if you have the article app installed. This is a problem because the article app is a better user experience than the mobile version of the article app.
The different way of implementing Deep Linking?
There are two ways of implementing deep linking:
- URL scheme
- Universal Links
URL schemes are a well-known way of having deep linking, Universal links are the new way Apple has implemented to easily connect your webpage and your app under the same link.
URL schemes are more easy to implement then Universal Links
Setup the react native project for both ios and Android
We are using react-native CLI to create a project and in that, we will create two pages Home screen and then an Article page. Then we will create deep links like myapp://article/4 and myapp://home to open these pages.
react-native init DeepLinkExamplecd DeepLinkExample
After creating a project we will add react-navigation and then use link command to link react native gesture handling.
It's not necessary that you use react-navigation for Deep Linking. Since its most popular navigation library for React Native, that's why we have used this in the tutorial.
yarn add react-navigationyarn add react-native-gesture-handlerreact-native link react-native-gesture-handler
Create an src folder in the root and add Article.js and Home.js file.
import React from 'react';
import { Text } from 'react-native';class Home extends React.Component { static navigationOptions = {title: 'Home',
};
render() {return <Text>Hello from Home!</Text>;
}
}
export default Home;
We have created a react component which renderd text Hello from Home!. Now we will create a file Article.js in src folder and add following code:
import React from 'react';
import { Text } from 'react-native';class Article extends React.Component { static navigationOptions = {title: 'Article',
};
render() { const { id } = this.props.navigation.state.params; return <Text>Hello from Article {id}!</Text>;}
}
export default Article;
We have created two components Home.js and Article.js we will now add this in React navigation routes. Open App.js and update the following code:
import React, {Component} from 'react';import { StyleSheet, Text, View} from 'react-native';import { createAppContainer, createStackNavigator} from "react-navigation";import Home from './src/Home';
import Article from './src/Article';
const AppNavigator = createStackNavigator({ Home: { screen: Home }, Article: { screen: Article, path: 'article/:id', },},
{initialRouteName: "Home"
}
);
const prefix = 'myapp://myapp/';
const App = createAppContainer(AppNavigator)
const MainApp = () => <App uriPrefix={prefix} />;export default MainApp;
We have created react navigation and created routes for two pages. We have configured our navigation container to extract the path from the app’s incoming URI.
Setting up for iOS
Lets first setup for iOS, then will configure for Android. Open the iOS project by clicking DeepLinkExample/ios/DeepLinkExample.xcodeproj/
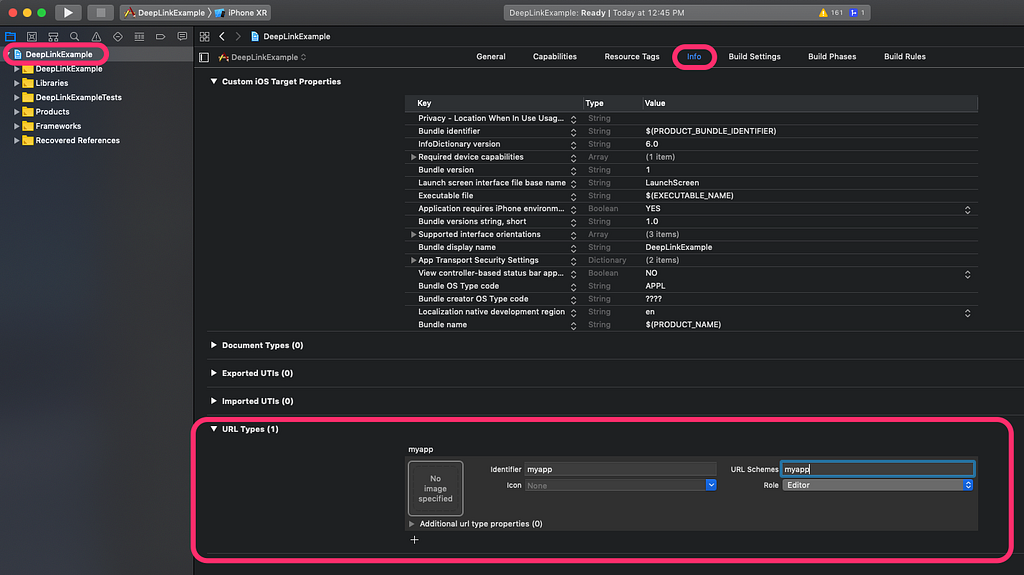
Open info.plist by clicking on top and then click on URL Types and add URL schemes. Update it as myapp. (whatever name you want to give to your app)
Then open AppDelegate.m in root folder and add import following header:
#import “React/RCTLinkingManager.h”
And then add this code above @end.
- (BOOL)application:(UIApplication *)application openURL:(NSURL *)url
sourceApplication:(NSString *)sourceApplication annotation:(id)annotation
{return [RCTLinkingManager application:application openURL:url
sourceApplication:sourceApplication annotation:annotation];
}
We are done with the change for iOS, lets now test it for ios.
Testing DeepLink in iOS
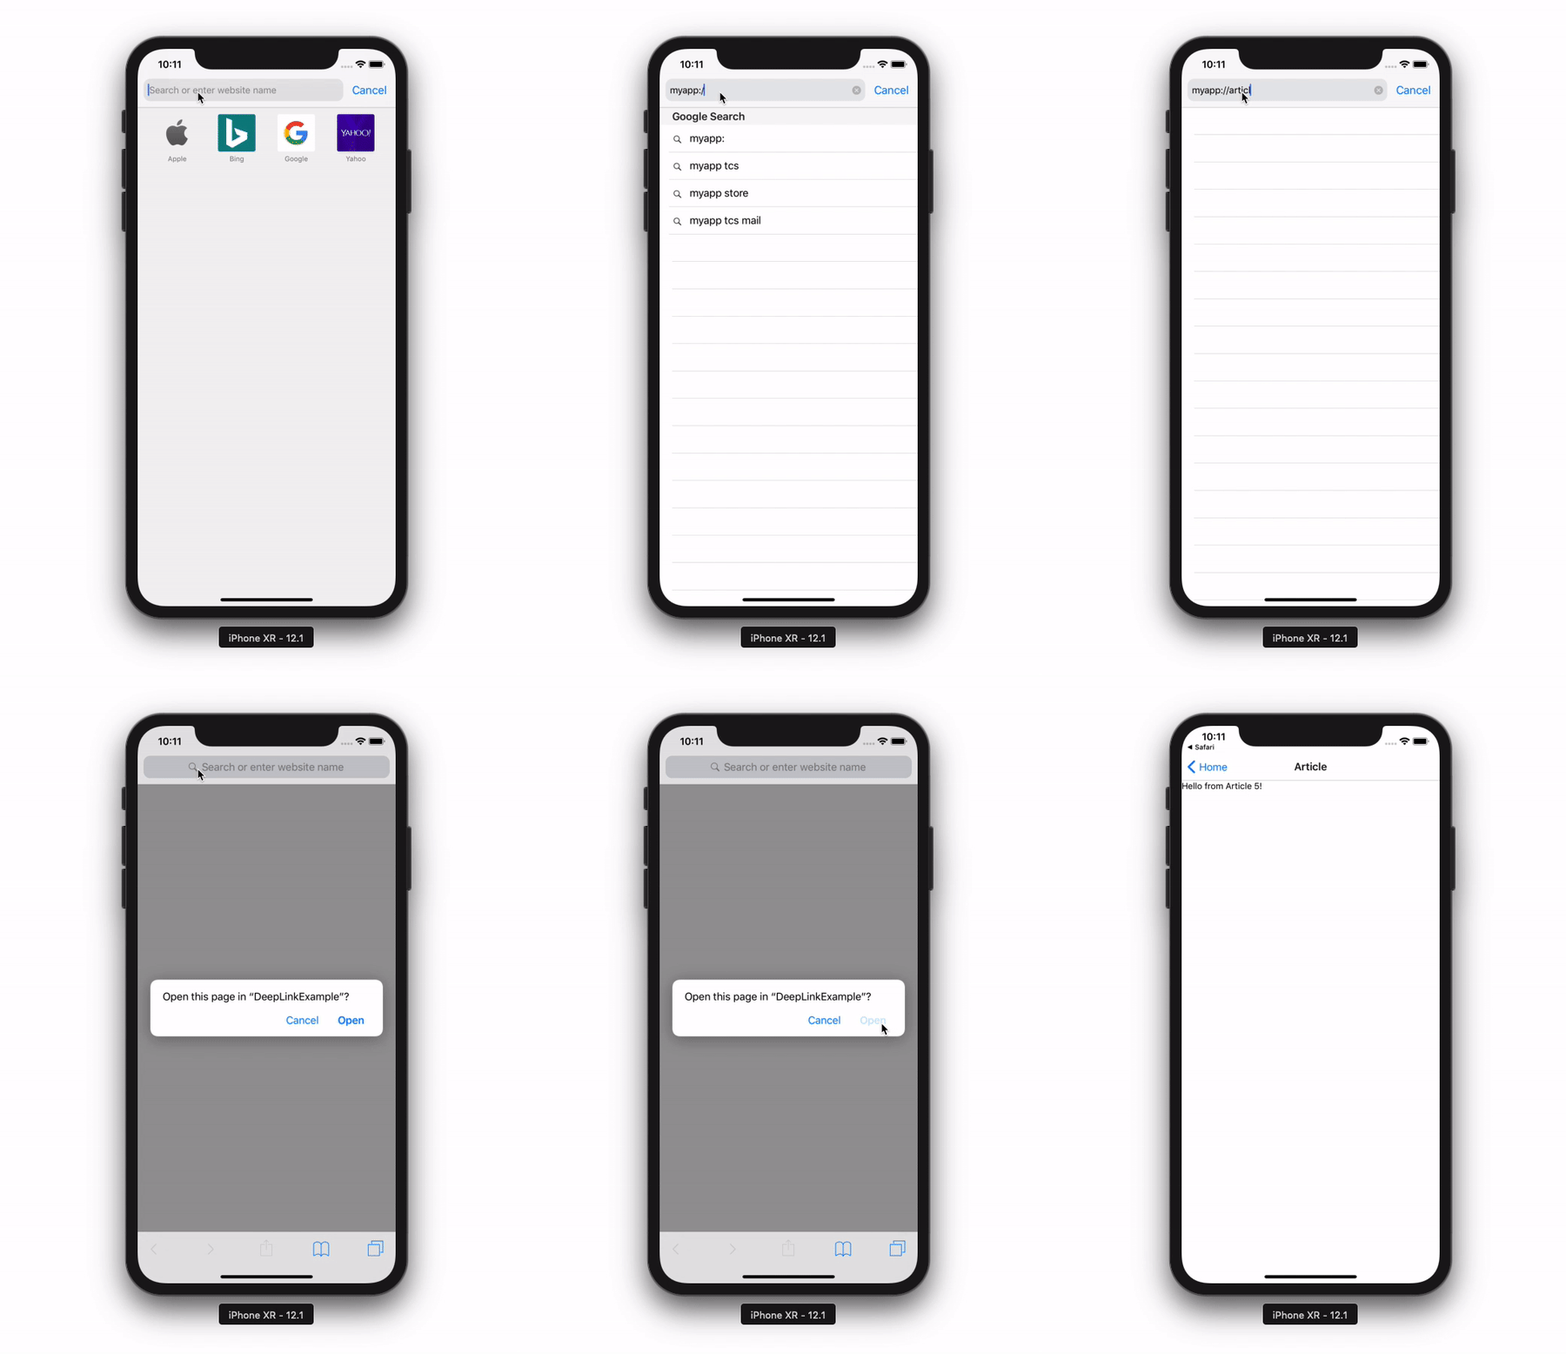
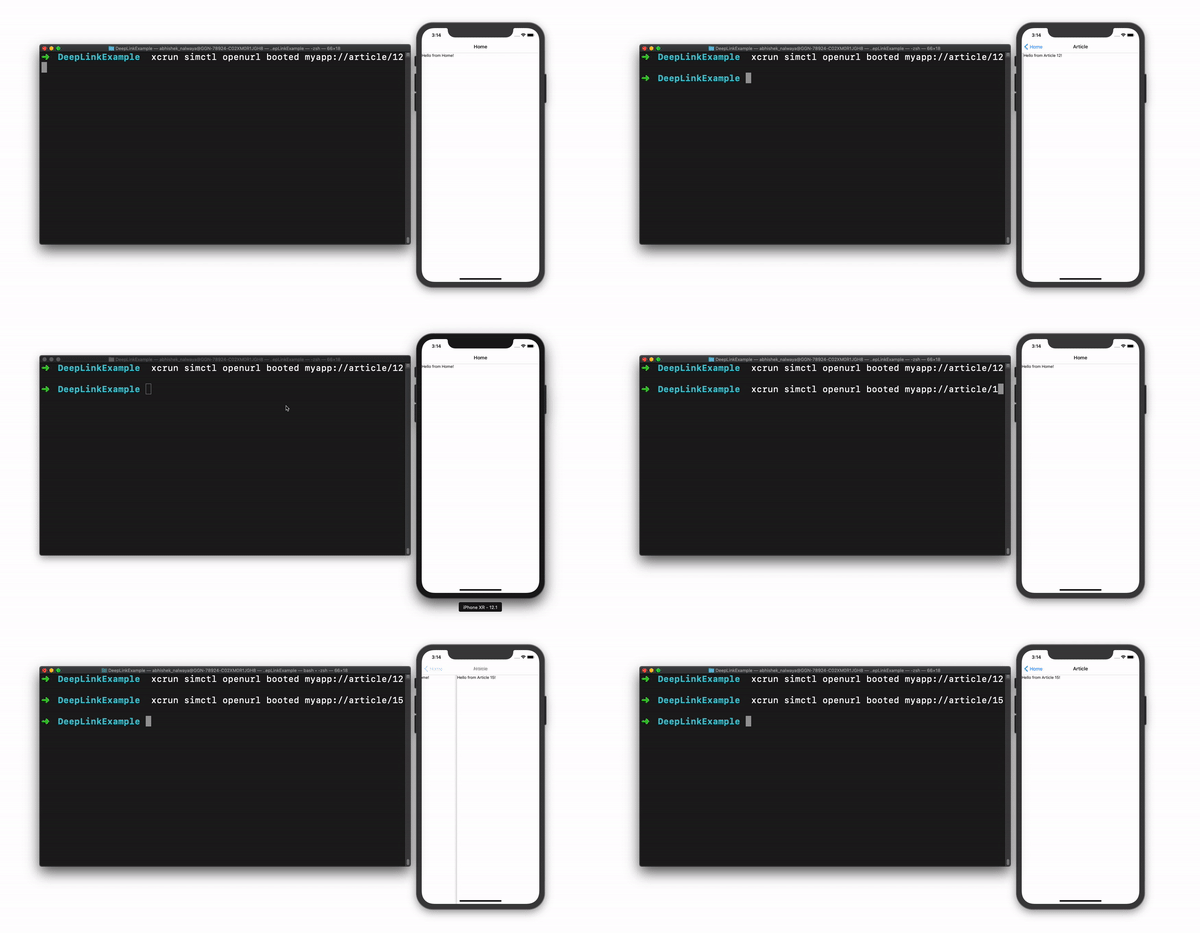
To test DeepLink you need to run the app using react-native run ios or through Xcode. Then open safari browser on simulator and type: myapp://article/5, it will automatically open the app and open Article with no 5.
You can also open DeepLink by running following command on your terminal:
xcrun simctl openurl booted myapp://article/5
 Configuring deep link for Android
To configure the external linking in Android, we need to create a new intent in the manifest. Open /src/main/AndroidManifest.xml add the new intent-filter inside the MainActivity entry with a VIEW type action:
<manifest xmlns:android="http://schemas.android.com/apk/res/android" package="com.deeplinkexample"> <uses-permission android:name="android.permission.INTERNET" /> <application android:name=".MainApplication" android:label="@string/app_name" android:icon="@mipmap/ic_launcher" android:roundIcon="@mipmap/ic_launcher_round" android:allowBackup="false" android:theme="@style/AppTheme"> <activity android:name=".MainActivity" android:label="@string/app_name" android:configChanges="keyboard|keyboardHidden|orientation|screenSize" android:launchMode="singleTask" android:windowSoftInputMode="adjustResize"> <intent-filter> <action android:name="android.intent.action.MAIN" /> <category android:name="android.intent.category.LAUNCHER" /> </intent-filter> <intent-filter> <action android:name="android.intent.action.VIEW" /> <category android:name="android.intent.category.DEFAULT" /> <category android:name="android.intent.category.BROWSABLE" /> <data android:scheme="myapp" /> </intent-filter> </activity> <activity android:name="com.facebook.react.devsupport.DevSettingsActivity" /> </application></manifest>
We are all set for Android.
Testing Deeplink on Android
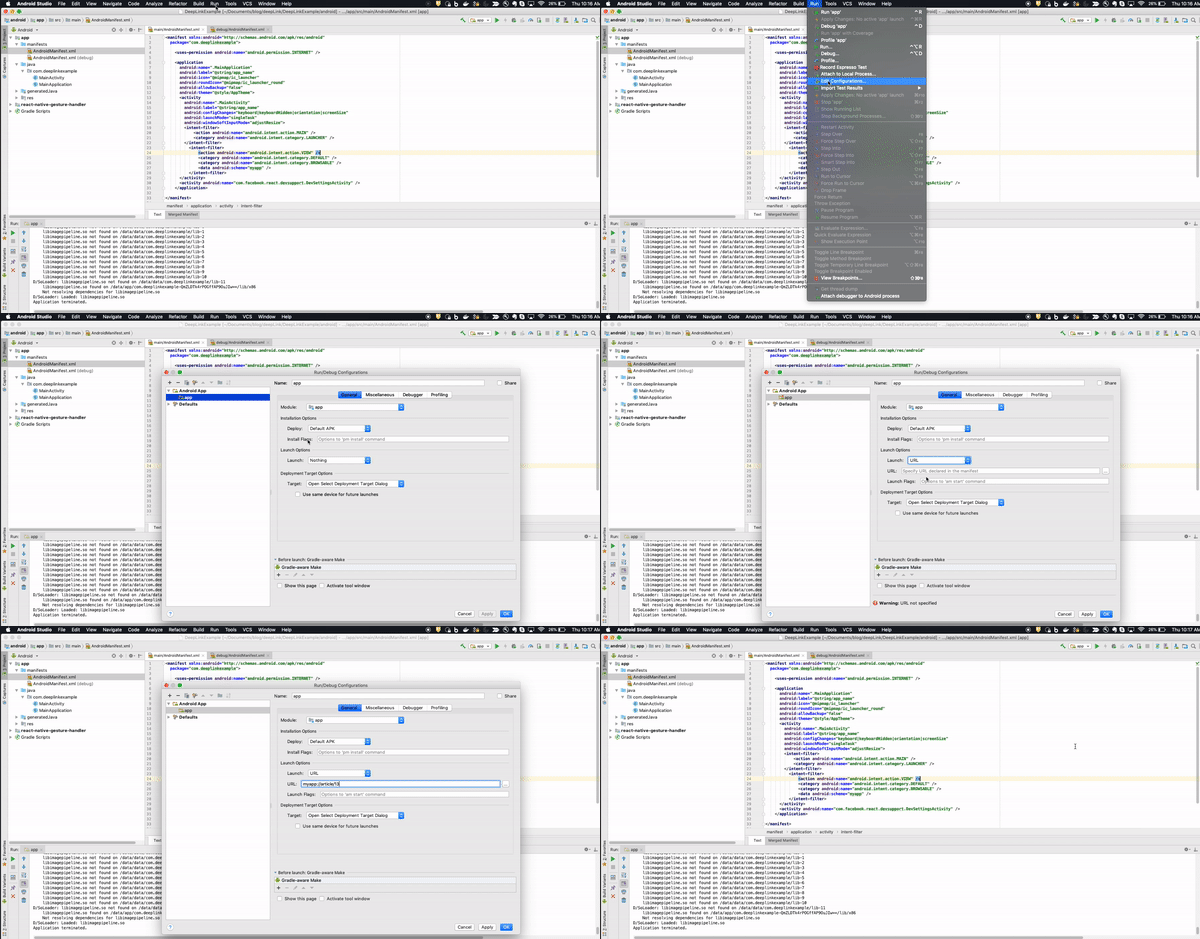
To test Deep Linking, open project in Android Studio and Click on Run -> Edit Configuration. and the change Launch options to URL and update URL to myapp://article/13
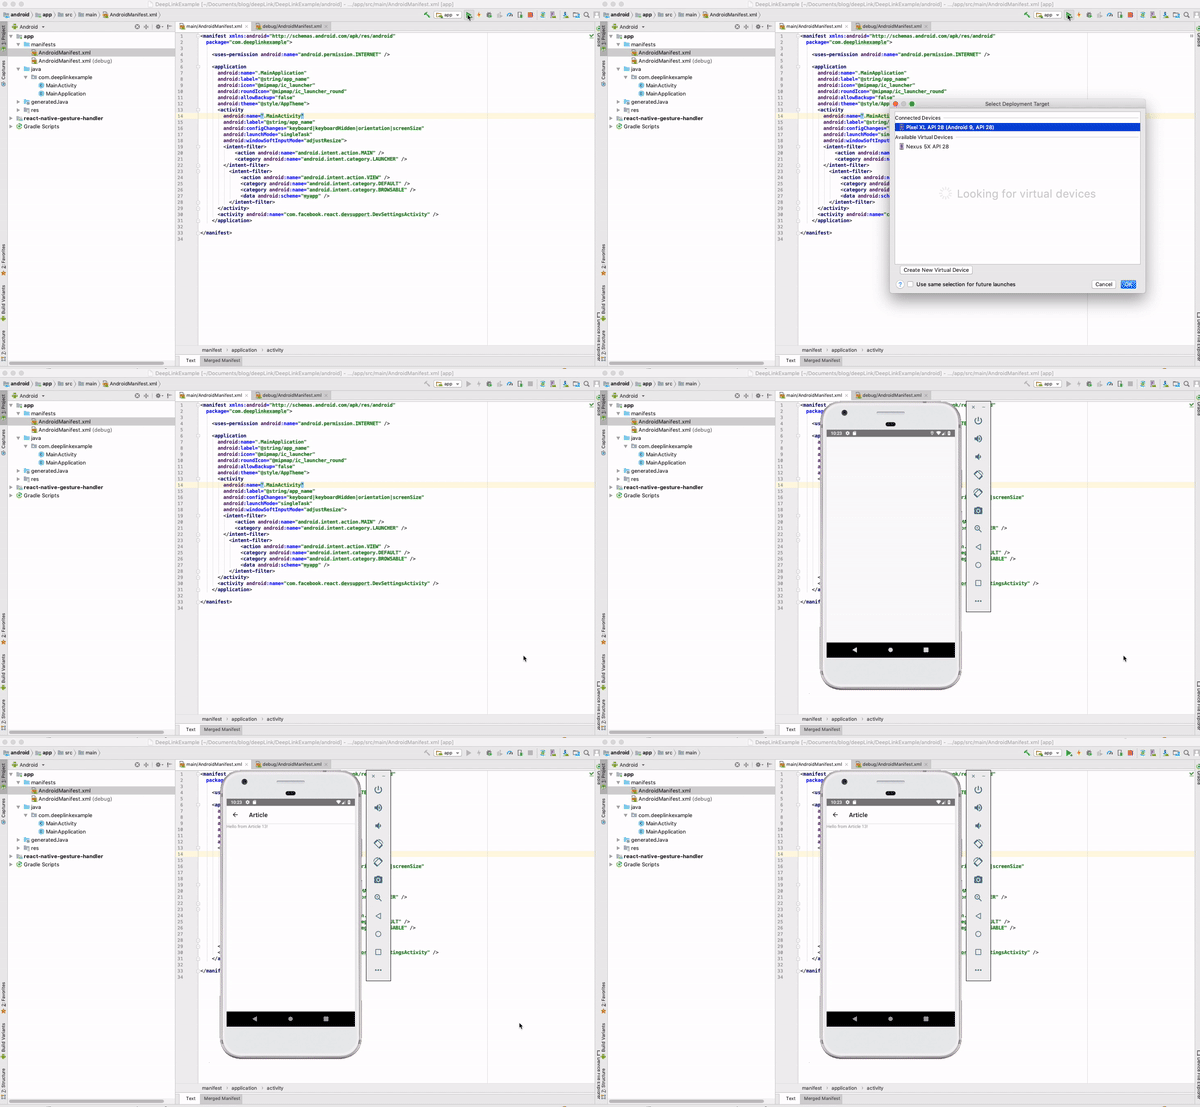
Now run the application by clicking Run button on Android Studio:
You can also open deep link though terminal using:
adb shell am start -W -a android.intent.action.VIEW -d "myapp://article/3" com.com.deeplinkexample
Setting up Universal Linking
Now lets setup Universal link for your app. First will suggest to check out Apple Doc.
We need to first create apple-app-site-association for your app. Upload an apple-app-site-association file to your web server
{ "activitycontinuation": { "apps": [ "<TeamID>.<Bundle-Identifier>" ]}, "applinks": { "apps": [], "details": [{ "appID": "<TeamID>.<Bundle-Identifier>", "paths": [ "<WebRoutes>" ]}]In our case it will look like this:
{ "applinks": { "apps": [], "details": [{ "appID": "D3KQX62K1A.com.example.deeplinkexample", "paths": ["/home"] }, { "appID": "D3KQX62K1A.com.example.deeplinkexample", "paths": ["/article/*"] }] }}Few of the important point to note for the file:
- It should be publically available.
- It should be served as application/json mime type
- File should be less than or equal to 128 Kb
- It should be served over Https
You can test your file here -> https://branch.io/resources/aasa-validator/
Then log into developer.apple.com with your account and Enable Associated Domains in your app identifier.
Now Launch Xcode and select the Capabilities tab. Enable Associated Domains and add two values.
- applinks:YOUR_WEBSITE_DOMAIN
- activitycontinuation:YOUR_WEBSITE_DOMAIN
You are all set for Univeral Link !!
Deep linking is a very important feature for user engagement. Its also a foundation for setting up push notification, Email Marketing, Social Sharing etc. So don't wait to implement this in your app.
Code of the example can be found here -> https://github.com/nalwayaabhishek/DeepLinkExample
Happy Connecting the world with your app !!
React Native Deep Linking for iOS and Android was originally published in Hacker Noon on Medium, where people are continuing the conversation by highlighting and responding to this story.
Disclaimer
The views and opinions expressed in this article are solely those of the authors and do not reflect the views of Bitcoin Insider. Every investment and trading move involves risk - this is especially true for cryptocurrencies given their volatility. We strongly advise our readers to conduct their own research when making a decision.
