Latest news about Bitcoin and all cryptocurrencies. Your daily crypto news habit.
Originally published at www.jamiemaison.com.
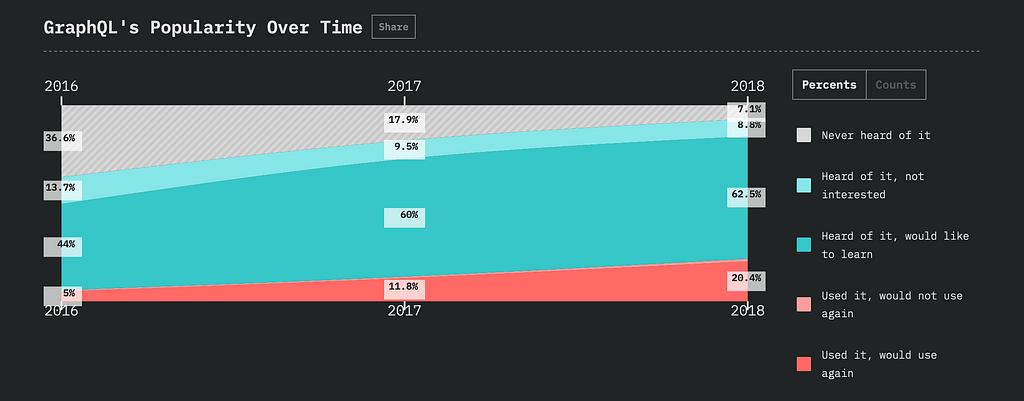
In 2015 Facebook released their internally built data query and manipulation language for APIs GraphQL and it has since risen to the forefront of our minds, in part due to the adoption by big names such as Twitter, Paypal and the New York Times. In fact, the State of JavaScript 2018 listed GraphQL second only to Redux as the world’s favourite Data Layer technology.
With that in mind, it’s useful to understand where GraphQL strengths and weaknesses lie. In this tutorial i’m going to guide you through creating a screen that hopefully a lot of you are familar with; the Spotify Playlist. With any luck you’ll get a better understanding of how GraphQL can benefit your applications and drive you to explore the technology in more detail.
Creating the View
As with any (good) application we’re going to need to piece together a great looking frontend experience to display our data in a way that appeals to our users, Spotify is no different. To get us going we’re going to use React Native to build our mobile application, running Expo to make development on our devices easier. We’ll get to the GraphQL part later on in this tutorial, once we have our application up and running.
First off we’ll install Expo and get our React Native template created. To install Expo simply run:
npm install -g expo-cli
Now to set up the folder structure and all the necessary files needed you run:
expo init spotify-playlist
- When asked to ‘Choose a template’ select ‘blank’
- When prompted to “enter a few initial configuration values” change the application name to ‘Spotify Playlist’
After the inital setup has completed you can start up your application by navigating to your newly created folder and running:
npm start
If you’re new to Expo it’s easy to get started. After running npm start you'll be presented with all the instructions on how to test your application with your device/simulator. To test on your device it's as simple as scanning the QR code using the Expo iOS/Android App.
Once running you should see the default screen saying “Open up App.js to start working on your app!”
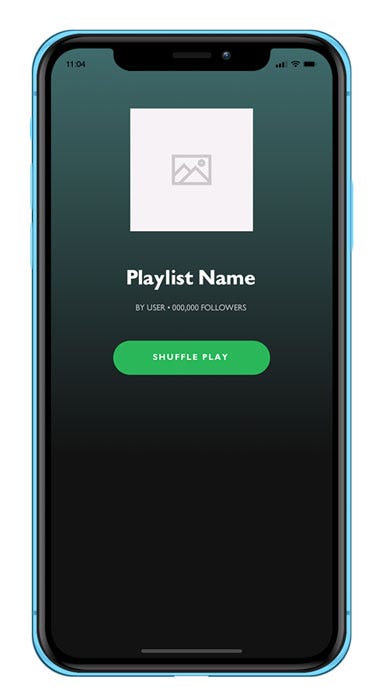
Let’s start by creating the basic container for the application. The Spotify Playlist screen consists of two main elements, a header with a gradient background and a list of all the playlist items. To recreate these two elements open up your App.js and replace it with the following:
Here we’re creating the two elements; a <LinearGradient /> component from Expo and a <FlatList /> from React Native itself. We've added some basic styling and hardcoded the height values just for the time being (we'll change this height to auto once we've got some data in).
Save your file, Expo should hot reload your application which should now look something like this:
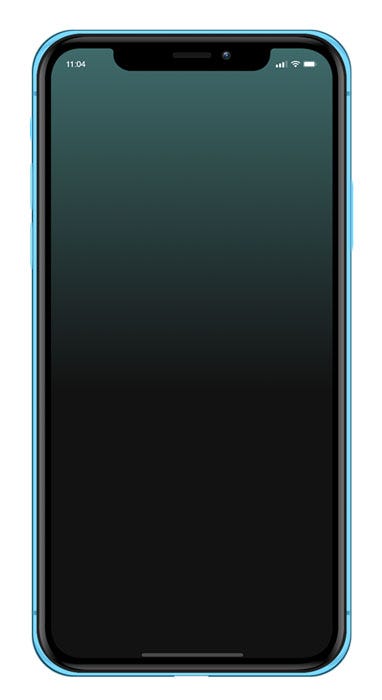 LinearGradient & FlatList View
We’re now ready to start inserting some placeholder data into our application to start getting the header elements styling correct. For this we’ll need two fonts gibson-regular and gibson-bold which you can download here and here. Add the fonts to the /assets folder in your project and we're ready to start putting the header components together.
Because we are using external fonts we’ll need to load them asyncronously before rendering our components otherwise the fonts won’t yet exist and the application will error. Luckily Expo gives us a nice way of doing this. Add the following to App.js:
See how we load the font async in componentDidMount and then not render the relevant components until this.state.fontLoaded = true? You may also notice that our playlist items are not children of the <LinearGradient /> component we created earlier. This is because if you look at the Spotify app the playlist items move independently to the top gradient. This parallax effect is one of those subtle things that make some apps look so appealing.
Save your App.js, you should now have something that looks like this.
Recreating the Playlist
Now for the all important part of any playlist, the songs themselves! We’ll achieve this by using a React Native <FlatList />. Again, we'll just add some mock data for the time being until we set up GraphQL. Modify your App.js to the following:
In this code snippet we are iterating over our data and creating a simple view with a couple of Text components for each piece of data.
If you load up the real Spotify app now you’ll see that upon scrolling the view there’s a little trickery that goes on to hide the playlist text as your thumb moves up the screen as well as gently fading out the album art. There’s a few ways to achieve this effect but i’ll show you one way that uses a combination of CSS & JS which hopefully is simple.
Again, open up your App.js and we'll make a few modifications so that it now looks like this:
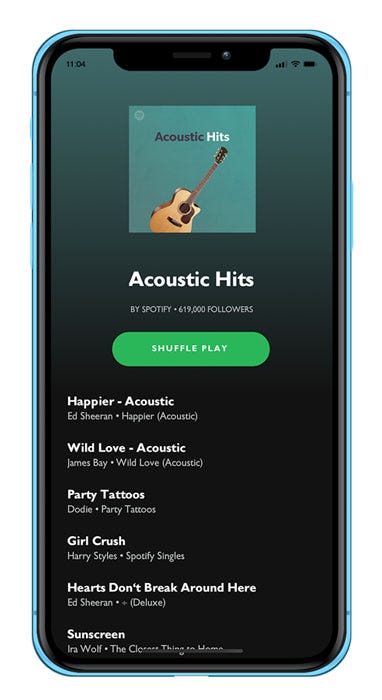
Great! We should now have a fully functioning app that behaves just like the playlist section in the Spotify app. A few things to note about the above code:
- Upon scroll of the view we save the currentScrollPos in state to be read by each of our components.
- We then use React to hide the various text components when currentScrollPos is more than a certain value - { this.state.currentScrollPos < 53 ? <Text> : null } .
- To make things seem a little less like voodoo and more readable we seperate some of the calculations into seperate functions: calculatePlaylistHeight, calculateButtonPos & calculateArtSize.
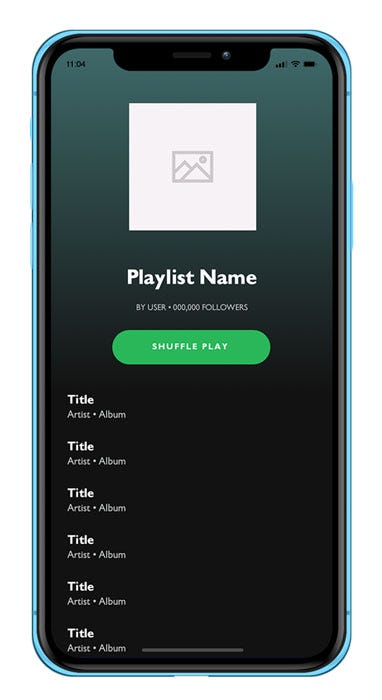 Playlist View with Placeholders
Now that we’ve got the app looking and behaving how we want it’s now time to start introducing GraphQL to the equation to handle the data!
Data Insertion using GraphQL
Before we get into the how let’s understand the what and why. GraphQL is sold as “front end queries made easy”. At its very core, GraphQL is a typed query language that gives developers an easier way to describe and ultimately obtain the data they need.
For the purposes of this tutorial we need some sort of server running where the actual data is going to be stored. This is easily enough done using apollo-server however you're not here to start writing server code! So just like magic, i've created a Apollo Server playground on codesandbox.io that we can use for the purposes of this example. If you're interested in the code you can view it here however if you just want to skip ahead all you need to do is open your favourite browser and navigate to https://rqvj0qw34.sse.codesandbox.io/ - launching this will start the server at that address so be sure to leave it open in the background for the duration of your development!
Now, back to our Spotify App — we’ll want to install the following dependencies for the next part of the tutorial:
- apollo-boost — It is a zero configuration way of getting started with GraphQL in react.
- react-apollo — Apollo client is the best way to use GraphQL in client-side applications. React-apollo provides an integration between GraphQL and Apollo client
- graphql-tag — A JavaScript template literal tag that parses GraphQL queries
- graphql — The JavaScript reference implementation for GraphQL. Needed to resolve a conflict with Expo.
Which can be installed by running:
npm install --save apollo-boost react-apollo graphql-tag graphql
Now that is sorted let’s get our data from our GraphQL server and display it using the following data query:
Hopefully you can see how simple GraphQL makes data queries look, in this example we’re simply requesting one playlist object which has the properties name, creator, followers, albumArt and songs and that songs have key, title, artist and album values.
Let’s fetch and display this data using react-apollo by modiying our App.js to the following:
In the above code we’re using the <Query /> component from react-apollo to request the data and on data being returned we're rendering all of our received information. The component also allows us to handle loading or error state which we're just rendering a blank view at the moment but you can see how this can be used to provide a greater user experience.
Save and run the application now, you should see a fully functioning Spotify Playlist application using data straight from your GraphQL server!
Further Reading
That’s about it for this tutorial, if you have any GraphQL or React quieres you can always reach out on Twitter or Email and i’ll do my best to help! For further reading here’s some other articles that I found interesting:
- GraphQL: Everything You Need to Know by Weblab Technology
- GraphQL Explained: How GraphQL Turns a Query into a Response by Jonas Helfer
- Queries and Mutations by GraphQL
Got a project that you’re looking to get started, think you may need my help with something or simpy want to reach out? Get in touch!
Recreating Spotify Playlists using GraphQL & React Native was originally published in Hacker Noon on Medium, where people are continuing the conversation by highlighting and responding to this story.
Disclaimer
The views and opinions expressed in this article are solely those of the authors and do not reflect the views of Bitcoin Insider. Every investment and trading move involves risk - this is especially true for cryptocurrencies given their volatility. We strongly advise our readers to conduct their own research when making a decision.
