Latest news about Bitcoin and all cryptocurrencies. Your daily crypto news habit.
A few months ago, a very generous friend of mine gave me a fantastic gift, my very own Raspberry Pi 3B+. For those who are unfamiliar, a Raspberry Pi is a small and affordable computer which can also be connected to sensors and other electronics.
The first challenge was deciding what to do. I’m always looking to extend my skills as a software developer, and I’d been toying with the idea of growing some vegetables. Receiving the Raspberry Pi was exactly the impetus I needed to start a project: a smart hydroponic garden system, with automated alerts, data analysis and maintenance.
Spoiler Alert: If you’re only looking to grow food, this project isn’t particularly efficient. Applying computing to a small home garden is time consuming, sometimes costly, and doesn’t necessarily improve yield. However, if you’re interested in IoT, cloud computing and how technology can be applied to agriculture, then read on, and maybe even try it yourself to learn some new skills!
A Crash Course in Hydroponics
Yep, I know what you’re thinking. But it’s not just that which is grown hydroponically. An increasingly large amount of food is also grown hydroponically, and there are plenty of benefits to consider: less water, little to no chemicals, less land and fast all year round growth (but much more energy consumed if you’re using lighting!). In a world where around 11% of all land is used for agriculture, access to clean water is a major issue, and renewable energy is becoming more effective, there’s a lot to be said for hydroponics.
The type of system I built is called Deep Water Culture. It’s fairly simple, so I made a diagram to explain how it works.
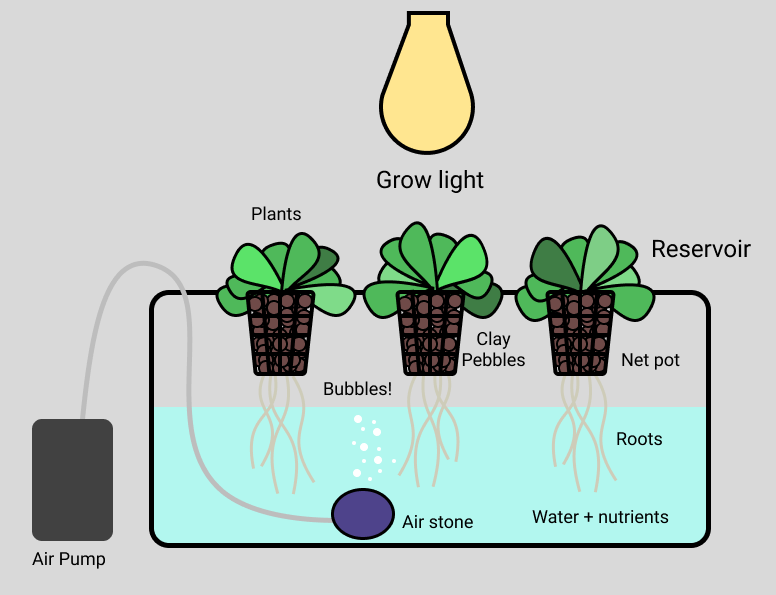 Everything a plant needs to thrive, but no dirt!
Building the System
Assembling the system involved a visit to a hydroponics shop, hardware shop various purchases online and some creative re-use of materials I already had on hand.
All up I spent around $250 AUD on the hydroponics aspect. The most expensive part was the light, and I could have done have saved more by purchasing everything online. I ended up purchasing almost 20 different items, and could still think of more things to buy. Marginal costs of growing are low though, so it would work out well over time.
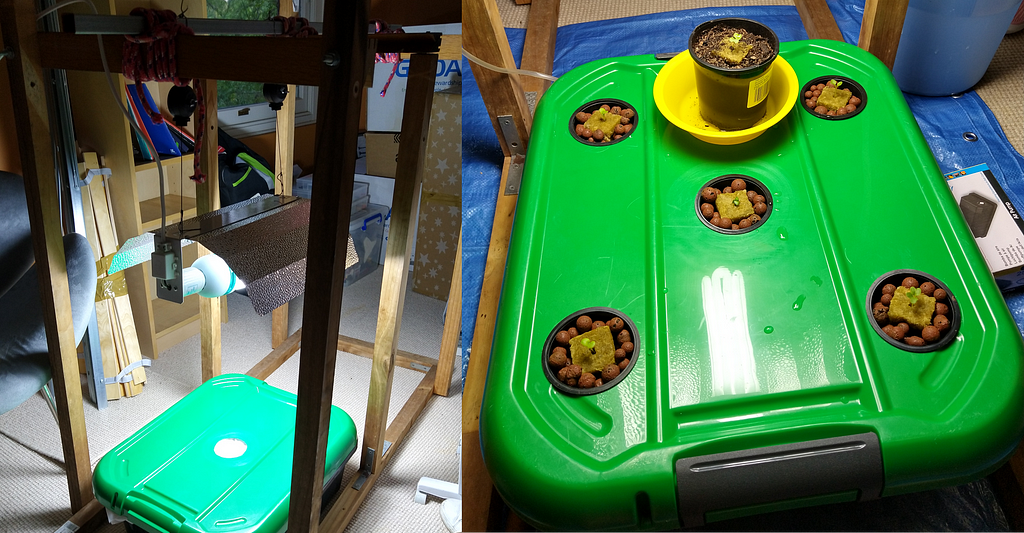 The picture on the left was before I finished the holes. There were also some intermediary steps in terms of growing the plants. Five plants, plus one in soil as a control.
After some DIY action, this was the end result. The tube leading into the box connects to the air pump out of view. The frame was definitely overkill but there’s space for a second system if I decide to upgrade and it was mostly already built from a previous project.
If you would be interested in a detailed article on how to make a system like this then leave a comment (or Google, there’s a lot of information out there).
Making it Smart
This was already pretty cool so far as I was concerned, and the plants were growing nicely. It was clearly time to add some unwarranted complexity. I saw four main elements to this:
- Collecting and storing and making it accessible
- Automated alerts
- Web based interface to monitor/control the system and analyze data
- Physical automation (Think pH balancing, dynamic light cycles based on power prices and more!)
Currently I’ve finished #1, completed a fair bit of #2 and have laid the initial groundwork for #3. Physical automation is definitely an exciting prospect but it will also require another round of spending and I wanted to get everything else settled first.
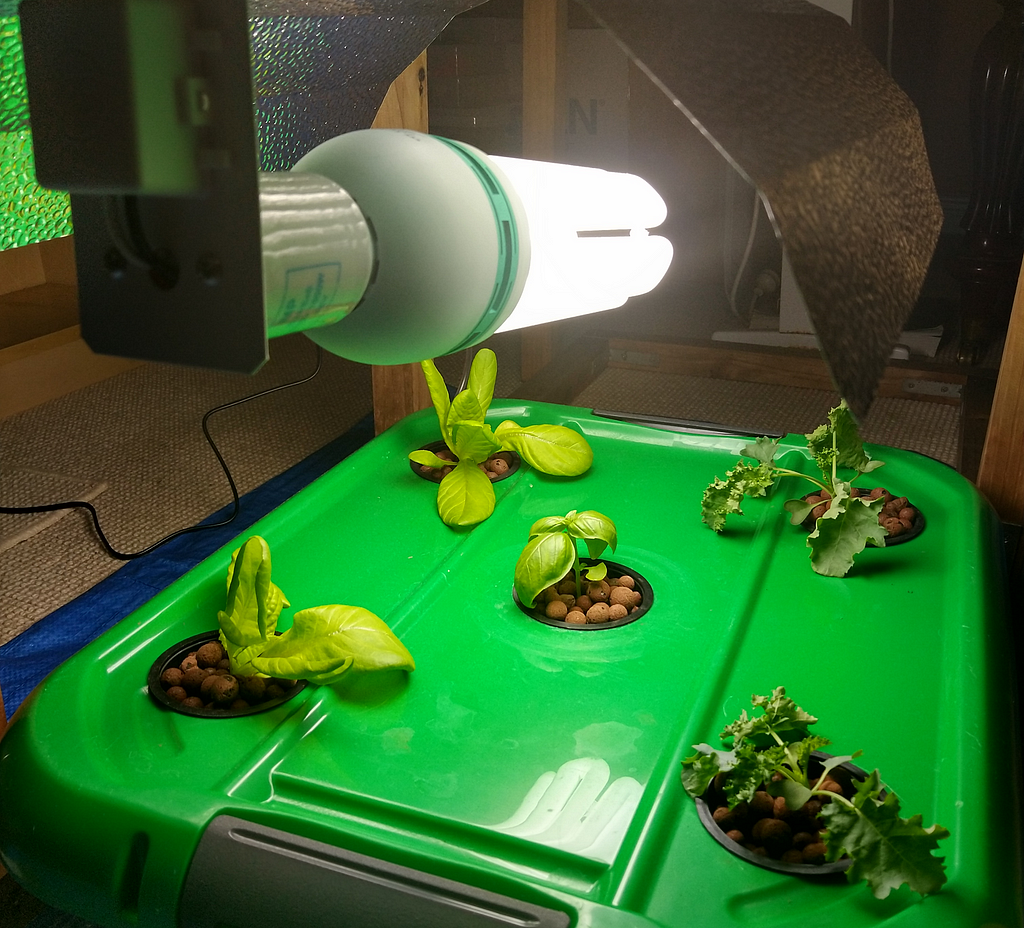 Lettuce on the left, basil in the middle and kale on the right. The reflective ‘batwing’ above the light reduces the amount of light that is wasted. The white light promotes vegetative growth whereas a yellow light works well for flowering plants.Collecting and Storing the Data
I have two sensors running at the moment, a DS18B20 waterproof temperature sensor and a DHT11 humidity and air temperature sensor. I also have a water sensor which I’ve been meaning to add in. They connect to the breadboard which is in turn connected Raspberry Pi.
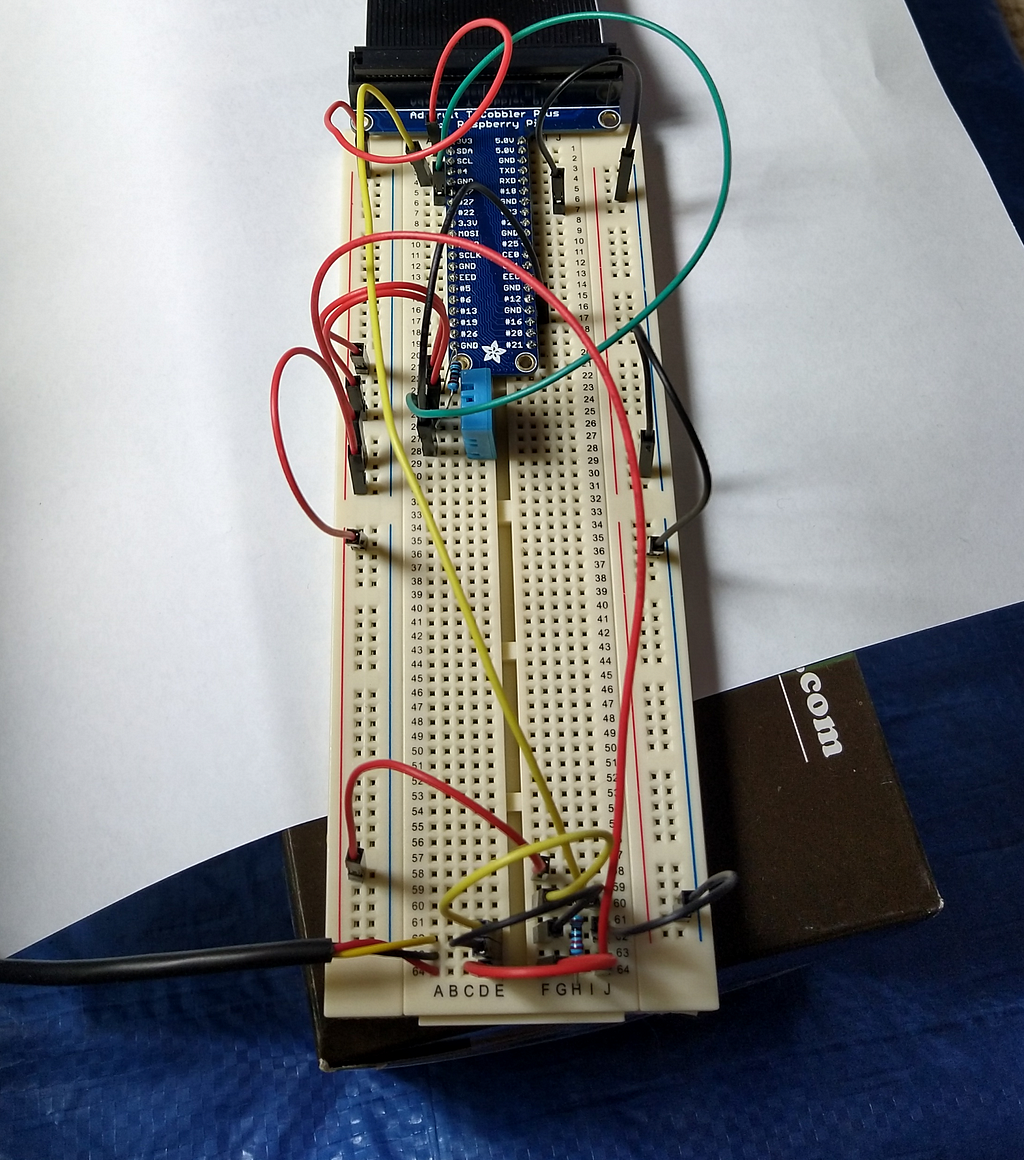 The DHT11 is the blue cube. The DS18B20 is the cable connected to the breadboard at the bottom left. A pH sensor would be great but they’re quite expensive.
The first question was where to store the data. I wanted to try out designing a NoSQL schema, and DynamoDB is free for up to 25GB which is more than enough for my purposes. As well as storing sensor readings the DynamoDB table also stores information about the system configuration. I optimized the schema for retrieving the system configuration and retrieving the data for a specific sensor for a specified time period, because I knew these would be my two main use cases.
I then wrote a simple python script to post the sensor readings into my database. So far, so good. However, this wasn’t contrived enough for my liking.
So I decided to write a GraphQL endpoint, deployed with the Serverless framework and Node.js 8.10 Lambda. This was a bit more complicated than I needed right now, but these were all things I’d been wanting to try, and I plan in the future to use third party weather and power price APIs in the future so GraphQL will provide more value at that point. Serverless is a really enjoyable way to work with Lambda (it also supports other providers!), and you should definitely try it if you haven’t yet.
Automated Alerts
At this point I had a pretty solid setup for logging, storing and accessing data. It was time to put that to good use by setting up alerts.
I wanted to be alerted for when:
- The sensor readings were outside of the ‘safe’ range.
- The sensors stopped sending data (this could mean that there was an issue with my Raspberry Pi).
- Either of the above issues persisted for an extended period of time.
- Either of the above issues resolved (i.e. the temperature dropped back into the ‘safe’ range’.
For this I turned to Amazon Simple Notification Service. I can send 1000 emails a month for free, and it’s very straightforward to publish a notification from a Lambda function. I wrote another Serverless project with functions that are run every 20 minutes. I stored information regarding the state of an alert (i.e. that this issue has been persisting since 10PM) in my DynamoDB table.
I also plan to add alerts to remind me to do tasks like check the pH and add nutrients.
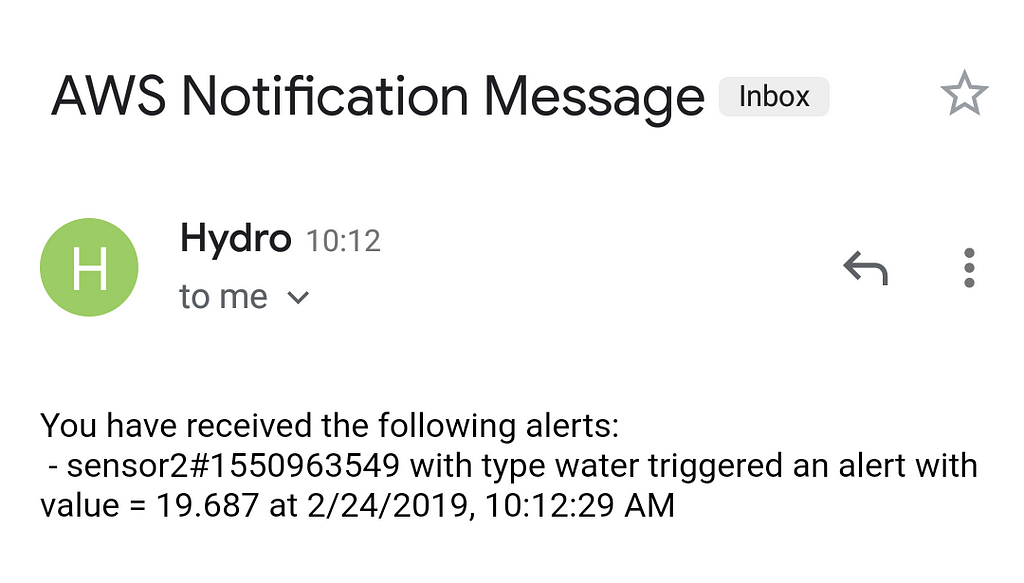 It’s super convenient to only need to check when alerted. If only I had that pH sensor…Web Interface
A web interface for the system could have all sorts of features. Reviewing the current state of the system, analyzing historical data, controlling automation and configuring alerts are just a few ideas. So far I’ve created an exceedingly bare bones Next.js app which uses Apollo Client to fetch data from the GraphQL endpoint I created earlier. I haven’t had time to work on this aspect too much yet, but with the data retrieval in place I can start building UI soon.
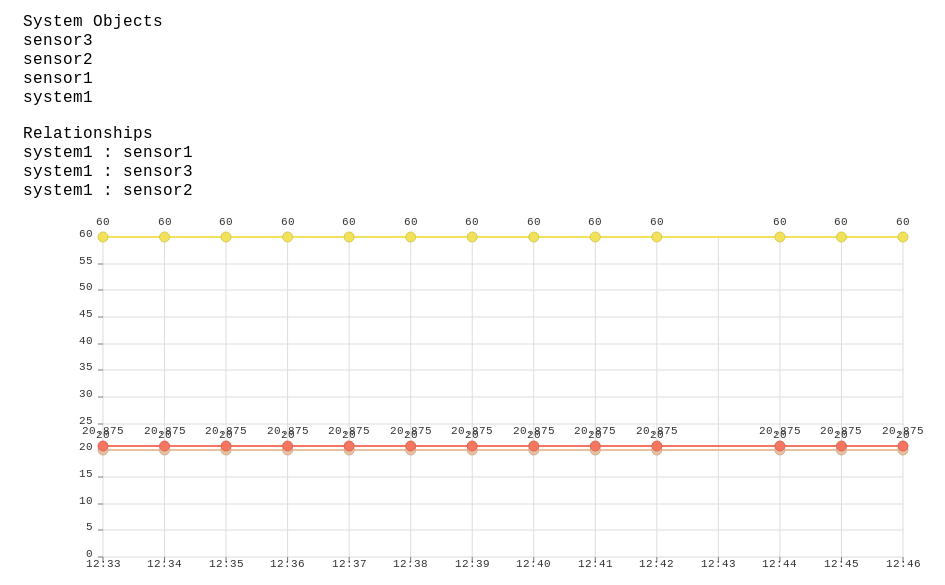 I really meant it when I said bare bones. The graph shows the last 15 minutes of humidity, air temperature, and water temperature. The charting library is called nivo, it’s worth checking out.
Additionally, it seems a bit of a waste to be storing more than a few weeks of time series data in DynamoDB, seeing as only the new data gets accessed frequently. To that end I plan to combine AWS Glue, S3, and Athena to transfer, store, and query long term data. Here’s an AWS blog which explains what that would involve.
Physical Automation and Other Cool (Expensive) Stuff
Unfortunately there’s nothing to show here yet. The first step will be buying a 433mHz transceiver and a remote control socket. I’ll use this to control the light, enabling features like automatically minimizing power expenses.
Other useful features would be likely to involve peristaltic pumps and pH sensors, which I would probably need to order from China. I might also buy an Arduino to have easy access to analog interfaces, seeing as that’s inconvenient with the Raspberry Pi. Another option could be adding a camera to the Raspberry Pi. Software wise I might try my hand at writing the next service in Go. Leave a comment if you have any ideas on what I should try and do next.
In Summary…
I’ve succeeded in growing food, learnt a lot of new things, and crammed an exceptionally high number of tech buzzwords into one post. Hopefully this wasn’t too long and has maybe inspired you to get started on a project of your own. I also made plenty of mistakes along the way (you might notice my kale is very small), so next cycle I aim to do better. Even a setup like this takes a lot of thought, and it makes you appreciate the complexity of food production which we mostly take for granted. I’ve also spent more than $300 AUD so it shows how capital intensive ‘high tech’ farming is.
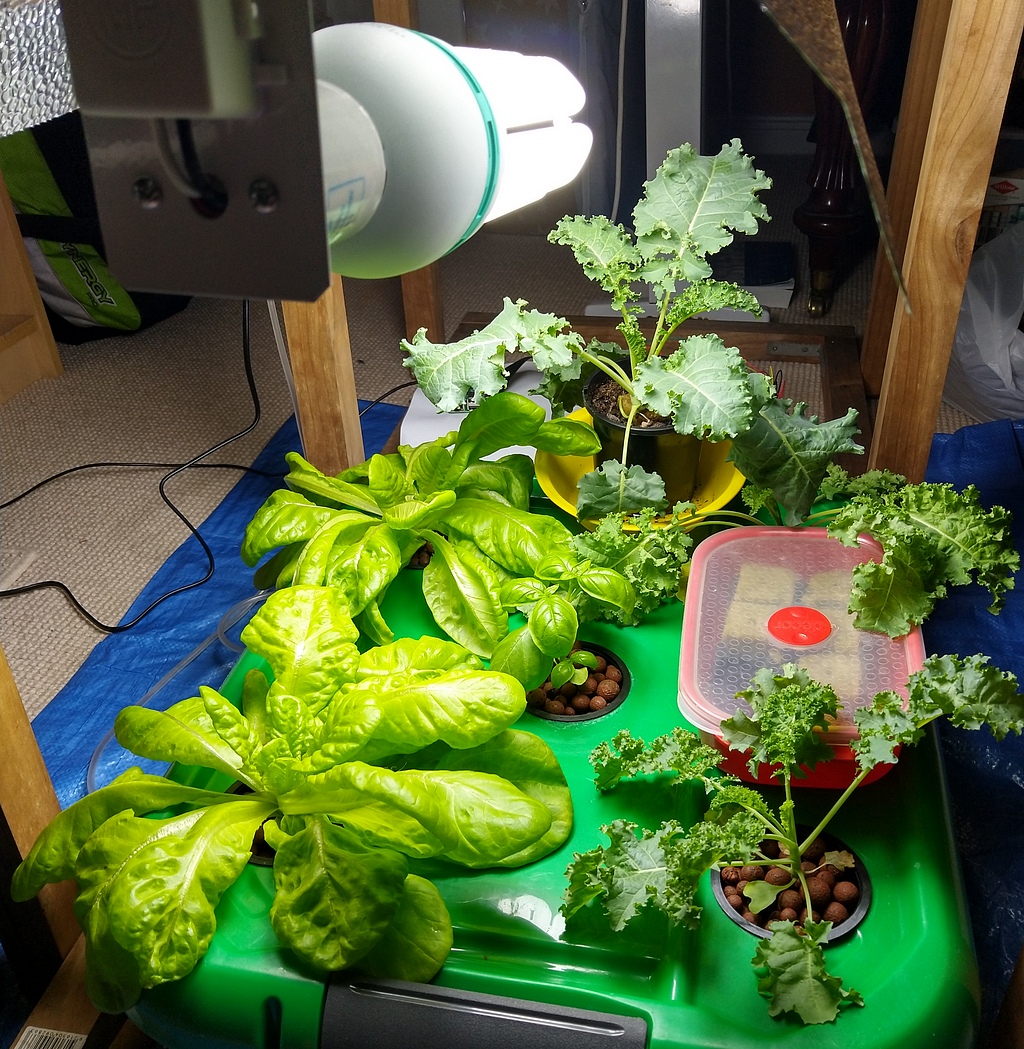 The title is a little misleading seeing as I got not one, but two lettuces. The red box contains some seeds which I’m germinating for once I harvest the current plants.
Further Information
If combining technology and agriculture interests you, then have a look at this video which shows commercial vertical farming. If you’d like to try hydroponics in a very simple and cost effective way then have a look at this video. Epic Gardening has a range of informative articles on hydroponics and other gardening topics. If you decide to have a go then you can ask questions on r/Hydroponics or Hydroponics for Beginners. All of the technologies used have extensive documentation and community support, so you should be able to find whatever you need.
Leave a comment if you have a suggestion for what I should do next, or if there’s a specific element of the project which you think I should write a more in depth post about. I’ll probably write a more technical post once I’ve progressed further. You can also message me on LinkedIn if you want to discuss anything!
The $300 Lettuce: Building a Smart Garden was originally published in Hacker Noon on Medium, where people are continuing the conversation by highlighting and responding to this story.
Disclaimer
The views and opinions expressed in this article are solely those of the authors and do not reflect the views of Bitcoin Insider. Every investment and trading move involves risk - this is especially true for cryptocurrencies given their volatility. We strongly advise our readers to conduct their own research when making a decision.