Latest news about Bitcoin and all cryptocurrencies. Your daily crypto news habit.
A painless experience of installing a database locally with Docker and Kitematic.
In this post, you are going to experience a quick and painless installation of a PostgreSQL database on your local machine using Docker. This will allow you to manage applications in lightweight Docker containers, without a need to install them on your host machine or a Virtual Machine. After reading this article, you will be able to install and manage thousands of other images available on the Docker Hub, such as Nginx, MongoDB, Redis, Node.js, etc., without all the difficulties of setting them up and managing yourself.
 PostgreSQL (left) and Docker (Right)
Step 1: Install the tools
We are going to need two tools: Docker Desktop and Kitematic. Docker Desktop contains the Docker engine required to operate containers, and Kitematic is a beautiful graphical user interface for running containers. You can get Docker Desktop here and Kitematic here, both of the apps are free.
Step 2: Download PostgreSQL image
Cool, now that the tools are installed, make sure that Docker is running before launching Kitematic. Once you got both running, you should land in the Kitematic interface. You might need to create a Docker Hub account, so in case Kitematic refuses to work without one, please register and login.
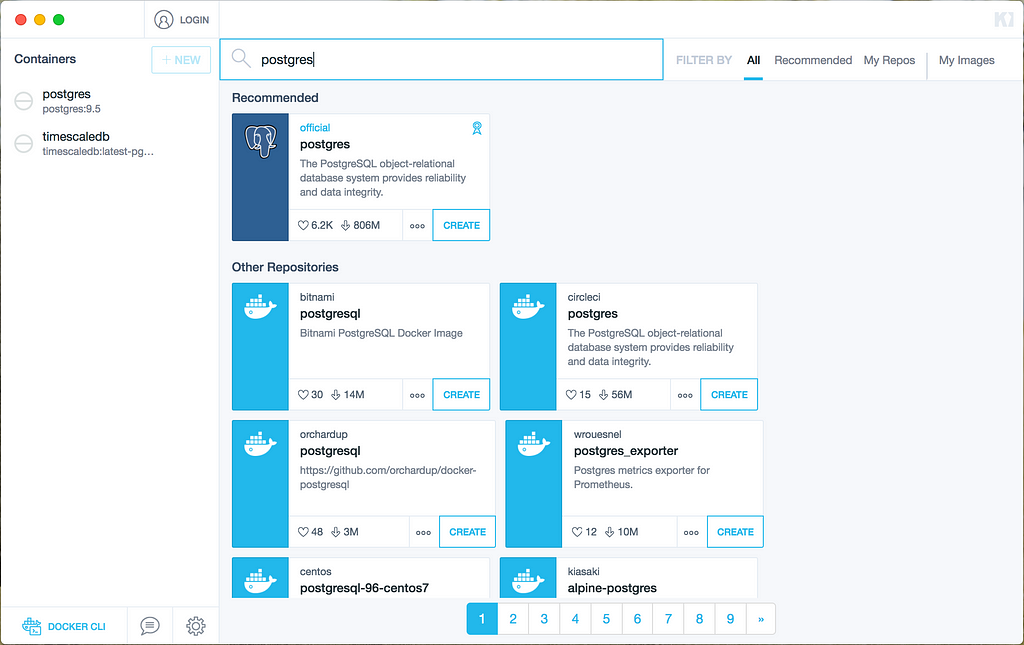
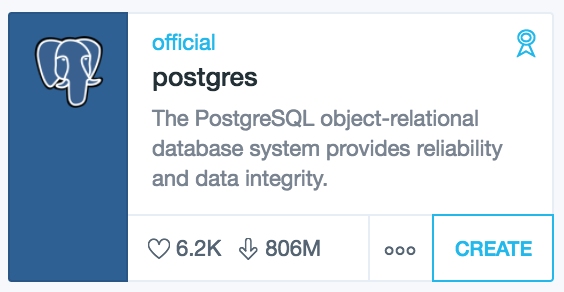
Now you can browse through thousands of Docker images available in the hub. Let us find the official PostgreSQL image by typing “postgres” in the search bar. Note that official images are marked with an appropriate label, like the first search result under “Recommended” section in the screenshot below.
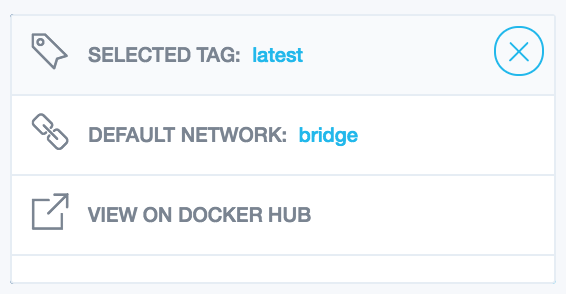
Before clicking the “CREATE” button, tap the three dots to the left of it. Several options will appear.
Then click on “SELECTED TAG: latest”.
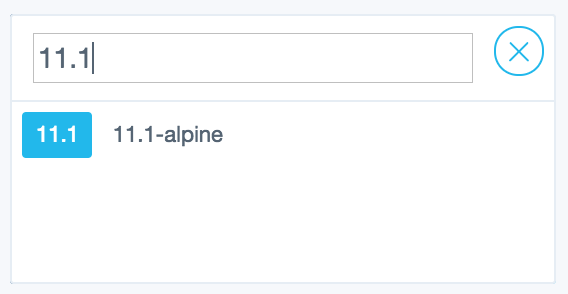
Here you can choose which version of Postgres you want to install. There are quite some available, let’s choose one and continue. I chose 11.1.
Exit the options menu and click the “CREATE” button. Kitematic will download the image for you and create a container. It should also run the container automatically when it is ready. You should see the “RUNNING” status next to your container name in the status bar on top. In “CONTAINER LOGS” section you can observe information that the container is logging in real-time.
Step 3: Container settings
Congratulations, you just installed and ran a PostgreSQL database on your local machine using Docker and Kitematic! You can start/stop/restart the container any time, and this happens fast because Docker containers are very lightweight.
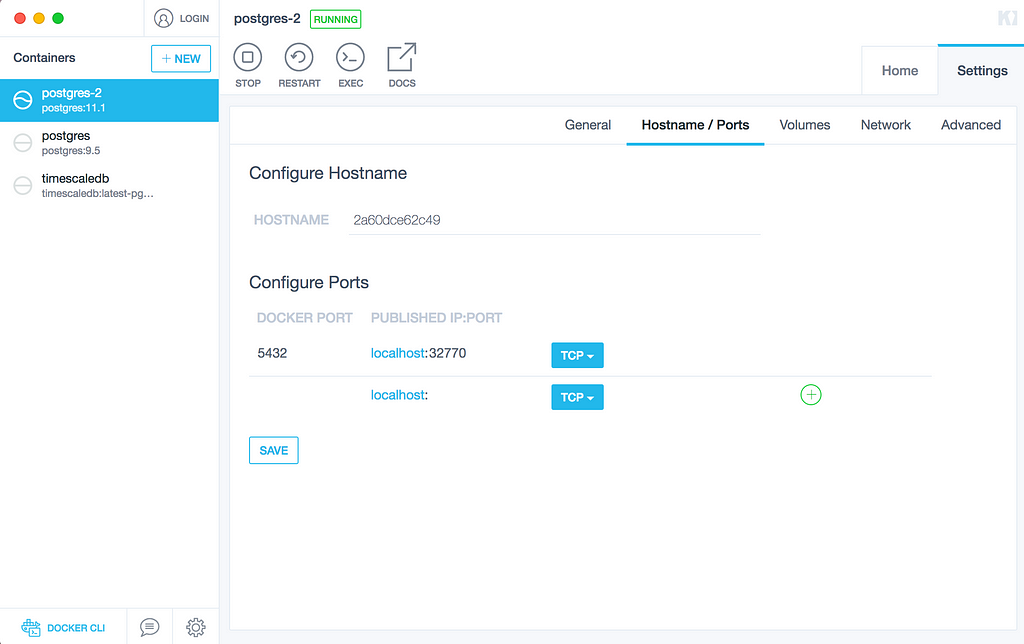
Since our container is running in an isolated environment, you should be able to get access to it from your local machine. For this, let us configure ports. Select your container, navigate to Settings -> Hostname/Ports. You should see this screen:
The above means that Postgres is running on its typical port in the container (5432), and that port is “bridged” to port 32770 on your local machine. For simplicity, you can set “PUBLISHED IP:PORT” to localhost:5432 if you want to, but this is not necessary.
Step 4: Container access
Now that your container is running, you might be wondering about how to access it. One way is using Kitematic, by pressing the “EXEC” button on top:
After pressing the button, a terminal opens and you have access to the container. In the case of Postgres, you can use psql to interact with the database. Please keep in mind that the default username is postgres:
If you want to access your database directly from the host machine, the only difference is that you would need to supply host and port parameters to psql:
 psql -U postgres -h localhost -p 32770
Conclusion
Thanks for finishing this little tutorial. In a similar way as we did with the PostgreSQL database, you should now be able to use any other image available in the Docker Hub.
At Pinch — The Mobile App Creators, we are using Docker for our Maven Repository and back-end development, and we are satisfied with the possibilities it gives us.
Feel free to ask questions and leave feedback in the comments section. Have a great time!
📝 Read this story later in Journal.
🗞 Wake up every Sunday morning to the week’s most noteworthy Tech stories, opinions, and news waiting in your inbox: Get the noteworthy newsletter >
Local Database with Docker in 5 minutes was originally published in Hacker Noon on Medium, where people are continuing the conversation by highlighting and responding to this story.
Disclaimer
The views and opinions expressed in this article are solely those of the authors and do not reflect the views of Bitcoin Insider. Every investment and trading move involves risk - this is especially true for cryptocurrencies given their volatility. We strongly advise our readers to conduct their own research when making a decision.
