Latest news about Bitcoin and all cryptocurrencies. Your daily crypto news habit.
 Our end game for routers.
Pardon me; I can’t explain my recent obsession with angular dart despite the fact that less than a certain percentage which am yet to figure out are actually interested in angular dart right here in Nigeria.
Straight into today’s tutorial and explanation of Router basics, we are going to apply the use of router to our navigation menu in our web app. So I actually saved you from the stress and prepared the files you need with a custom navigation bar made with HTML, some CSS and Bulma CSS framework.
Alright, let’s clone the repository from my github, run pub get to update dependencies and then webdev serve to setup our live server.
Great, I guess we are good to go. By observing, you notice that clicking the links has no effect and doesn’t lead to other pages and that’s the good news. The bad news is we have to configure everything to function properly.
Let’s recap and look into Routers or Routing, am all about explaining what can’t be found on a single page. The angular router enables navigating from one view to another as a user performs app tasks. Skipping what’s already explained in the angular dart official documentation let’s add router provider to our program.
Adding Router Provider
Firstly, we head over to our main.dart file and add our Router Providers there. With router provider; there are two location strategy which are the hash Location strategy and path location strategy and you are going to learn how to switch between the two location strategies easily.
Let’s import the router package into our main dart file
import ‘package:angular_router/angular_router.dart’;
After that, we import the main.dart file to reference it within the program as “self”, self isn’t a keyword and it can be named anything of your choice.
import ‘main.template.dart’ as self;
Now, if you don’t know about dependency injection in angular dart please go back to the documentation and read about it and if you don’t understand it then read my article on dependency injection right here.
We want to make our routersProviderHash(hash location strategy) available to every component within our program and the only way to do that is if we make it a service that can be injected. The @GenerateInjector annotation is what we need to inject routersProviderHash into our program that generates an InjectorFactory at compile time with parameter <object> which could either be a provider or module.
Alright let’s pass routersProviderHash as our parameter to @GenerateInjector to be injected into our program. Since router is a custom service, we have to pass it as an argument in our runApp() function.
runApp(ng.AppComponentNgFactory, createInjector: injector);
So obviously we created an injector, but we haven’t actually specified what that injector does so let’s do that.
final InjectorFactory injector = self.injector$Injector;
Add this code above your main() method. We are well aware that @GenerateInjector generates an InjectorFactory which defines a function that creates an injector around a parent injector and $Injector is used to retrieve object instances as defined by router provider that also instantiate a type, invoke methods and also load modules, while self.injector refers to the main file referencing the injector within it. Yeah, that’s all it takes to add a router provider.
Just before we move on, I replaced the <script>…..</script> we can find in quickstart master index.html file within the head tag with:
<base href=”/”></base>
The base should always be used for production and maybe a minor coding practice.
Configuring Routes
Routes tell the router which view to display when a user click a link or paste a URL into the browser address bar. Based on the nav menu, we have four links which means we have to create four routes but before we go into creating routes we all want each link to display different information so let’s set that up first.
To do this, we need to create five (Five links == Five components) components first. Head to the lib -> src folder and create another folder title linksComponent. With these changes our file structure looks like this.
lib -> src -> linksComponent
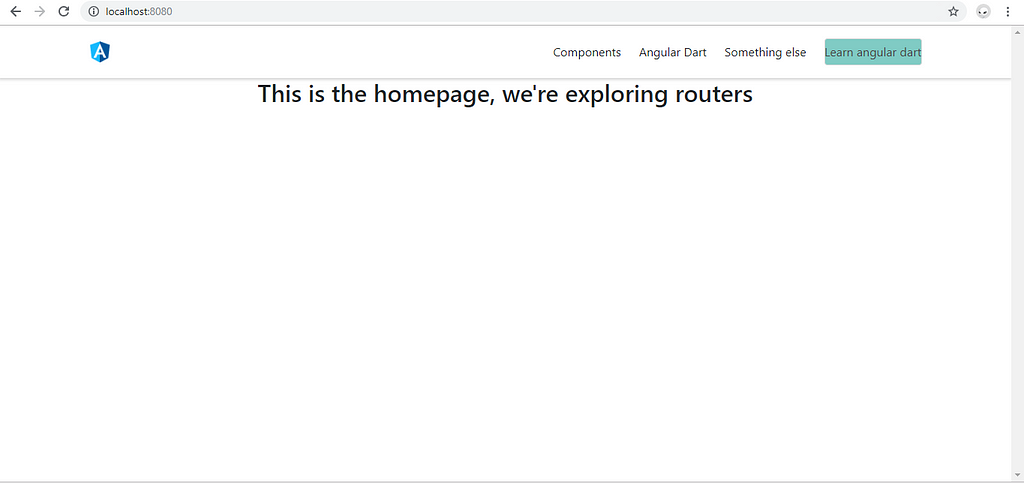
Our page looks like that when you run it and we all can see four links and I stated five links, the fifth link is actually for the home page which will be used to explain default route.
So our component names for each links will be components.dart, angular.dart, something.dart , learn.dart and home.dart respectively. I’ll be working with only the components.dart, angular.dart and something.dart while you can fill the rest as homework.
Alright, let’s treat each component the same way we treat our app_component.dart file.
For components.dart:
For angular.dart:
For home.dart:
Great, you can work the rest out.
Let’s head into routes. Simply, routes tell the router which views to display when a link is clicked as mentioned earlier. So we want to define the route path which will be used for route definition (to generate urls).
Our app structure now looks like this:
lib -> src -> linksComponent
Now, under the src folder we create another folder to handle operation relating to routes. Create a folder for Routes and in this folder create a route_path.dart and routes.dart file.
Starting with the route path file we import angular routers and create a class RoutePaths and define the route path for each app’s view, in this case we create for all links in the navbar and since am only working with three links I’ll be creating route path for just three links.
There we have our route path for the three links. The String argument passed to path is what displays in the URL bar and you can name it whatever you like.
We want to define each route paths in our routes.dart file which is responsible for handling navigation to the path and rendering of associated view.
Quickly, let’s import the following package and file:
import ‘package:angular_router/angular_router.dart’;
import ‘../linksComponent/components.template.dart’;
import ‘../linksComponent/angular.template.dart’;
import ‘../linksComponent/home.template.dart’;
import ‘route_path.dart’;
Yes, our importation is complete but not fully we can see the .template.dart extension on all links component but we didn’t actually create any .template.dart file, what it simply does is that we are trying to access each components factory to use within the route definition and we must reference it with as xyz_template or xyz or mycomponent anything that works for you. Let’s make this correction to our program right away:
import ‘package:angular_router/angular_router.dart’;
import ‘../linksComponent/components.template.dart’ as components_template;
import ‘../linksComponent/angular.template.dart’ as angular_template;
import ‘../linksComponent/home.template.dart’ as home_template;
import ‘route_path.dart’;
class Routes{}
Here changes made and I added a class Routes where we are going to define each route path.
So let’s define the route path for components, angular and home:
We’ve defined all the route paths, a RoutePaths encapsulate a route definitions property and create link urls. Now, let’s store all the routes defined in an array of type RouteDefinition:
Add this piece of code just after the last route definition. That’s it we are done with creating our route path and defining them and we actually do need the routes in our navbar_component.dart file so we need to export the routes.dart file so it can be used from any component.
export ‘routes.dart’;
Add the export line of code above the RoutePath class file and your program should look like this:
Right in our navbar component file, let’s add our routeDirectives, export Routes and RoutePaths to the List of exports referenced in the template under the @Component method.
directives: [routerDirectives],
exports: [Routes, RoutePaths],
Almost done!
All we need to do is put this bunch of code into effect by binding each router link to a route path by adding:
[routeLink] = “RoutePaths.components.toUrl()”
Where components refer to the variable name defined in both the routes and route path file.
Ensure your variable name for each link is the same across your router files.
A sample of me binding router link to its respective anchor tags:
The routerLinkActive is necessary in every anchor tag or link else you won’t be able to click on the link.
Now we’ve bonded the router link to each anchor tag and we are well aware that this pages display output or another set of information for a user to carry out a task and we have to specify which area it appears in with the router-outlet tag.
Add the following router-outlet code to the area you specifically want your output to be displayed in and as a developer where other than just after the navbar on your webpage.
<router-outlet [routes]= “Routes.all”></router-outlet>
Routes.all refers to all the links in the array of RouteDefinition telling it to display its content within this area. So to display in the appropriate area which is just after the navbar we switch to our app_component.dart file and insert the router-outlet tag beneath it.
If you noticed after adding this, the build command line shows a severe failure rather than success if our code is 100% correct.
To fix this, import routes, routePath file and angular_router then add the routerDirectives and also export RoutePaths and Routers
directives: [NavBarComponent, routerDirectives],
exports: [RoutePaths, Routes],
Now it works right and our page works well.
Default Route:
Default route can be used to set which page should be loaded by default once the user loads the page and in every case that’ll be the homepage so we head to the routePaths file and add the following code to the link attribute we would like to use as the default view page:
useAsDefault: true,
The useAsDefault only receive bool value and at most you can only use one default case within your program.
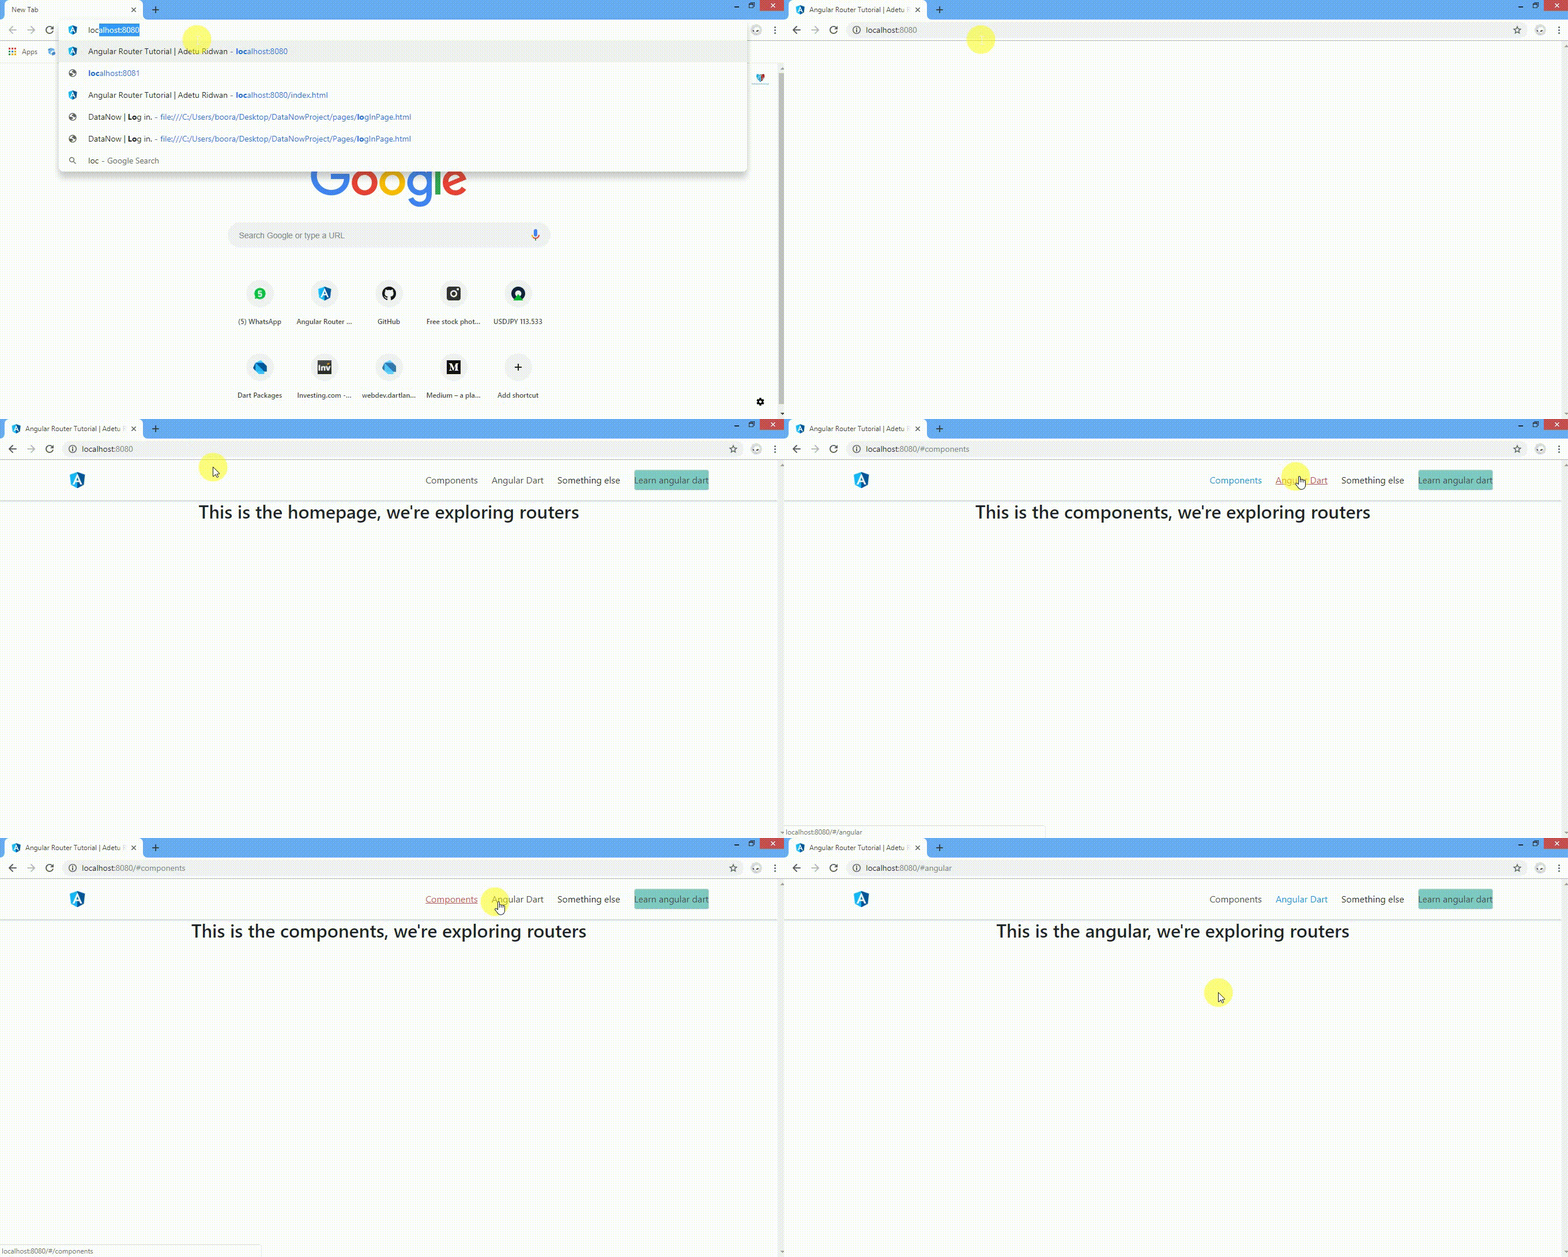
Home is now the default page to view on window load.
Let’s add a little styling to know the difference between the active pages.
styles: [‘.active-route {color: #039be5;}’],Add this piece of CSS styling code to the navbar component file and that’s it all done.
Switching between RouterProviderHash and RouterProviders:
The routerProviderHash as used within our program attaches a “#” before the url like this:
http://localhost:8080/#angular
While the routerProviders displays the url in a similar way to how most web pages display url. E.g.:
Either you want to use providersHash or providers, just head to your main.dart file and change the parameter passed to @GenerateInjector to any location strategy of your choice.
Ensure you maintain one location strategy when building your web app.
See! Router is easy and angular dart is cool. Up next we look into navigating imperatives, child and router lifecycle hook.
Router Practical Approach With Angular Dart was originally published in Hacker Noon on Medium, where people are continuing the conversation by highlighting and responding to this story.
Disclaimer
The views and opinions expressed in this article are solely those of the authors and do not reflect the views of Bitcoin Insider. Every investment and trading move involves risk - this is especially true for cryptocurrencies given their volatility. We strongly advise our readers to conduct their own research when making a decision.
