Latest news about Bitcoin and all cryptocurrencies. Your daily crypto news habit.
 Photo by JJ Ying on Unsplash
Our nervous system is a real wonder.
Just think of that brain of ours… continually sending messages all over our bodies. Notifying us when we need to eat, sleep, or remove our hand from that stove.
Could you imagine having to consciously ask your brain if you’re hungry, hurt or tired?
Life would be unmanageable.
Good news is the same automation & notification system can also be at the core of your web development projects.
One way to get there is by using webhooks. You probably use them fairly often, without even knowing what they really are. You might even be confusing them with APIs to this point.
So let’s take time today to explain what webhooks are and how leveraging them will step up your dev game.
What you’ll find in this post:
- A webhook definition
- Real-life webhook examples
- A development flow for webhooks integration
- A list of development tools
- (Slightly) advanced features
Trust me dev padawan, change your life, webhooks will.
What are webhooks?

Put bluntly: webhooks are a way for apps to communicate between them automatically.
- MailChimp uses a webhook to signup users from your website to your newsletter.
- Paypal uses it to tell your accounting app when your clients pay you.
- Shopify offers webhooks to keep parts of your commerce system up-to-date, so you don’t have to enter new transaction details manually.
Analogies go a long way — the easiest programming comparative I can come up with is the observer pattern.
Take browser notifications for instance.
The browser (the subject) notifies the user (the observer) when an event occurs — say an incoming email.
This dynamic of observer <> subject makes it very easy to leverage asynchronicity in event-driven systems. Once you master this, it’s way easier to manage use cases with a lot of user interactions.
Instead of the user polling a server asking if the state has changed, the user can only say: “Hey, you know what? YOU tell me when the state changes”.
This interaction is a lot more efficient, but it’s a little harder to setup and wrap your head around at first.
Let’s transfer this knowledge to our initial subject: webhooks.
The observer pattern could be implemented in any event-driven systems, but webhooks are restricted to, you guessed it, the web. This implies that they must communicate over a web protocol — HTTP in almost every cases.
An event-driven architecture being a software promoting the production, detection, consumption of, and reaction to events. An event can be defined as “a significant change in state.”
How does a webhook operate?
You can register a webhook by registering the URL to notify once given events occur. This first step is usually done via either a UI or by API.
The route created holds the logic to be executed once the event occurs.
This way, a system doesn’t have to know the nature of what needs to be executed, it only needs to keep track of the routes to notify.
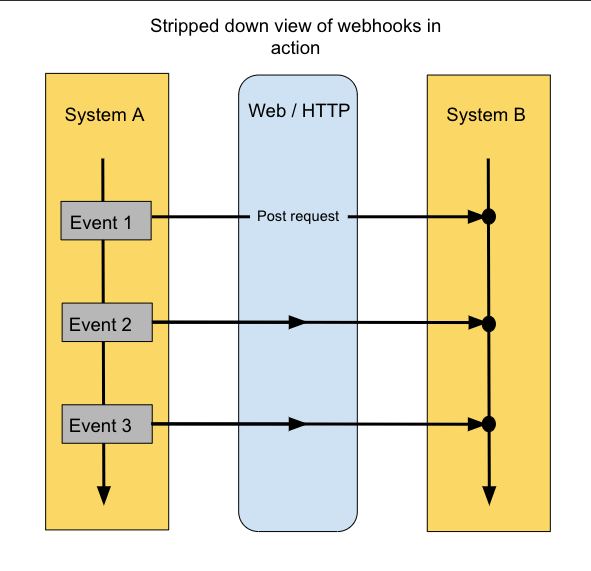
It’s really powerful since everything remains decoupled. System B, receiving the notification through the chosen URL, not only knows an event occurred on another system, but it can also react to it.
The route holding the logic has to be accessible through an HTTP POST request.
A POST request being the method that allows the transfer of information in the body of the request through HTTP.
Why specifically a POST request? Precisely because it gives you that ability to include a body to the request. It’s usually a simple JSON object, but it can also be an XML document (this will always be specified in the webhook documentation, so it’s always good to read it before starting playing around).
It’s directly in the body that you’ll find the information discerning what event happened (see second graphic below). Plus, it’ll tell you which user triggered it, at what time, and more event specific information.
Webhooks are powerful because they can either be public or private.
Private here means that only the owner of a specific system’s account can register a webhook. It’s not accessible in the wild for anybody to track the account’s events.
Real-life webhook example
How does all of this translate to real life?
Let’s expand on how a webhook operates through a particular Snipcart event. With our shopping cart for developers, webhooks are used to notify other apps when events occur in the cart, such as a new order.
Note: I’m using Snipcart’s webhooks as an example here because I know them like the back of my hands, but this example is applicable for most webhooks out there.
This example highlights the order.completed event.
You can see the body, also frequently called the payload, of the event here.
I won’t create a server to run any actual logic right now — I’ll only suppose I have one. The goal here is to understand how information flows and how it gets triggered (not to practice our server setup skills).
Let’s imagine you created an HTTP server route called /completed and that you registered the route in the Snipcart dashboard:
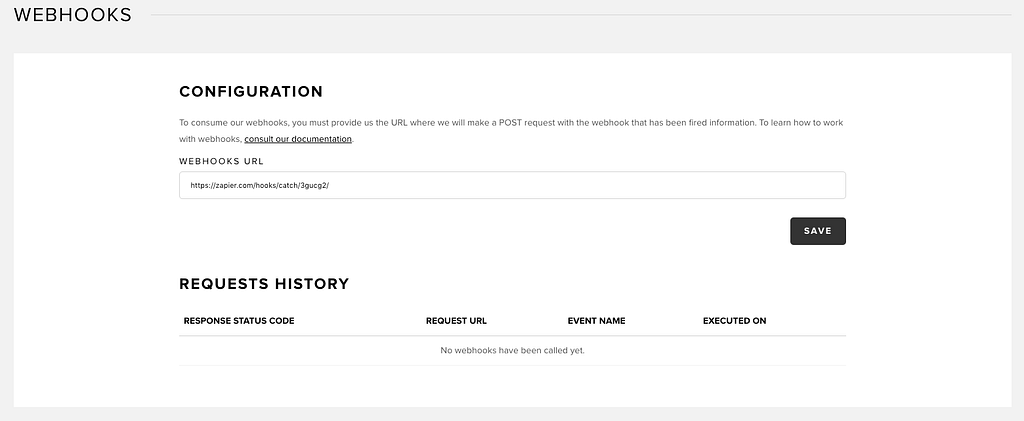
The so-called webhook is the route containing the logic to be executed, and adding the route in Snipcart’s dashboard is what we call “registering the webhook.”
The critical question, for now, is: “How does this get triggered?”
Well, let’s say I’m a customer visiting your store. I wander around for a bit and decide to buy a product. I go through the whole checkout process, and the order goes through.
Snipcart’s server can quickly check if there’s any webhook registered. Here, the /completed route needs to get notified. To do so, you would create an HTTP request with a body containing the order information and would send it directly to the URL.
Aaand bingo, the job on Snipcart’s side is done; notifying you for the event you asked.
It’s straightforward, but the power lies in what you make out of that notification.
The whole point here is to understand that since you can execute your logic after the notification, it isn’t static. It gives you the opportunity to take action immediately without any human interactions.
Let’s say an order.completed event just occurred, then you could create a new discount code with Snipcart's discount API and send that new code through an email to the customer who just bought from your website.
Possibilities are endless. You could even create customizable t-shirts with, let’s say the name of the customer automatically printed on it once the order is made.
I hope you start to grasp the power of webhooks!
A development flow for webhooks integration
Now that you get how they operate, here’s my personal webhook dev flow so you can get a grasp of what development would look like in real life. I’ll also share with you my favorite tools to kickstart your journey while saving you a lot of time during development.
First things first:
- As I mentioned earlier, always read the webhook documentation beforehand. It might sound like a dumb cue, but honestly, when you start getting comfortable you might feel like you can skip this step and this might cost you quite some time in the long run.
- Then, you’ll want to check if the events are actually sent. RequestBin is a handy tool to do so. You create an endpoint and register that endpoint as your webhook. The tool will collect any request sent to that route so you can inspect them. It’s an easy way to confirm that you can register a route and adequately receive the events data.
While doing so, it’s good to check if the data (the requests’ body) corresponds to the proper objects as shown in the docs. Once everything is confirmed, you’re ready to get your hands dirty and start developing the logic!
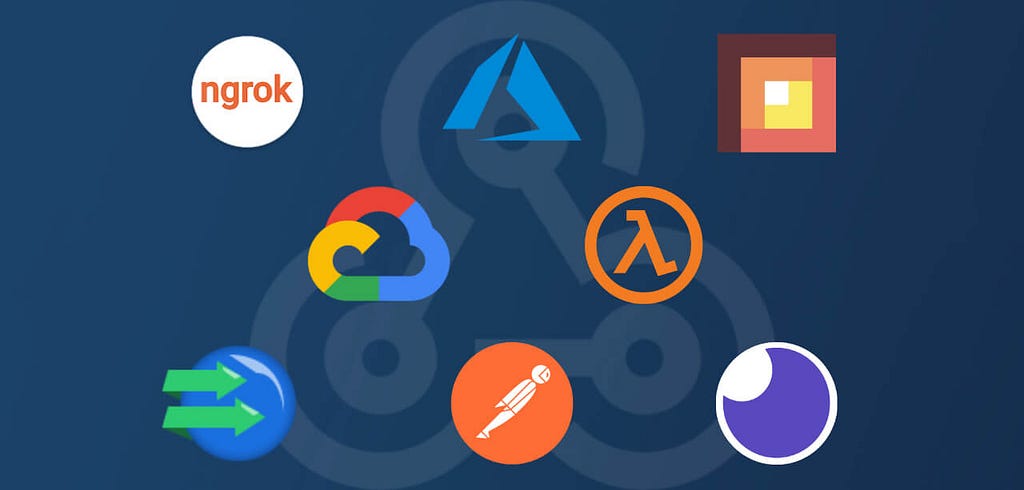
- An easy way to kickoff is by starting locally. You’ll be able to use the tech you want while staying in a controlled environment. But, you’ll quickly hit a problem. The logic you’re implementing is on your computer and can’t be reached by the outside world. The go-to tool to open up your computer while remaining secure is ngrok. I honestly think every developer should know about it and is a great value to be added to your web dev Swiss Army knife.
- Now, I usually don’t open up a public route out-of-the-box as my logic isn’t bulletproof at that time of the development. So, I’ll mock the requests instead. To do so, I’ll use Postman, or the new kid on the block, Insomnia. Both are simple, yet powerful REST clients who will let you forge an HTTP request manually. Instead of waiting that an actual third-party event happens to trigger your logic, you’ll be able to trigger it manually.
If you used RequestBin, as suggested before, you’ll be able to copy what was in the body of a real event to create your local one. This makes the whole process a lot less contrived since you’ll be using actual data to test your logic. You can continue your development freely and send the forged request directly from Postman only once you think you have something. This way your iterations are quick and you can get feedback anytime it pleases you.
- Once you’re happy with what you have, you should use ngrok to test with real-time data. Once everything is testing fine, that’s when you want to host your logic. There are a couple of ways to do this:
- By hosting a full-blown server. The whole process depends on the used techs so I won’t be covering the how-tos here.
- By using serverless functions. Since webhooks logic are usually kept simple and concise, it’s a perfect case for them. The significant players being Webtask.io, AWS Lambda, Google Cloud and Azure.
Serverless functions are used more and more in the web ecosystem so I would definitely give it a closer look. If you’re interested in getting a good understanding of how serverless functions operates, start [here](https://snipcart.com/blog/webtask-baas-serverless-tutorial).
Webhook development tools recap 🛠️
This list regroups the tools I mentioned in the last part.
- Webhooks’ documentation — specific to every webhook.
- RequestBin — HTTP request inspecter.
- ngrok — secure local testing.
- Postman or Insomnia — REST clients.
- Webtask.io, AWS Lambda, Google Cloud & Azure — serverless functions.
(Slightly) advanced webhook features
I think we’re getting somewhere, right?
It might be time to unveil details I kept hidden without puzzling you too much. These are slightly more complex concepts, but they’ll cross your path quite quickly if you move forward with webhook development.
A dominant, powerful characteristic of webhooks is that not only they send a notification through an HTTP POST, they can also respond to that same request with more information. The example before didn’t need an answer. However, if we had registered, let’s say, a shipping webhook instead, it would have been useless without a response.
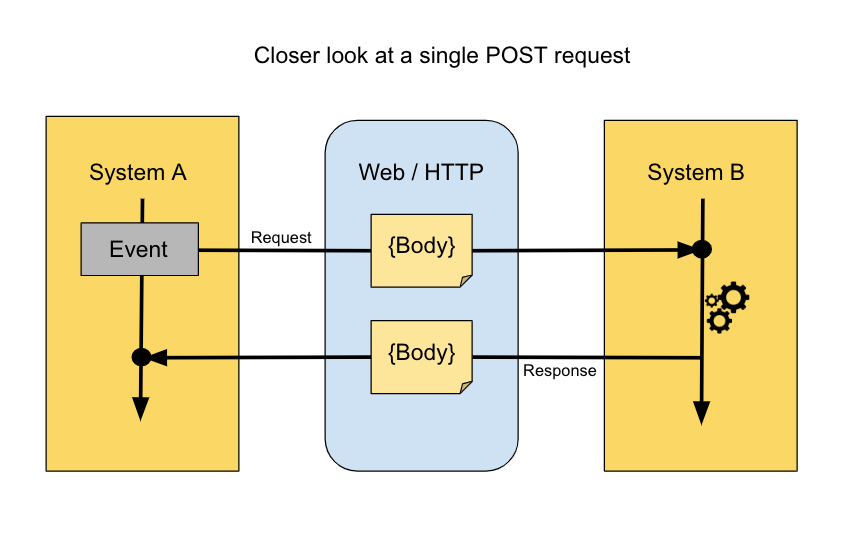
With Snipcart’s shipping webhook, for instance, the route is notified when someone fetches shipping rates for his order. The expectation is then to get shipping rates back as an answer.
This way, you’re the one handling the shipping rates through programming without any third-party involved. This would be very useful if you had various custom shipping rules to apply.
The process is the same as before, but you need to answer back at the request by returning the rates you want to show in your interface. In this case, the rates would have to be defined in a JSON object or XML. Once the initial notifier gets the answer, the new data can be used in his process — in this case, showing the shipping rates in the cart.
Keep in mind that some webhooks need an answer and some don’t. If it needs one and you don’t provide it, the process will idle until the request timeout, resulting in a lot of wait time. So again, always read the doc before. ;)
Another lower level webhook’s characteristic is authentication. You could want to verify the notifier’s identity, and it is up to the notifier to provide a way to do so. With Snipcart, every webhook HTTP POST request has a header entry named “HTTP_X_SNIPCART_REQUESTTOKEN”.
You can use the value of this field to make sure it’s really coming from Snipcart.
To do so, you would have to only send a new request to Snipcart’s server at https://app.snipcart.com/api/requestvalidation/{your_request_token} using your API key and it will answer you whether or not the token is valid.
Validation is not mandatory but, for security’s sake, I would highly recommend doing it.
Closing thoughts
I hope this makes for a well-rounded introductory piece on webhooks. What I really want you to get out of it is the benefits they can bring to your development game. Which sums up as added efficiency, the power to scale your apps & easy access to outside functionalities.
Back in the first section of the post, I used the observer pattern metaphor. In reality, my examples would be closer to a pub-sub pattern. The differences aren’t obvious to everyone, and it’s out of scope to explain their subtleties, but I thought it would be great to share this excellent post on this topic if it’s of any interest to you.
What did I miss about webhooks? Do you think they are an essential part of web development? Let’s discuss it in the comments below!
I originally published this post on the Snipcart blog and shared it in our newsletter.
Webhooks Explained: What They Are & How to Use Them was originally published in Hacker Noon on Medium, where people are continuing the conversation by highlighting and responding to this story.
Publication date
Disclaimer
The views and opinions expressed in this article are solely those of the authors and do not reflect the views of Bitcoin Insider. Every investment and trading move involves risk - this is especially true for cryptocurrencies given their volatility. We strongly advise our readers to conduct their own research when making a decision.