Latest news about Bitcoin and all cryptocurrencies. Your daily crypto news habit.
Training and Deploying A Deep Learning Model in Keras MobileNet V2 and Heroku: A Step-by-Step Tutorial Part 2
In the first part, we covered the two main aspects of deploying a deep learning model:
- Preparing the dataset
- Training the model using the transfer learning technique.
Part 2 will focus on preparing a trained model to be served by TensorFlow Serving and deploying the model to Heroku.
TensorFlow Serving
Is a flexible, high-performance serving system for machine learning models, designed for production environments. I am not going to cover it in details because TensorFlow Serving has many ways to serve models and there are too many concepts to digest for this short tutorial.
I strongly encourage TensorFlow Serving beginners to first read, TensorFlow Serving 101 pt. 1. However, this tutorial will cover how to serve Keras models and using the new RESTful API, which is not covered in that tutorial.
Serve the model.
First, let’s load the saved model from Part 1
from keras.models import load_model
# model_name = tf_serving_keras_mobilenetv2model = load_model(f"models/{model_name}.h5")Save the Model
We define the input images and output scores tensors. The name image and score can be any string. Then we specify a path where the model will be saved, models/export/tf_serving_keras_mobilenetv2/1. 1 is the version of the model; this is very useful when you are going to retrain the model and have a new version.
Each version will be exported to a different sub-directory under the given path. Lastly, we build the model by passing the TensorFlow session, input, and output tensors. sess is the TensorFlow session that holds the trained model you are exporting [3].
tags is the set of tags with which to save the meta graph. In this case, since we intend to use the graph in serving, we use the serve tag from predefined SavedModel tag constants [3].
signature_def_map specifies what type of model is being exported, and the input/output tensors to bind to when running inference.
Containerize Your Model for Deployment — Docker
What is Docker? Why Docker?
Docker is a tool designed to make it easier to create, deploy, and run applications by using containers. Containers allow a developer to package up an application with all of the parts it needs, such as libraries and other dependencies, and ship it all out as one package. By doing so, thanks to the container, the developer can rest assured that the application will run on any other Linux machine regardless of any customized settings that machine might have that could differ from the machine used for writing and testing the code.[1]
Here are some of the benefits of using Docker:
- Return on Investment and Cost Savings by dramatically reducing infrastructure resources [2].
- Docker containers ensure consistency across multiple developments and release cycles, standardizing your environment [2].
- Rapid Deployment since Docker creates a container for every process and does not boot an OS [2].
- All major cloud computing providers support docker, including Heroku.
- Docker makes sure each container has its own resources that are isolated from other containers [2].
If you would like to take a deeper dive into docker, I recommend this blog.
Next: Install docker — for macOS, windows or Ubuntu.
Once Docker has been install run the following to make sure it is working properly.
> docker ps CONTAINER ID IMAGE COMMAND CREATED STATUS PORTS NAMES
Heroku
What is Heroku? Why Heroku?
Heroku is a platform as a service (PaaS) that enables developers to build, run, and operate applications entirely in the cloud. I am going to use Heroku because it’s free to use for development and testing, easy to deploy (does not require much work), supports many languages by default,
(As I could not find many resources on deploying TensorFlow models to Heroku, please leave comments below if you have trouble and I will help troubleshoot)
Signup & Install heroku-cli
After you have signed up to install heroku-cil, run the following commands to confirm the installation.
> heroku --versionheroku/7.18.3 darwin-x64 node-v10.12.0
# make sure you have logged in to your heroku account> heroku login# Output should have: Logged in as xxxxx@xxx.xx
Nice work — now we are going to deploy TensorFlow Serving docker image to Heroku; however, since the default TensorFlow Serving docker image is not optimized to be deployed to Heroku, I have created a Dockerfile:
Run the following code to build the docker image, making sure you are in the same folder as Dockerfile live.
> docker build -t tf-serving-heroku-1.11 .
Let’s run it locally to test it
> docker run -p 8501:8501 -e PORT=8501 -t tf-serving-heroku-1.11...
2018-10-27 21:17:47.515120: I tensorflow_serving/model_servers/server.cc:301] Exporting HTTP/REST API at:localhost:8501 ...
Call the model
Now we are ready to call the production-ready model.
Before calling the model, let’s understand how TensorFlow Serving RESTful API actually works:
POST http://host:port/<URI>:<VERB>
URI: /v1/models/${MODEL_NAME}[/versions/${MODEL_VERSION}]VERB: classify|regress|predictIn our case the request will look like:
http://localhost:8501/v1/models/tf_serving_keras_mobilenetv2/versions/1:predict
Second, the JSON data that is sent to TensorFlow Model Server has to be structured in a very particular way
{ // (Optional) Serving signature to use. // If unspecified default serving signature is used. "signature_name": <string>,// Input Tensors in row ("instances") or columnar ("inputs") format. // A request can have either of them but NOT both. "instances": <value>|<(nested)list>|<list-of-objects> "inputs": <value>|<(nested)list>|<object>}In our case:
{ "signature_name":'prediction', "instances": [{"images":IMAGE_AS_LIST}]}You can see the full documentation about RESTful API Here.
Now, I will show an example how to call our model from python
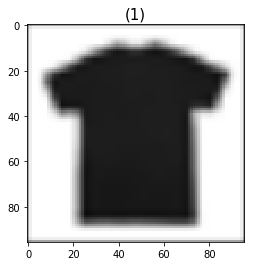
Image before preprocess:
Image after preprocess:
It will print T-shirt/top
If you have reached this far , you have overcome many hurdles, congratulations! — we are almost there.
Now we are going to deploy the model to Heroku.
Before running any of the commands below make sure you are in the same folder where Dockerfile live.
Log in to Container Registry:
> heroku container:login
Create a Heroku app:
> heroku create ${YOUR_APP_NAME}Push the docker image to Heroku:
> heroku container:push web -a ${YOUR_APP_NAME}> heroku container:release web -a ${YOUR_APP_NAME}To test your app, change the RESTful API URL to:
{YOUR_APP_NAME}/v1/models/tf_serving_keras_mobilenetv2/versions/1:predictThat is - you have now trained and deployed a deep learning model to production. Welcome to the very small production ready machine learning community :)
I have created a Jupyter notebook, which has all the code for part 1 and 2 of this tutorial.
Conclusion
I hope you have enjoyed this 2 part series on deploying and training a deep learning model. I will be responding to question/suggestions, for whomever leaves them below in the comments section. If you would like to see more tutorials like this please follow, clap and suggest what we should learn next
:)
A special thanks to Shaun Gamboa for his help and feedback.
References
Training and Deploying A Deep Learning Model in Keras MobileNet V2 and Heroku: A Step-by-Step… was originally published in Hacker Noon on Medium, where people are continuing the conversation by highlighting and responding to this story.
Disclaimer
The views and opinions expressed in this article are solely those of the authors and do not reflect the views of Bitcoin Insider. Every investment and trading move involves risk - this is especially true for cryptocurrencies given their volatility. We strongly advise our readers to conduct their own research when making a decision.


