Latest news about Bitcoin and all cryptocurrencies. Your daily crypto news habit.
Adding Chatbot to your Android App
I was trying to develop an application for my Social Innovation project. It called LISTEND — Listend and End Depression. This project is part of my assignment as an XL Future Leaders awardee. Listend is now released in beta version. We still need to gather data to train the bot so it become smarter and helpful to the user. Basically we have a couple features including the chatbot itself. Our main focus is to prevent depression or mental health problem by doing early prevention. For more, you can check the app here Listend App please give your feedback to make the app more better, thanks :).
Okayy, now let’s code!
For the backend of this chatbot, I am using firebase realtime database and I used Dialogflow for the chatbot engine.
note: In this tutorial, I am not going to dig deep on training the chatbot, I am just showing general way to adding a chatbot in your android app.
Setting the dialogflow.
For tutorial purpose, we need to activate the small talk of the chatbot agent in dialogflow console. Simply go to your dialogflow console and create agent. fill the required form including time and default language. Now you have an agent but it doesn’t know anything. In order to make it functional we need to train it. As I mentioned before we’re not going to focus in that so instead we can use the prebuilt agent. Prebuilt agent is basically preconfigured agent that has been trained to understand specific contexts. Go to the sidebar. After that import small-talk agent. Now we have an agent that can involved in small talk. yeayy!
Setting dependencies in android project.
There a couple thing we needed in order to build the app, these are :
- Dialogflow
- Firebase Realtime Database
- Firebase UI
As I stated earlier that we’re going to use Firebase Realtime database as a backend meaning that all the conversation from user and the chatbot will be stored in this database. To simplify our ui creation, we used Firebase UI where we can simply integrate the data we get from the database and populate it in the UI and we can also observe the data and automatically update if there is a new changes. You can also use your own Firebase by simply add firebase from Firebase assistant in android studio, go to tools -> firebase -> add firebase realtime database.
And at the end, here is the build.gradle file :
Create the ui
We’re going to create a simple UI where it shows the message. we’re going to achieve this by using recyclerview. So first we need to create the item_view. like this :
After that, we’re going to create the layout who contain the recyclerview for displaying the chat and a button with edit text at the bottom of the screen for type and send a message. the code like this:
Work with the business logic
In this tutorial we’re going to use MVP approach to make the architecture loosely coupled(I suggest you learn about this or other approach if you’re focusing on android development). First we need to specify a contract to make the role of the view and the presenter clearly. Basically the presenter going to act receive input message from user and send it to the database and retrieve the replied message from the chatbot. While the View responsible to get the user typed message and populate the recyclerview with both user’s message and bot’s message. the contract look like this :
As you can see above the View doesn’t have any function, it because firebase adapter can observe data changes from the database so we don’t need to handle it.
Now we have the clear role, second step is to implement the contract for each role. Before we go to the view and presenter, we need to write the adapter first for the recyclerview. Here we are using the firebaseadapter and the viewholder. the code look like this:
The Presenter
In the presenter we handle the message entered by user to send it to the firebase database and trigger chatbot in dialogflow, here to make the request execute in background I used kotlin coroutines.
Now we only need to set the activity, to get the user input, populate the recyclerview and observe the data changes in firebase realtime database.
one last step, we need start listening the request on the onStart function, simply write :
adapter.startListening()
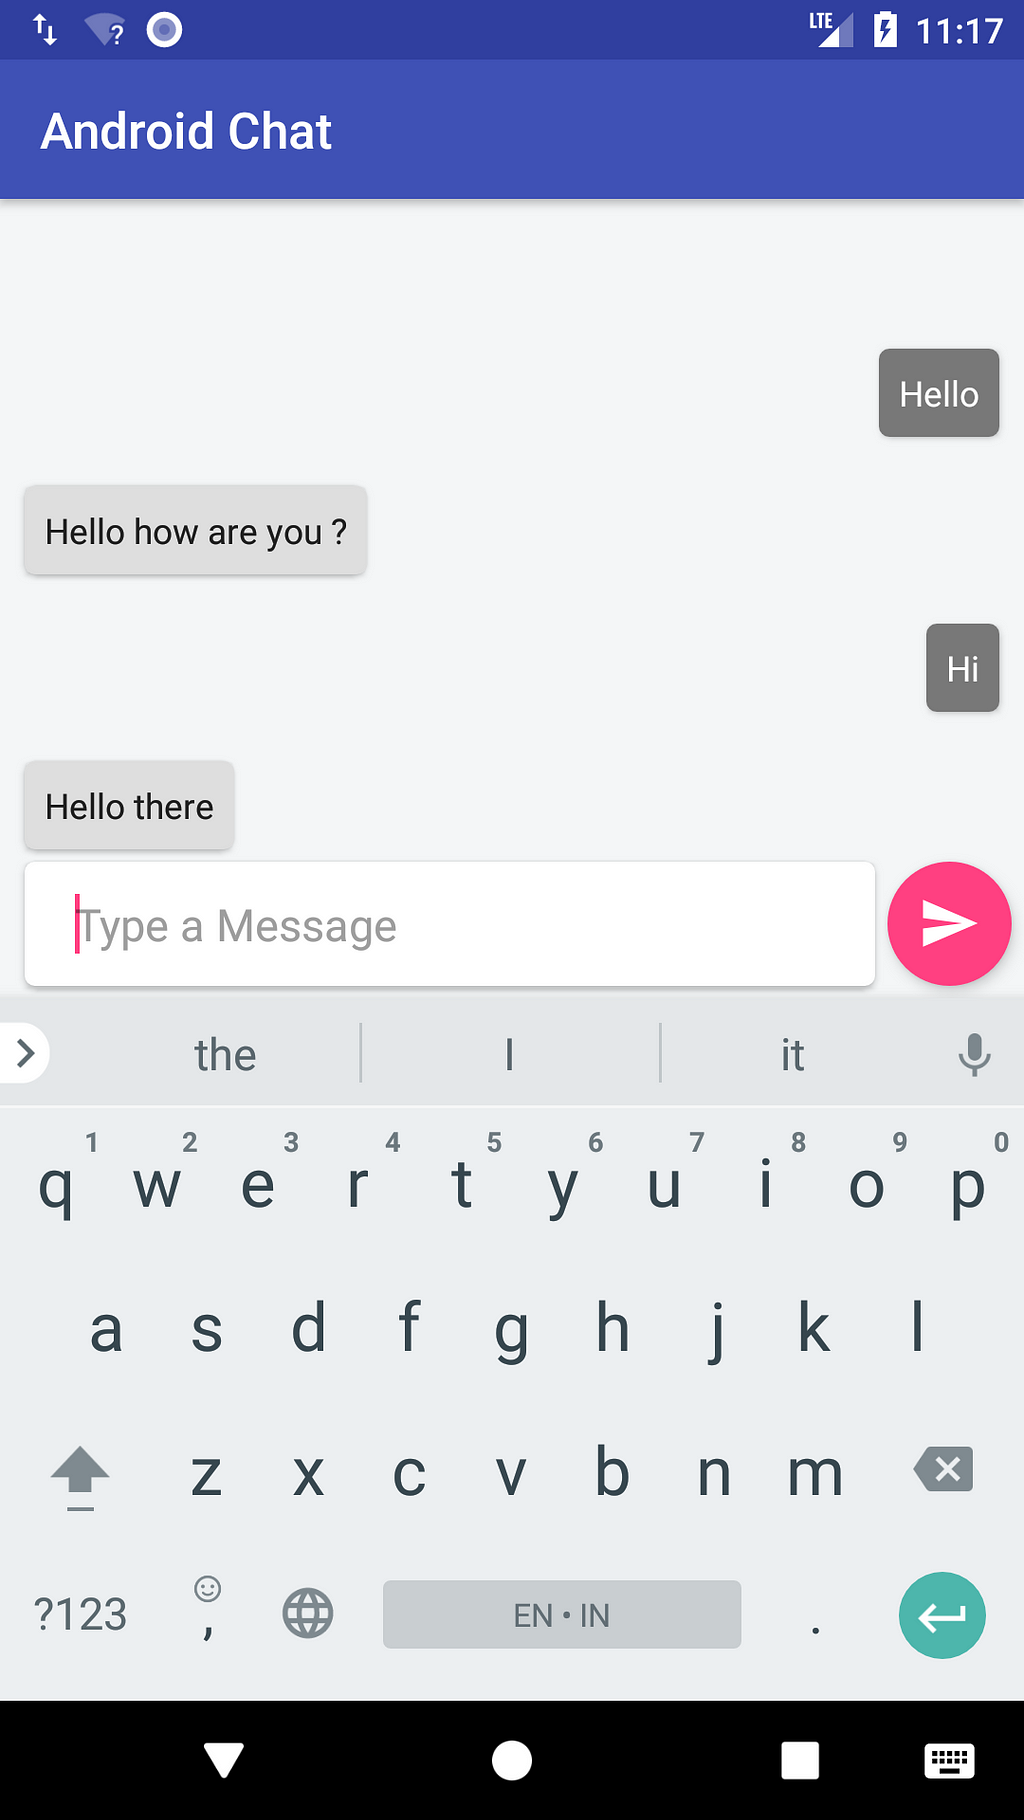
now we’re done, if you try to run the app and you can simply start a small talk with the chatbot, here a screenshots :
ps: the chatbot is not so smart, we need to train it more to make it smart, you can also use your own dialogflow agent by change the client access id.
You can view the full code here :
muhrahmatullah/android-chatbot
Okay, it’s done for this post. Thanks for read this post till the end. If you think this post is useful, don’t forget to follow, share and give it a claps! :) and if you have something in your mind like questions or suggestions please leave it at the comment section below! Thank you.
Add Chatbot to your Android App was originally published in Hacker Noon on Medium, where people are continuing the conversation by highlighting and responding to this story.
Disclaimer
The views and opinions expressed in this article are solely those of the authors and do not reflect the views of Bitcoin Insider. Every investment and trading move involves risk - this is especially true for cryptocurrencies given their volatility. We strongly advise our readers to conduct their own research when making a decision.


