Latest news about Bitcoin and all cryptocurrencies. Your daily crypto news habit.

It was a simple idea to create a replica of iPhone’s system calculator in Flutter. The design is uncomplicated and the program logic is well-known.
Let’s focus on the UI design here since the logic can be tedious to teach.
You can check out our Git Repo to get a complete idea.
Building iPhone Calculator App using Flutter
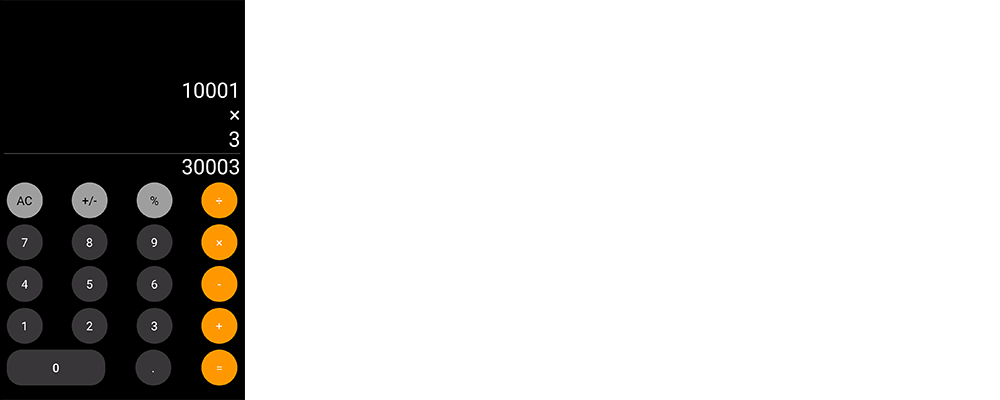
This is the UI we got to design.
Now, let’s decompose this view into a number of components.
- The operands, operator, result and the buttons are vertically aligned using a column widget.
- Now, we use 5-row widgets to arrange buttons horizontally.
- Buttons are of different designs. So, we need to create separate widgets for each type.
The Number Button is designed like this:
import 'package:flutter/material.dart';
class NumberButton extends StatelessWidget { NumberButton({this.text,this.onPressed});final String text; final Function onPressed;
@override Widget build(BuildContext context) { return Padding( padding: const EdgeInsets.all(5.0), child: RawMaterialButton( shape: const CircleBorder(), constraints: BoxConstraints.tight(Size(60.0, 60.0)), onPressed:onPressed, child: Text( text, style: TextStyle(color: Colors.white, fontSize: 20.0), ), fillColor: Color.fromRGBO(56, 54, 56, 1.0), )); }}The Number Button is a Stateless widget which takes a String “text” and a function “onPressed”. It is implemented using a RawMaterialButton because we needed the button size to be extra large. The shape is given to be a circle of size 60.
The Zero button has a bit different UI, so I created a custom widget for it.
import 'package:flutter/material.dart';
class ZeroButton extends StatelessWidget { ZeroButton({this.onPressed});final Function onPressed; @override Widget build(BuildContext context) { return Padding( padding: const EdgeInsets.all(5.0), child: Container( height: 60.0, width: MediaQuery.of(context).size.width / 2.5, decoration: BoxDecoration( borderRadius: BorderRadius.circular(25.0), color: Color.fromRGBO(56, 54, 56, 1.0)), child: MaterialButton( onPressed: onPressed, child: Text( "0", style: TextStyle(color: Colors.white, fontSize: 20.0), ), ), ), ); }}The width of the zero button is given in relative to the screen width.
Now there is a Binary Operator button and Unary Operator Button which is different from each other only in text color, background color, and its action.
import 'package:flutter/material.dart';
class BinaryOperatorButton extends StatelessWidget { BinaryOperatorButton({this.onPressed,this.text});final text; final Function onPressed;
@override Widget build(BuildContext context) { return Padding( padding: const EdgeInsets.all(5.0), child: RawMaterialButton( shape: const CircleBorder(), constraints: BoxConstraints.tight(Size(60.0, 60.0)), onPressed:onPressed, child: Text( text, style: TextStyle(color: Colors.white, fontSize: 20.0), ), fillColor: Colors.orange, )); }}
For the Unary Operator Button:
import 'package:flutter/material.dart';
class UnaryOperatorButton extends StatelessWidget {UnaryOperatorButton({this.text,this.onPressed});final String text; final Function onPressed;
@override Widget build(BuildContext context) { return Padding( padding: const EdgeInsets.all(5.0), child: RawMaterialButton( shape: const CircleBorder(), constraints: BoxConstraints.tight(Size(60.0, 60.0)), onPressed:onPressed, child: Text( text, style: TextStyle(color: Colors.black, fontSize: 20.0), ), fillColor: Colors.grey, )); }}Now the entire layout is done in calculator.dart. The build method of it is given below.
@overrideWidget build(BuildContext context) { return new Scaffold( backgroundColor: Theme.of(context).primaryColor, body: SafeArea( child: Padding( padding: const EdgeInsets.all(8.0), child: Column( children: <Widget>[ Expanded( child: Container( child: Align( alignment: Alignment.bottomRight, child: Column( crossAxisAlignment: CrossAxisAlignment.end, mainAxisAlignment: MainAxisAlignment.end, children: <Widget>[ operand1 != null ? SingleChildScrollView( scrollDirection: Axis.horizontal, child: Text( operand1 is double ? operand1.toStringAsFixed(2) : operand1.toString(), style: _whiteTextStyle, textAlign: TextAlign.right, ), ) : Container(), operator != null ? Text( operator.toString(), style: _whiteTextStyle, textAlign: TextAlign.right, ) : Container(), operand2 != null ? Text( operand2.toString(), style: _whiteTextStyle, textAlign: TextAlign.right, ) : Container(), result != null ? Divider( height: 5.0, color: Colors.white, ) : Container(), result != null ? SingleChildScrollView( scrollDirection: Axis.horizontal, child: Text( result is double ? result.toStringAsFixed(2) : result.toString(), style: _whiteTextStyle, textAlign: TextAlign.right, ), ) : Container(), ], ), ), ), ), Row( mainAxisAlignment: MainAxisAlignment.spaceBetween, children: <Widget>[ UnaryOperatorButton( text: "AC", onPressed: () { _otherOperationAction(OtherOperation.clear); }, ), UnaryOperatorButton( text: plus_or_minus_sign, onPressed: (){_unaryOperationAction(UnaryOperation.changeSign);}, ), UnaryOperatorButton( text: percent_sign, onPressed: (){_unaryOperationAction(UnaryOperation.percent);}, ), BinaryOperatorButton( text: divide_sign, onPressed: () { _binaryOperationAction(BinaryOperation.divide); }, ) ], ), Row( mainAxisAlignment: MainAxisAlignment.spaceBetween, children: <Widget>[ NumberButton( text: "7", onPressed: () { _numberButtonAction("7"); }), NumberButton( text: "8", onPressed: () { _numberButtonAction("8"); }), NumberButton( text: "9", onPressed: () { _numberButtonAction("9"); }), BinaryOperatorButton( text: multiply_sign, onPressed: () { _binaryOperationAction(BinaryOperation.multiply); }, ) ], ), Row( mainAxisAlignment: MainAxisAlignment.spaceBetween, children: <Widget>[ NumberButton( text: "4", onPressed: () { _numberButtonAction("4"); }), NumberButton( text: "5", onPressed: () { _numberButtonAction("5"); }), NumberButton( text: "6", onPressed: () { _numberButtonAction("6"); }), BinaryOperatorButton( text: minus_sign, onPressed: () { _binaryOperationAction(BinaryOperation.subtract); }, ) ], ), Row( mainAxisAlignment: MainAxisAlignment.spaceBetween, children: <Widget>[ NumberButton( text: "1", onPressed: () { _numberButtonAction("1"); }), NumberButton( text: "2", onPressed: () { _numberButtonAction("3"); }), NumberButton( text: "3", onPressed: () { _numberButtonAction("3"); }), BinaryOperatorButton( text: add_sign, onPressed: () { _binaryOperationAction(BinaryOperation.add); }, ) ], ), Row( mainAxisAlignment: MainAxisAlignment.spaceBetween, children: <Widget>[ ZeroButton(onPressed: (){_zeroButtonAction();},), BinaryOperatorButton( text: ".", onPressed: () { _otherOperationAction(OtherOperation.addDecimal); }, ), BinaryOperatorButton( text: equal_sign, onPressed: () { _otherOperationAction(OtherOperation.equals); }, ) ], ), ], ), ), ), );The End Result
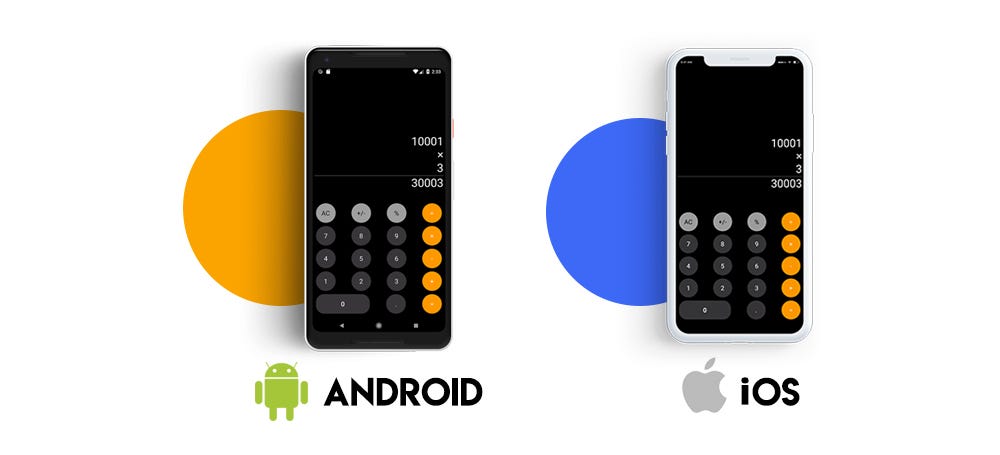
This is how it looks on both the devices. Our Flutter experiment has worked out for good. SayOne Mobile team has been working on Flutter since 2017. We have never been this drawn towards any other technology. Stay tuned as we experiment more with Flutter in the coming days!
If you are interested in knowing more about our Flutter projects and would like to give it a try, write to us at hello@sayonetech.com or visit SayOne.
Originally published at https://www.sayonetech.com/blog/how-build-iphone-calculator-using-flutter/.
How to build iPhone Calculator using Flutter was originally published in Hacker Noon on Medium, where people are continuing the conversation by highlighting and responding to this story.
Disclaimer
The views and opinions expressed in this article are solely those of the authors and do not reflect the views of Bitcoin Insider. Every investment and trading move involves risk - this is especially true for cryptocurrencies given their volatility. We strongly advise our readers to conduct their own research when making a decision.


