Latest news about Bitcoin and all cryptocurrencies. Your daily crypto news habit.
 Photo by Marion Michele on Unsplash
If you are one of the happy readers of my article about TDD + Serverless architecture, just keep reading because today we are going to improve our serverless toolkit with mongoose, connection pooling and monitoring.
If you haven’t yet, I strongly encourage you to read part #1 first, and get back once you are happy, up and running.
If TDD is Zen, adding Serverless brings Nirvana
So if part #1 is OK for you but still need more, let’s see how we can make our DB perform fast and furious.
Database model
If we want our code to be easily maintainable, lambda functions and TDD are our friends. But when dealing with the database, we clearly can do better to document and enforce a database schema for our backend.
The mongodb NPM package is the lightest way to implement a call to our database. However, we may want to consider using an ODM like Mongoose, as the benefits we get are worth sacrificing just a bit of performance. We will be tweaking performance in a few minutes.
So, starting on the code from episode 1, let’s install Mongoose and get started:
npm uninstall mongodbnpm install mongoose
Ready! Now we can define our first model.
As a team member joining the project I would clearly go to the models folder if I checked out the code for the first time. So let’s create the folder and add a model for a user in models/user.js .
As you may notice, we are defining the three fields we used in the starter project as String and required and we are also definig an extra field created which will be populated with the result of evaluatingDate.now upon creation.
Now we can use our DB model object and invoke methods on it to perform operations on the database with type validation and schema compliance. We also get a more compact and cleaner code.
For example, to find all users with mongodb we needed to do:
const dbUsers = dbClient.db(dbName).collection(dbCollection)const result = await dbUsers.findOneAndUpdate({ _id: ObjectID(userId) }, { $set: newUser })return result.value._idWhereas now, the same with mongoose would look like:
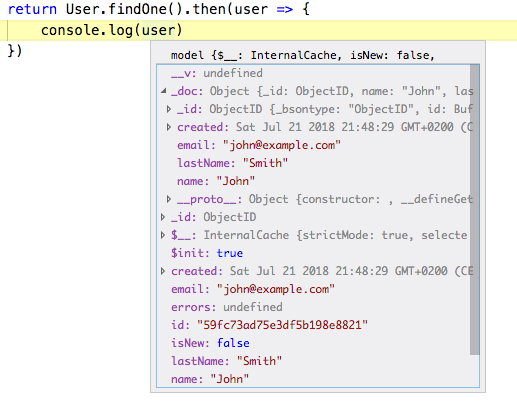
const User = require("./models/user.js")const result = await User.findByIdAndUpdate(userId, newUser)return result._idYou see, shorter, quicker… and we get schema validation. But you may think: What about the extra overhead? Right, let’s see what happens when we query an object created as { name: "John", lastName: "Smith", email: "john@example.com" }:
Objects returned by Mongoose are not the plain JS objects we would expect. They behave like JS Proxy objects, with internal getters, setters, caches and more. This happens in order to detect whether a field was updated and whether the object needs to be synced or not. All of this magic comes at a cost.
However, mongoose allows us to enable the lean mode, skip the extra housekeeping and deal with plain JS objects. Schema validation will only be done when updating or creating documents. Queries will just pass the data. How that?
await User.findByIdAndUpdate(userId, newUser).lean()
Easy, right? So now, let’s rework our handlers and see how they look:
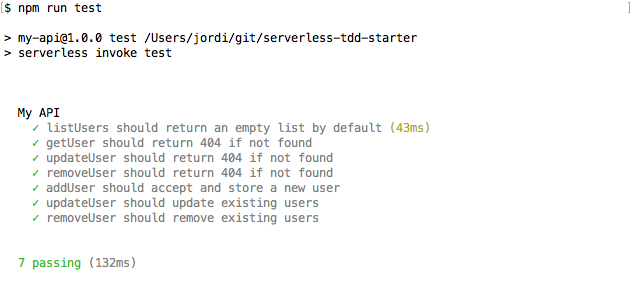
Now, our beloved tests:
See? We rewrote most our logic, but in just 132ms we know that we broke nothing. That’s what I meant by TDD and zen.
Connection pooling
But we still have room for improvement. As you just saw, our handler connects and disconnects from the DB server at every request. This is due to the constraints of the serverless architecture, the process starts from scratch at every request and exists once the event loop is empty.
However, there is a small serverless trick that can be used to keep our process frozen when a response is sent, instead of exiting. This would allow us to keep our context and reuse database connections that were already established.
“Sounds good, show me the money”.
Sure, in your handler, set the following property to false at the begining of the function:
exports.list = async (event, context) => {context.callbackWaitsForEmptyEventLoop = false// ...}
Since now our function may already have DB connections available, we need to encapsulate our connection logic and ensure connectivity across executions:
This is fine, but we need to do an extra step with our DB models. They need to be attached to the active mongoose connection, so the previous code will not work anymore.
Let’s change models/user.js and return the schema instead of registering it to the global mongoose context.
Then, we need a last step in our ensureDbConnected function:
Now in our handlers we just need to replace the connection logic by a call to ensureDbConnected and remove the calls todisconnect . So our handlers now look like this:
Every new developer on your team will have little to no problem in mastering such code.
The gotcha
However, now there is a small issue.
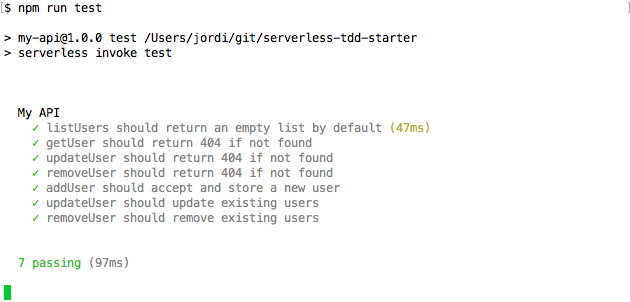
If you nice, now the Node process does not just exit when tests are complete. We told serverless to freeze our context instead of letting the event loop be empty, so now the process will not exit because of that.
This is okay if testing and deployment are performed by the project maintainer, but definitely becomes an issue if the testsuite is part of a pipeline that performs CI/CD tasks.
There may well be better approaches, but the solution I’ve found to work in our projects is adding hooks to every test suite and force the process to exit when they are done. Create the file test/test-completion-hooks.js like this:
We need to register them in every test suite (by now, test/user.spec.js ). The result change is very simple:
There are two lines to include in every test suite, but usingaddCompletionHooks is the solution that I’ve found to work best. If you have a better approach to get around this limitation, I’ll be more than glad to read it from you on the comments :)
So we have DB models, we keep connections open and our testing is working. What next?
Webpack
Let’s optimize the code we are shipping. It is no secret that node_modules can easily contain hunderds of megabytes of data that will be never used. However, serverless will package the main folder of your project, except for development dependencies in node_modules .
Even if we only wrote 455 lines of code at the current point, running serverless package results in a 2.3Mb file, which expands into 11Mb of uncompressed data.
We can surely do better by making use of webpack’s tree shaking capabilities. Let’s install the package:
npm install -D serverless-webpack webpack
At the time of writing, webpack version 4 is supported.
Now we need to declare the plugin in serverless.yml > plugins above the declaration of serverless-offline :
# ...plugins: - serverless-webpack - serverless-offline - serverless-mocha-plugin
Next, we need a config file for webpack, so we will create webpack.config.js :
That’s all! Now we just need to npm run deploy again and now everything will be bundled into a single JS file.
Comparison
After all these changes, how well are we doing? Let’s use Apache Bench to see if we made any difference.
Before we made any change, this was the result of making 1000 requests to the listUser function:
$ ab -k -c 50 -n 1000 https://hkyod1qhuh.execute-api.eu-central-1.amazonaws.com/staging/users
This is ApacheBench, Version 2.3 <$Revision: 1807734 $>
[...]
Concurrency Level: 50Time taken for tests: 39.649 secondsComplete requests: 1000Failed requests: 423 (Connect: 0, Receive: 0, Length: 423, Exceptions: 0)Non-2xx responses: 423Keep-Alive requests: 1000Total transferred: 493011 bytesHTML transferred: 28317 bytesRequests per second: 25.22 [#/sec] (mean)Time per request: 1982.445 [ms] (mean)Time per request: 39.649 [ms] (mean, across all concurrent requests)Transfer rate: 12.14 [Kbytes/sec] received
Connection Times (ms) min mean[+/-sd] median maxConnect: 0 23 98.7 0 466Processing: 83 1753 2052.4 1001 7927Waiting: 83 1753 2052.4 1001 7927Total: 83 1775 2065.3 1001 7927
Percentage of the requests served within a certain time (ms) 50% 1001 66% 1601 75% 2270 80% 3075 90% 5934 95% 6126 98% 6686 99% 6996 100% 7927 (longest request)
The benckmark is made upon a starter plan of MongoDB Atlas, which has a limit of 100 simultaneous connections. Even if we set a concurrency limit of 50, we see that 423 requests are still failing because they try to open a connection that surpasses this limit.
Now let’s run the same with the improvements we made in this article and see how it goes:
$ ab -k -c 50 -n 1000 https://hkyod1qhuh.execute-api.eu-central-1.amazonaws.com/staging/users
This is ApacheBench, Version 2.3 <$Revision: 1807734 $>
[...]
Concurrency Level: 50Time taken for tests: 10.087 secondsComplete requests: 1000Failed requests: 0Keep-Alive requests: 1000Total transferred: 465000 bytesHTML transferred: 2000 bytesRequests per second: 99.14 [#/sec] (mean)Time per request: 504.335 [ms] (mean)Time per request: 10.087 [ms] (mean, across all concurrent requests)Transfer rate: 45.02 [Kbytes/sec] received
Connection Times (ms) min mean[+/-sd] median maxConnect: 0 19 85.2 0 468Processing: 61 484 406.7 370 1079Waiting: 61 484 406.7 370 1079Total: 61 503 399.9 487 1079
Percentage of the requests served within a certain time (ms) 50% 487 66% 883 75% 917 80% 927 90% 972 95% 985 98% 1001 99% 1010 100% 1079 (longest request)
Simple and clear, the actual throughput is 4x. And the number of failed requests (because of no DB connection) drops to zero.
Note: There is no remarkable performance improvement in adding webpack alone. Keep it if you like to store lighter files on S3, but you can also disable the plugin and achieve faster response/rebuild times while developing.
Needless to say: before jumping into production, do your own distributed benckmarks with a scalable DB hosting plan and setting a and much higher number of connections.
Monitoring
Monitoring lambda functions is a subject that could well cover another article by itself. However, there are some tools that we can take advantage of, out of the box.
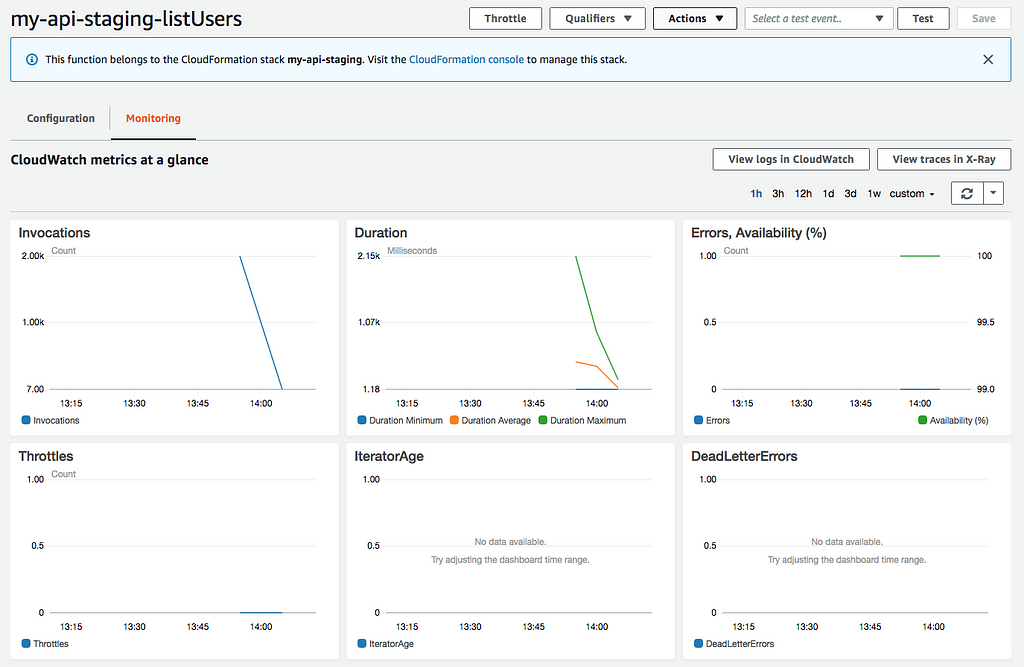
Let’s have a look at the lambda we have been benchmarking: listUsers . Open AWS Lambda, click the function on the list and select the “Monitoring” tab.
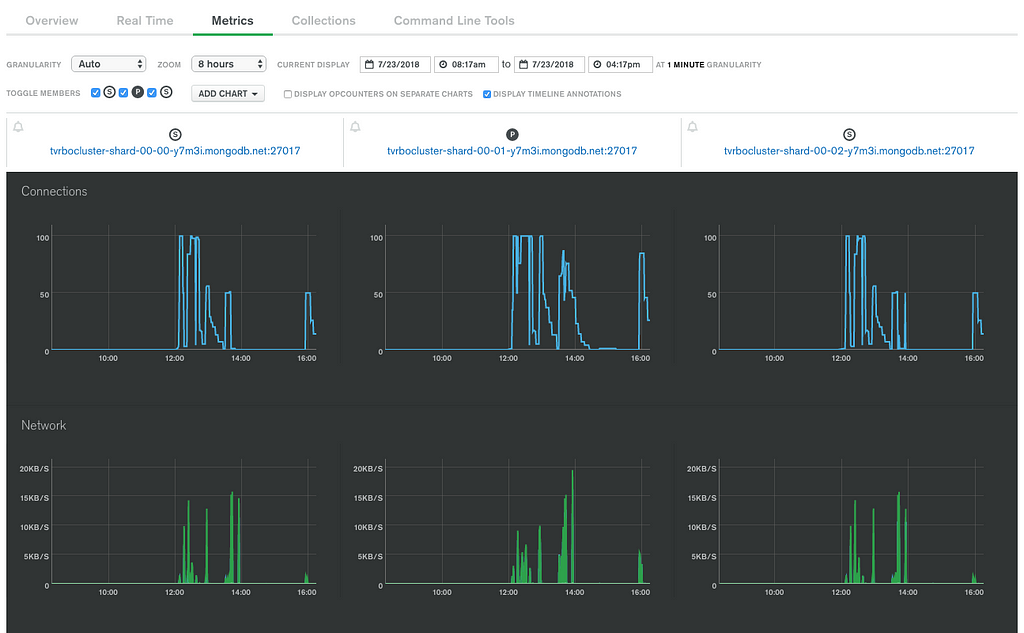
You’ll be presented with a few charts giving you an overview of the function’s status. To check the status of the DB cluster, we can also refer to MongoDB Atlas, open our cluster and open the metrics section.
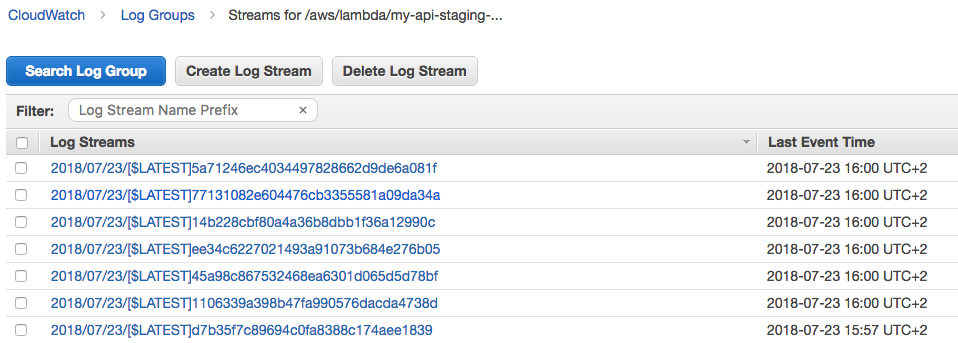
If we got into a scenario in which we would like to diagnose a problem, we can get back to the Lambda function console and click on the “View logs in CloudWatch” button.
Let’s click on the latest log stream:
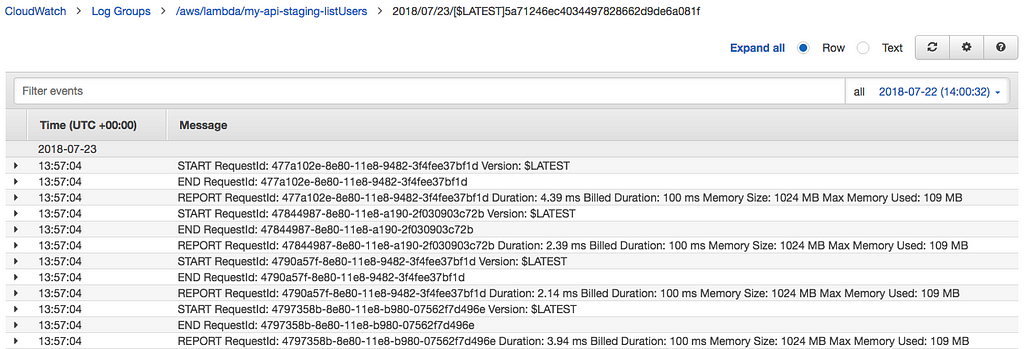
Now we can explore execution times, billed times, memory usage, etc.
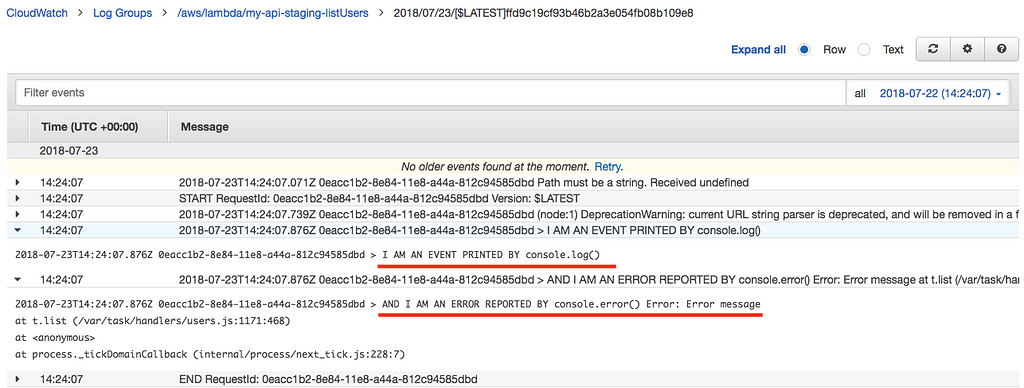
If you need to investigate the internals of a function’s execution, you can make use of console.log , console.err , etc. Let’s add some logging on our lambda function:
console.log("> I AM AN EVENT PRINTED BY console.log()")console.error("> AND I AM AN ERROR REPORTED BY console.error()", new Error("Error message"))If we deploy our code and open the latest log stream entry, we will be able to see them:
There is room to go deeper in this subject. Depending on your needs, you can have a look at serverless-plugin-tracing , along with AWS X-Ray, or check Dashbird.
Wrap up
If you want to experiment with the code of the article, I have updated the repo in a dedicated branch: https://github.com/ledfusion/serverless-tdd-starter/tree/part-2
This concludes part #2 of my article on how to achieve nirvana by using TDD, along with Serverless. I hope that you found it useful, and don’t forget to clap, comment, share and smile if you want more and more :)
BTW: I am available to help you grow your projects. Feel free to find me on https://jordi-moraleda.github.io/
Thanks for your read.
If TDD is Zen, then TDD + Serverless is Nirvana (part #2) was originally published in Hacker Noon on Medium, where people are continuing the conversation by highlighting and responding to this story.
Disclaimer
The views and opinions expressed in this article are solely those of the authors and do not reflect the views of Bitcoin Insider. Every investment and trading move involves risk - this is especially true for cryptocurrencies given their volatility. We strongly advise our readers to conduct their own research when making a decision.
