Latest news about Bitcoin and all cryptocurrencies. Your daily crypto news habit.
By Dayne Sorvisto
Here’s the problem at hand: You have a directory (or many directories) full of images, videos and other media formats. Maybe your old hard drive is full of vacation photos and videos you recorded years ago and you’d like to sift through quickly and efficiently.Let’s make the problem even more challenging and say you’re looking for a very specific image or video file but you there’s no way you have the time to manually sort through all the files, watch all the videos or search through all your images. You wish there were a way to write a bash script to do it for you … well, there is.
Computer vision nowadays to use the extremely powerful facial recognition and object detection algorithms that have been making waves in the ML community lately. In this post I’m going to show you a quick and dirty way to use computer vision in your own applications without having to know anything about algorithms.
Step 1: Write a Python Script that makes an API call
With all the fervor around ML many budding data scientists are fascinated with advanced algorithms like “LSTM”, deep learning and oways to do things like object detection. API calls are not only easy to implement in code, requires very few modules/libraries and most importantly can achieve target accuracy on test data well within the range of the cutting edge ML models. API calls are also a very flexible way of integrating computer vision into your application, especially if you don’t have hands on experience with sophisticated topics like hyperparameter tuning or don’t have the resources to train your own computer vision algorithms.
Of course, as always there are trade-offs to using API calls. The most obvious of which is API calls may be called a ‘black box’ method meaning you are giving up some of your control as developer to the API call.
I’m going to make it easy on myself and just use the Google Cloud ML Engine. This is not free and requires credits but I will use the free trial for this demo. If you do not want to make an API call in the cloud you are free to replace this with for example scitkit-learn or any of the other thousands of ML libraries available in python.
Google Cloud Platform, offered by Google, is a suite of cloud computing services that runs on the same infrastructure that Google uses internally for its end-user products, such as Google Search and YouTube.
By using the cloud as your backend for computer vision processing which is very resources intensive (high CPU load and memory usage), you can easily port your solution to any internet enabled device. This is really my secret reason for using Google in the cloud, I am running this demo on an older laptop with no GPU and although an advanced technique like transference learning could allow me to skip the computationally intensive training step, for the sake of this demo the cloud provides the perfect solution.
Google Cloud Platform has a Cloud ML Engine that allows you to train machine learning models using frameworks like TensorFlow and scikit-learn or keras without having to plan for the infrastructure size of the equation — this is managed for you by Google and all you have to do is make an API call. Without further ado let’s document this 4 step process:
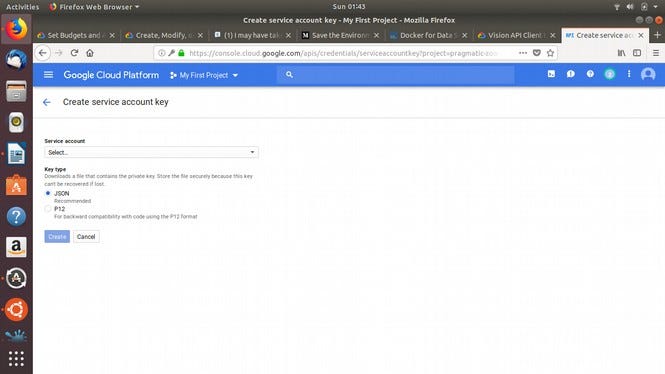
Step 1 Create a service account
If you read the documentation and tutorials on Google’s Vision API you will see there’s more than one option to authenticate to the cloud. Another option is getting a developer API key. However, this is insecure especially if you’re going to be making API calls from production you’re going to want a more permanent and secure solution and it is suggested to create a service account.
Authenticate API requests. In order to make requests to the Vision API, you need to use a Service Account. A Service Account is an account, belonging to your project, that is used by the Google Client Python library to make Vision API requests.
Create an alert so you don’t go passed your budget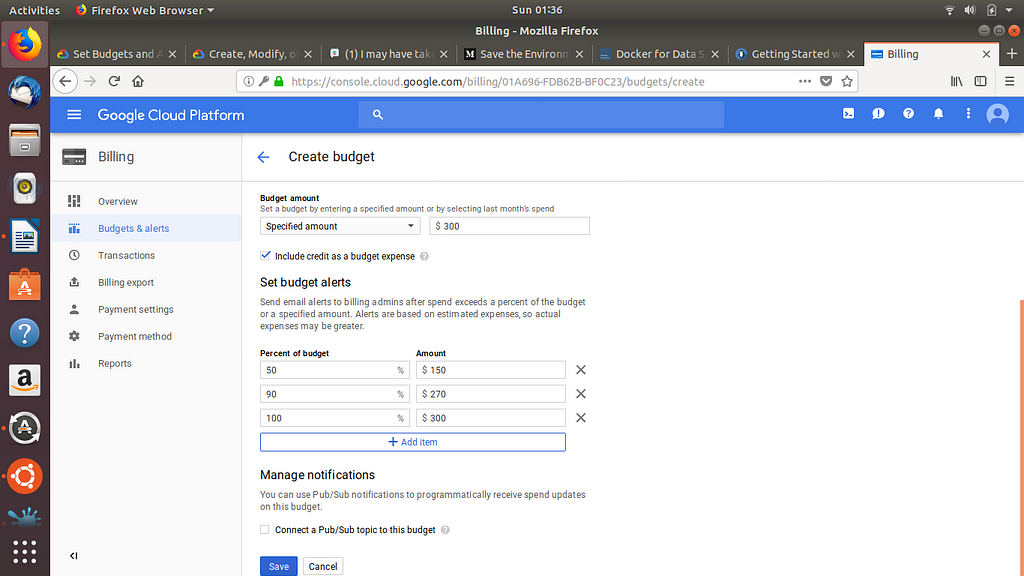
Once the service account is created you can generate a service account key — just a JSON file with your credential information in it. You should store this in a secure file system with appropriate permissions set according to the principle of least privilege. In a production application, it’s suggested that you store this file using Google cloud storage rather than your local file system.
Step 2. Enable the Vision API
Google Cloud Platform requires you enable a service before you start using it, services like Cloud Vision API are disabled by default. Enabling the API within your project can be done by clicking “Enable” in the API Library pictured below.
Step 3. Test Your API Call
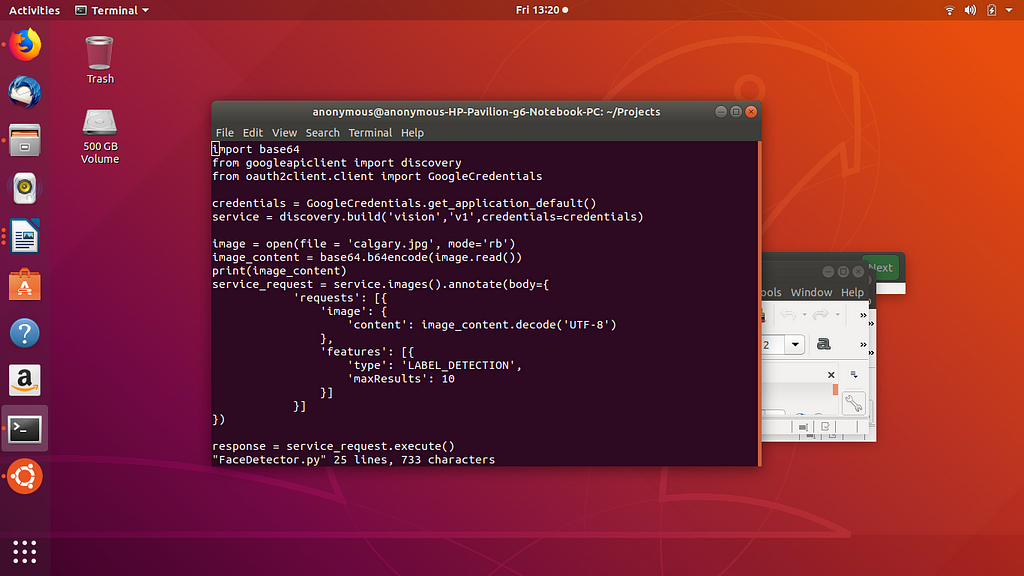
I wrote a simple python script called LabelImages.py the code to make an API call to the Google cloud. The data you get back should be JSON.
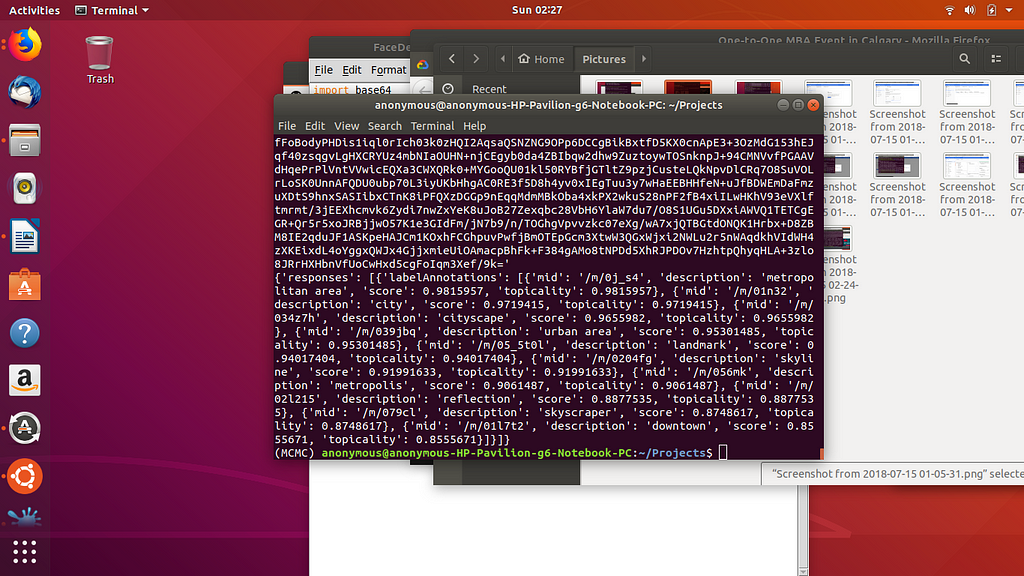 Step 4. Write Useful Bash Script
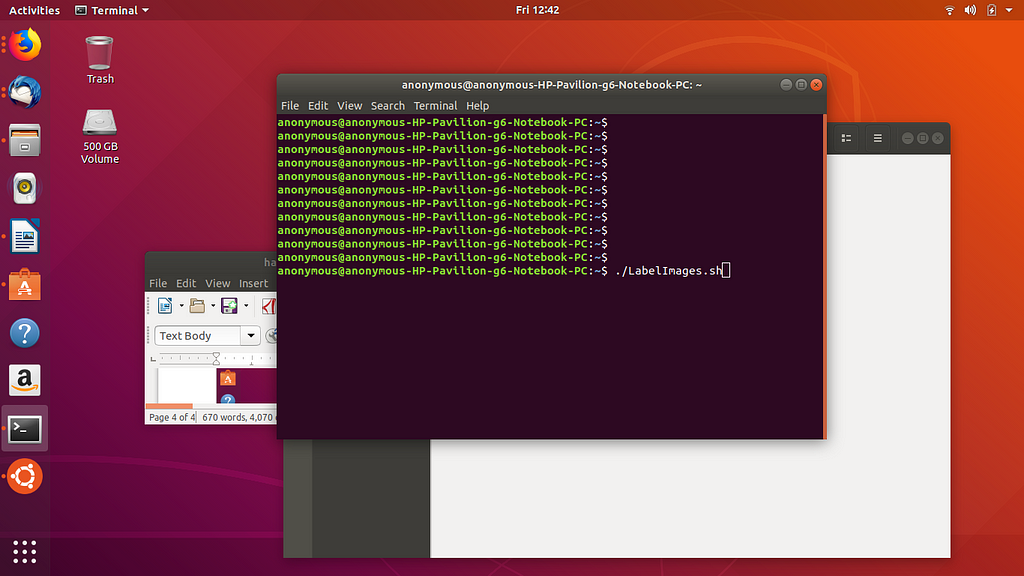
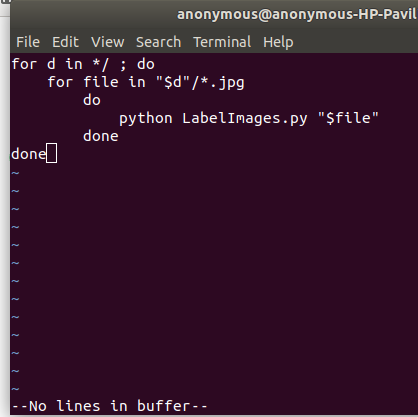
You can easily write a bash script that will run your API call for each image stored in a directory (which may be on the cloud or on your local computer). There are many applications of this but what I used it for was categorizing images and organizing/labeling file names in an image directory which contained over 100,000 images collected from various sources stored in multiple formats. I will leave the details of creating this script to you.
Of course you can also use xargs from the command line to pipe each file to your computer vision API call which will run in parallel if you have a lot of files.
Conclusion
In four steps I’ve demonstrated how to create a simple utility that uses computer vision to label images. The list of interesting computer vision applications is far greater than I could list in a single blog. Some resources on where to start investigating are given below. You can even port the code to your internet enabled Raspberry Pi device and build some very practical applications of computer vision with Google cloud (or whatever cloud service you like) as your processing backend. Just make sure to set a budget and alerts so you don’t go past your budget as you can be charged per API call.
Additional Resources
https://cloud.google.com/billing/docs/how-to/budgets
https://cloud.google.com/docs/authentication/
Spicing up Bash Scripts with Computer Vision was originally published in Hacker Noon on Medium, where people are continuing the conversation by highlighting and responding to this story.
Disclaimer
The views and opinions expressed in this article are solely those of the authors and do not reflect the views of Bitcoin Insider. Every investment and trading move involves risk - this is especially true for cryptocurrencies given their volatility. We strongly advise our readers to conduct their own research when making a decision.
