Latest news about Bitcoin and all cryptocurrencies. Your daily crypto news habit.
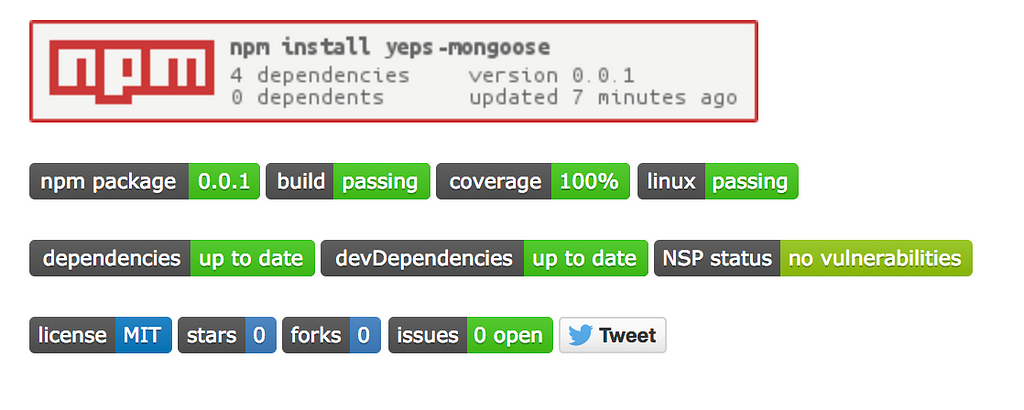
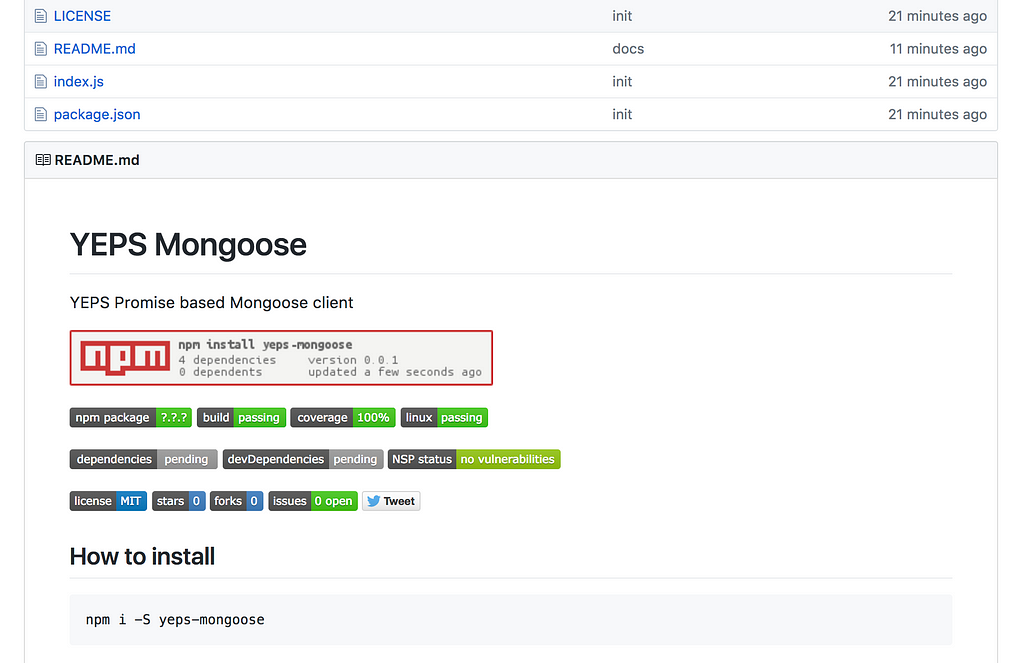
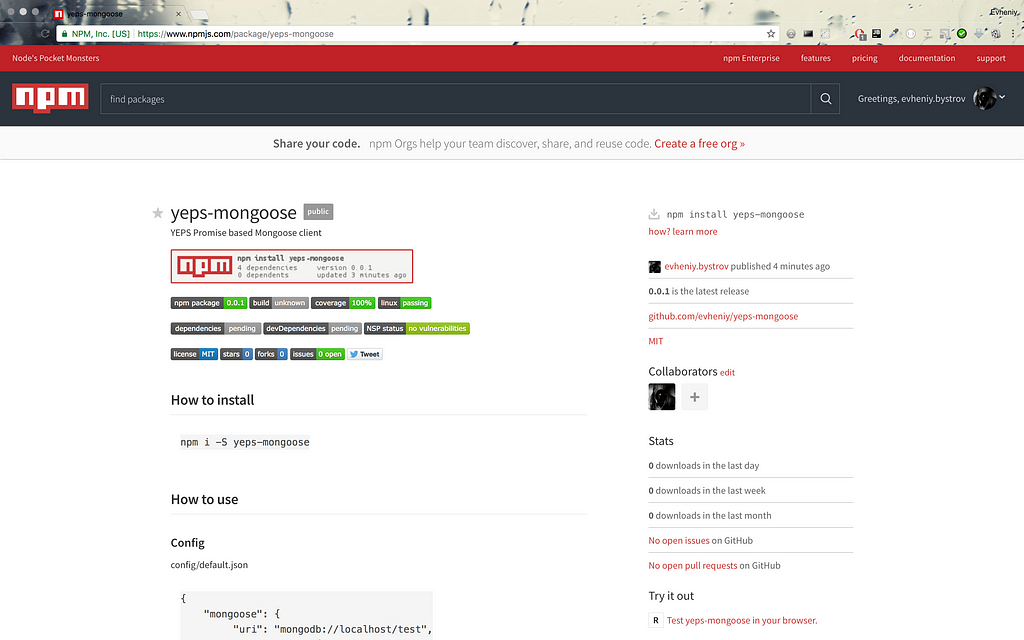
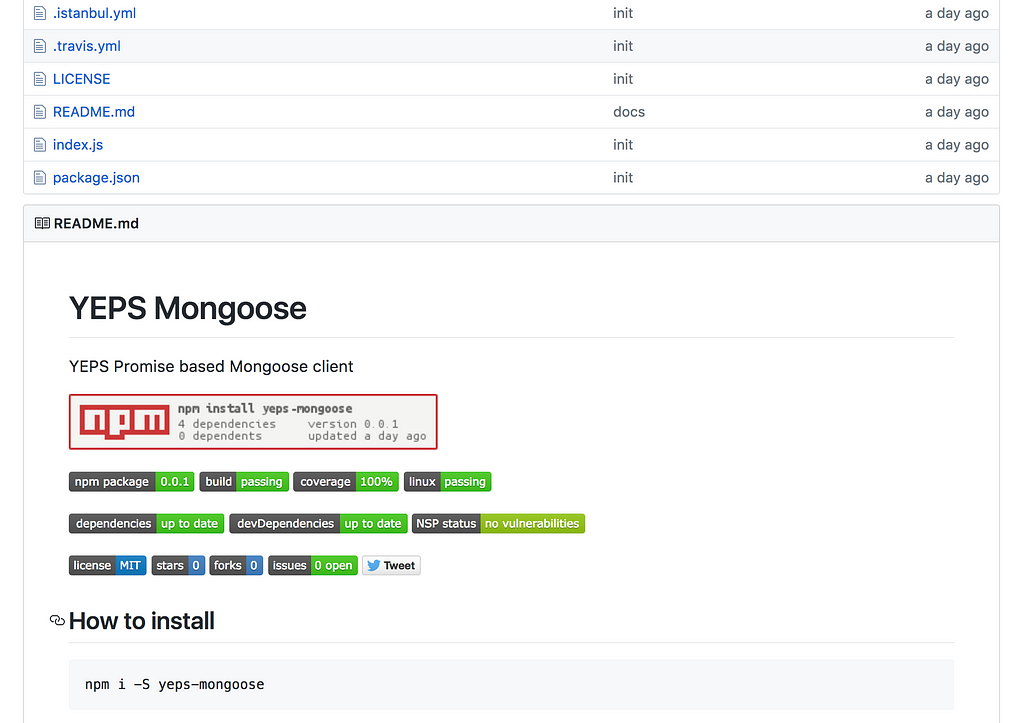
In this tutorial I want to show how easy to create node.js package and register it in npm. Our main goal is to see image like this:
There are a lot of developers who use open source code but never give back anything. I’m going to show how easy and fast to create node package and register it in npm.
For this tutorial I’m going to create YEPS module and register it in npm. But without code quality and test code coverage it won’t be finished. I will use only linux for testing as I think node works better in linux environment and as it’s open source we will use open source everywhere. And MongoDB as open source database is perfect for us too. I’m going to use this package in future parts of series.
I like idea: Do Not Learn Frameworks. Learn the Architecture. That’s why I don’t like to work with a big universal frameworks — instead of resolving business problems I need to spend a lot of time for learning this framework to know about all features and know how to use it in some abstract future problems. Like premature optimization.
Node.js is a platform of small packages. Most packages have single responsibility. It helps to resolve problems and gives possibility to create own application or even framework for business. If you can’t find package for own requirements you can create own and share it with other developers. For example Airbnb eslint config. And don’t forget about testing — if it has only one reason to be changed it’s easy to test.
So let’s start. First we need to create directory and create npm project using npm init command:
mkdir yeps-mongoosecd yeps-mongoosenpm init -f
As it will be a part of YEPS we need to create module for connecting to mongo. For this we need to use configs. Let’s install config package:
npm i -S config
And create file config/default.json:
{ "mongoose": { "uri": "mongodb://localhost/test", "parameters": { "useMongoClient": true} }}Here we set uri for connection to MongoDB and some parameters.
Why so small package with only one connection? Mongoose helps with creating schemas and save it as models. But for saving and updating our data we need to connect to real database.
We need to work with two flows when we use node.js as a web server with framework like express.js or YEPS: application initiation and processing request event from users. We use first when we run node process, it includes JavaScript files, reads config files, connects to database…
Here we can use our package. When package will be required first time it will read config file and connect to MongoDB. After that we can create schema, store it in file and require as a module. And as mongoose connected to real database our models can save and update data.
Next we need to install all other dependencies: mongoose and npm-run-all and debug:
npm i -S mongoose npm-run-all debug
And devDependencies:
npm i -D chai chai-http coveralls eslint eslint-config-airbnb-base eslint-plugin-import husky istanbul@next mocha mocha-lcov-reporter nsp rimraf yeps yeps-server yeps-error
And some help files:
.editorconfig
root = true[*]end_of_line = lfinsert_final_newline = truecharset = utf-8indent_style = spaceindent_size = 2
It helps to have the same code standards for a team in different IDEs.
.eslintrc
{ "extends": "airbnb-base", "env": { "node": true, "mocha": true}, "rules": { "no-unused-expressions": 0, "no-underscore-dangle": 0 }}Config for eslint — code quality tool.
.istanbul.yml
instrumentation: default-excludes: trueexcludes: []include-all-sources: true
Code coverage tool.
.travis.yml
sudo: requiredlanguage: node_jsnode_js:- "7" - "8"services:- dockerbefore_install:- npm installscript:- docker version - node --version - npm --version - npm run lint - npm run test - npm run report
This config helps us to work with TravisCI. We need to work with node.js, test it on latest 7 and 8 versions of node, we will use docker and run a few commands for testing: check versions, run lint, tests and reports.
Don’t forget about license and README.md file with our documentation. You can find latest version of README.md in github or npm.
And our main code:
index.js:
const debug = require(‘debug’)(‘yeps:mongoose’);const mongoose = require(‘mongoose’);const config = require(‘config’);
debug(config.mongoose);
mongoose.connect(config.mongoose.uri, config.mongoose.parameters);mongoose.Promise = global.Promise;
Here we have debug tool, requiring mongoose package, config and connection mongoose to our MongoDB server. And small update — setting up mongoose promise from node.js.
Next step is testing:
tests/index.js
require('..');const App = require('yeps');const srv = require('yeps-server');const error = require('yeps-error');const chai = require('chai');const chaiHttp = require('chai-http');const mongoose = require('mongoose');const { Schema } = mongoose;const { expect } = chai;chai.use(chaiHttp);let app;let server;const UserSchema = new Schema({ name: { type: String, required: [true, 'Name is required.'], },});const User = mongoose.model('user', UserSchema);describe('YEPS mysql test', () => { beforeEach(() => { app = new App(); app.then(error()); server = srv.createHttpServer(app); }); afterEach(() => { server.close(); }); after(() => { mongoose.connection.close(); }); it('should test User', async () => {let isTestFinished1 = false;let isTestFinished2 = false; app.then(async (ctx) => {const test = new User({ name: 'Test' });await test.save();const users = await User.find({ name: 'Test' }); expect(users[0]._id.toString()).to.be.equal(test._id.toString());const user = await User.findOne({ _id: test._id }); expect(user.name).to.be.equal('Test');await test.remove(); isTestFinished1 = true; ctx.res.writeHead(200); ctx.res.end(JSON.stringify(test)); });await chai.request(server) .get('/') .send() .then((res) => { expect(res).to.have.status(200); isTestFinished2 = true; }); expect(isTestFinished1).is.true; expect(isTestFinished2).is.true; });});Here we are creating a simple schema, running YEPS server and making some simple operations like creating, updating and deleting data from database.
About testing you can read in my previous article.
package.json
{ "name": "yeps-mongoose", "version": "0.0.1", "description": "YEPS Mongoose connector", "main": "index.js", "scripts": { "lint": "npm-run-all lint:**", "lint:js": "eslint index.js tests", "test": "npm-run-all test:**", "test:db:start": "npm run db:start", "test:db:preparing": "node -e \"setTimeout(()=>1, 1000)\"", "test:security": "nsp check", "test:code": "mocha tests --recursive", "test:coverage": "istanbul cover _mocha -- tests --recursive", "test:db:stop": "npm run db:stop", "report": "cat ./coverage/lcov.info | ./node_modules/.bin/coveralls", "clear": "rimraf coverage", "precommit": "npm run lint && npm test", "prepush": "npm run lint && npm test", "db:start": "docker run -d --name mongo -p 27017:27017 mongo", "db:stop": "docker rm -f mongo" }, "repository": { "type": "git", "url": "git+https://github.com/evheniy/yeps-mongoose.git" }, "keywords": [ "promise", "http", "server", "rest", "fast", "async", "await", "https", "ssl", "easy", "mongoose", "mongo" ], "author": "Evheniy Bystrov", "license": "MIT", "bugs": { "url": "https://github.com/evheniy/yeps-mongoose/issues" }, "homepage": "https://github.com/evheniy/yeps-mongoose#readme", "files": [ "index.js" ], "engines": { "node": ">=7.6.0" }, "dependencies": { "config": "^1.26.2", "debug": "^3.1.0", "mongoose": "^4.12.2", "npm-run-all": "^4.1.1" }, "devDependencies": { "chai": "^4.1.2", "chai-http": "^3.0.0", "coveralls": "^3.0.0", "eslint": "^4.9.0", "eslint-config-airbnb-base": "^12.0.2", "eslint-plugin-import": "^2.7.0", "husky": "^0.14.3", "istanbul": "^1.1.0-alpha.1", "mocha": "^4.0.1", "mocha-lcov-reporter": "^1.3.0", "nsp": "^2.8.1", "rimraf": "^2.6.2", "yeps": "^1.0.0", "yeps-error": "^1.2.0", "yeps-server": "^1.0.0" }}Package.json file is one of the most important files in any node.js projects. It has name of app, version, keywords, dependencies… And the most important — it has script section for easy running any command with npm like testing or starting server.
The most interesting command here is running docker:
"db:start": "docker run -d --name mongo -p 27017:27017 mongo","db:stop": "docker rm -f mongo"
It helps to start mongo in docker as a process with opened 27017 port. To test it just run npm run db:start or npm run db:stop.
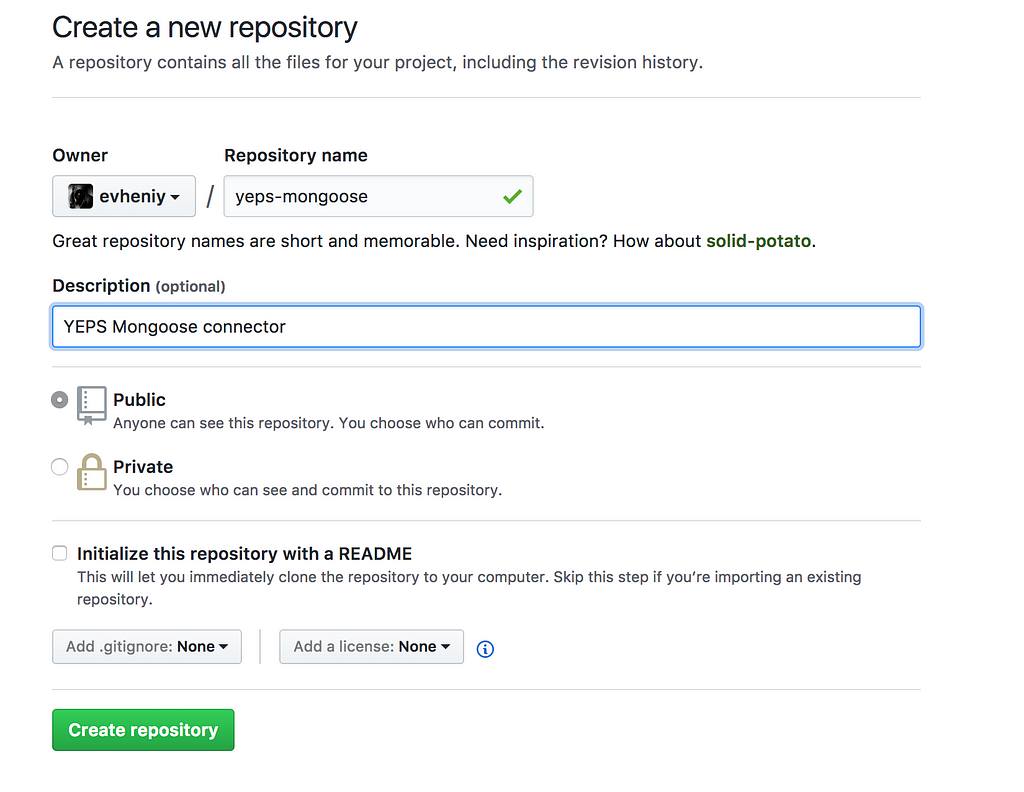
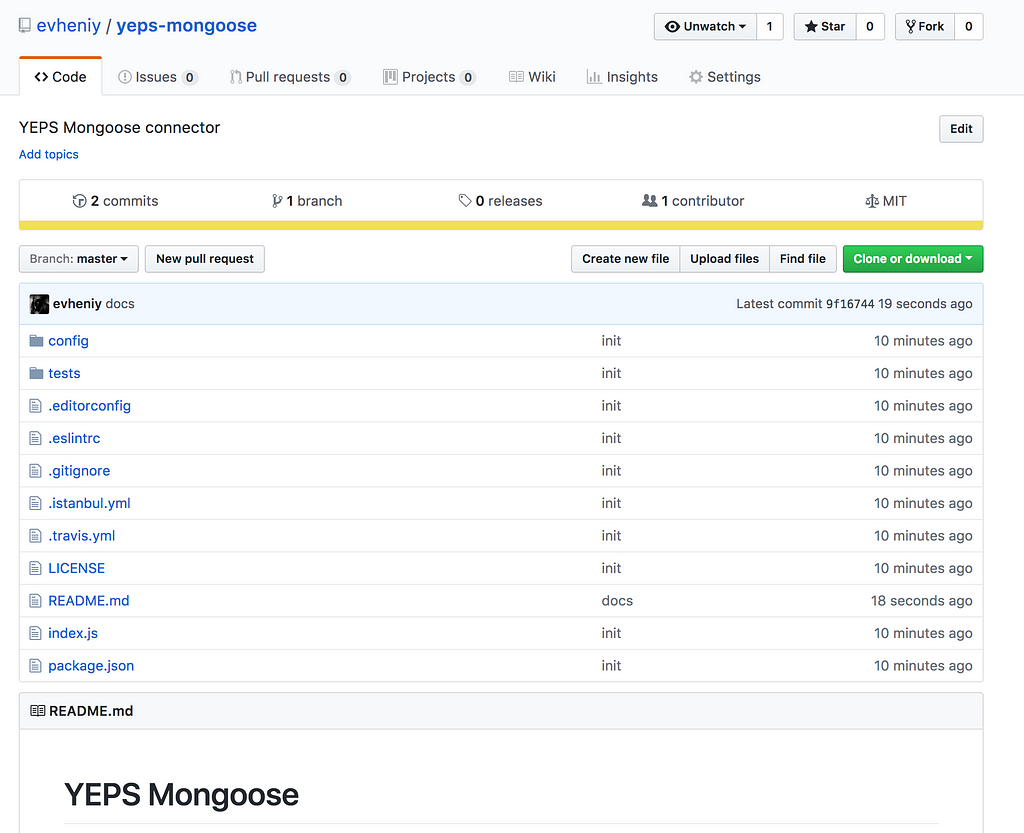
First step after testing code is saving it in github. For this we need to create a new repository:
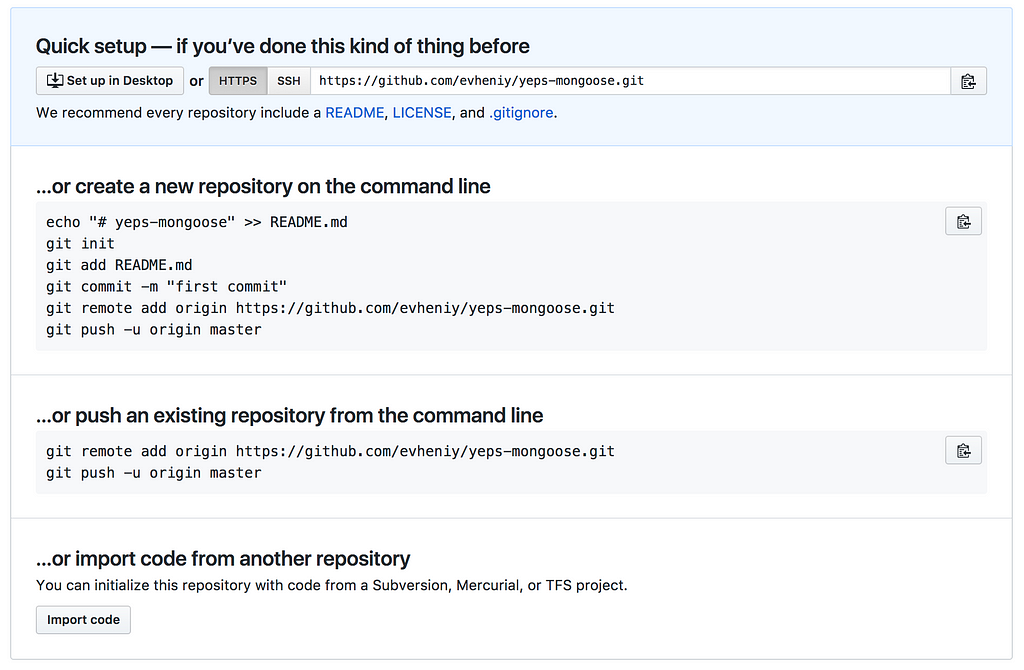
Github helps and shows all steps for this:
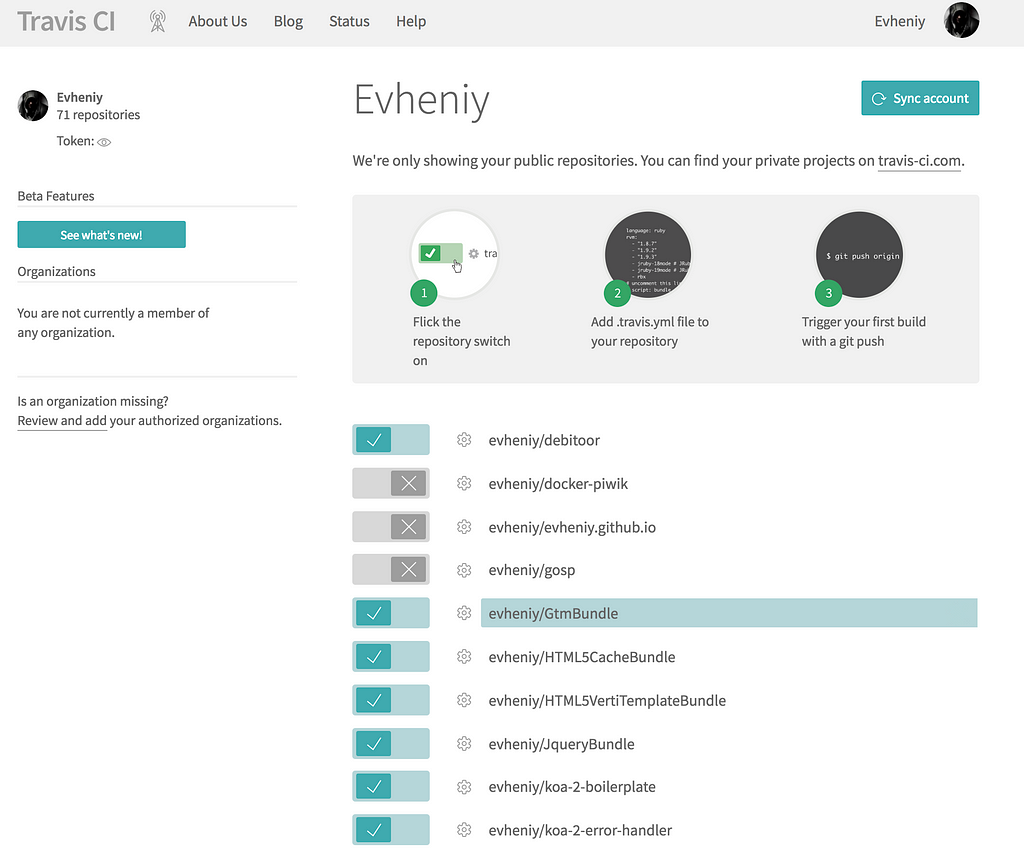
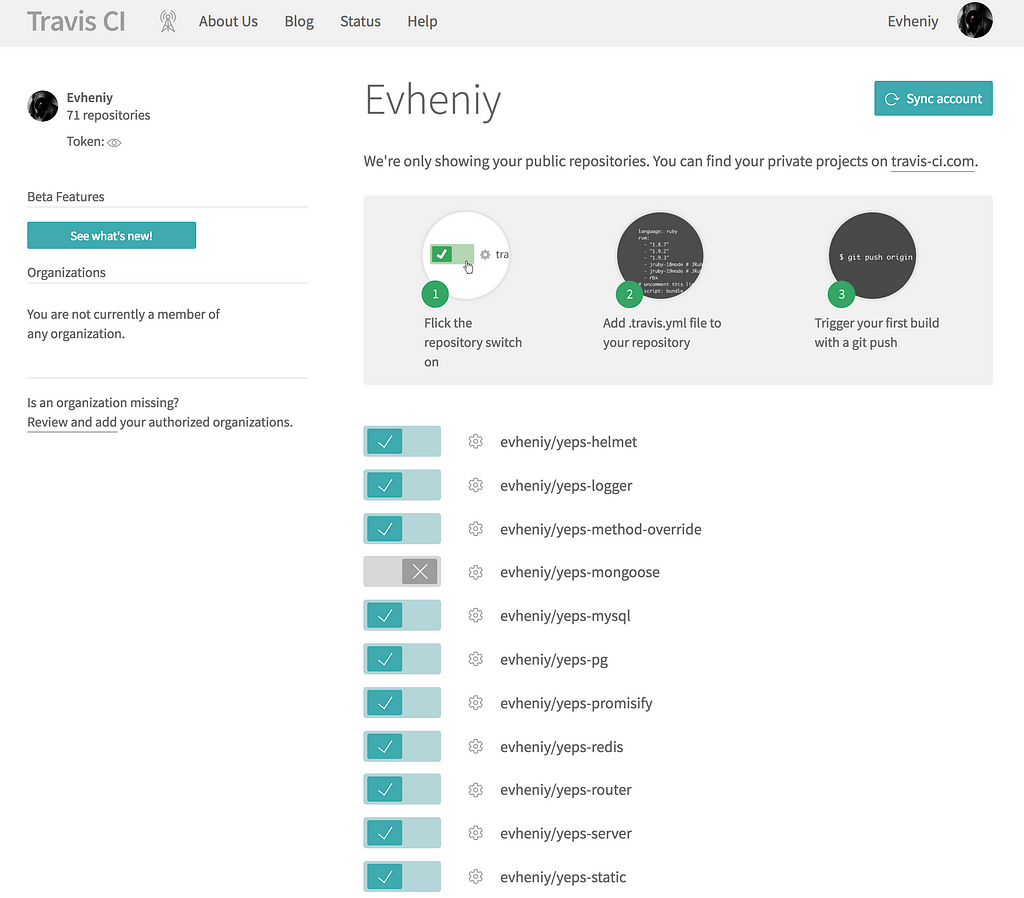
But before save our code we need to configure TravisCI and Coveralls. After opening TravisCI admin panel (don’t forget to create account and log in) we need to synchronize github repositories. Just click Sync account button:
You can see our new repository:
And enable our new repository for checking and running test each time after commit:
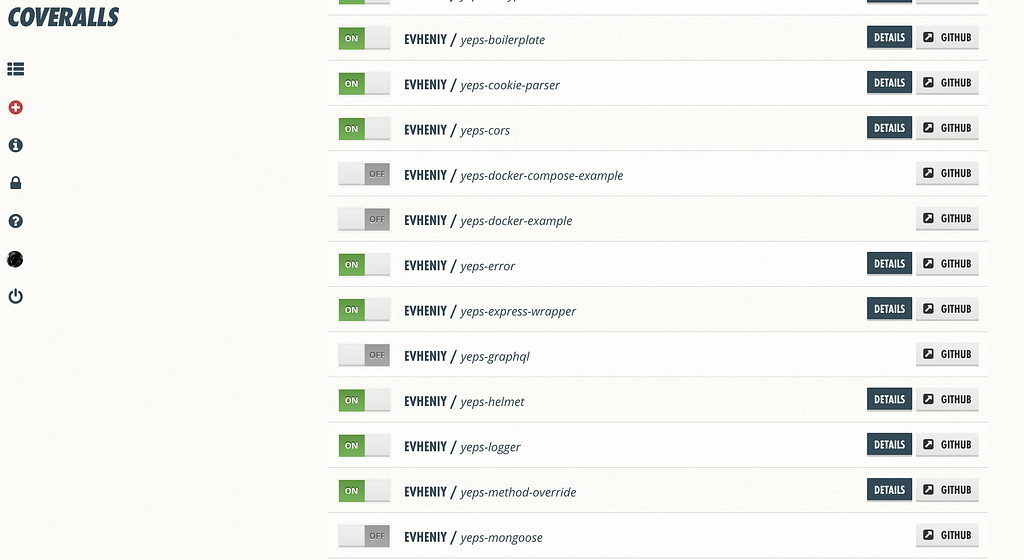
Next step: we need to make the same for Coveralls. Log in and add repository:
We need to synchronize github repositories and after at the bottom of next image we can see a new repository. Just enable it:
And we are ready to make our first commit and see all our changes in github repository:
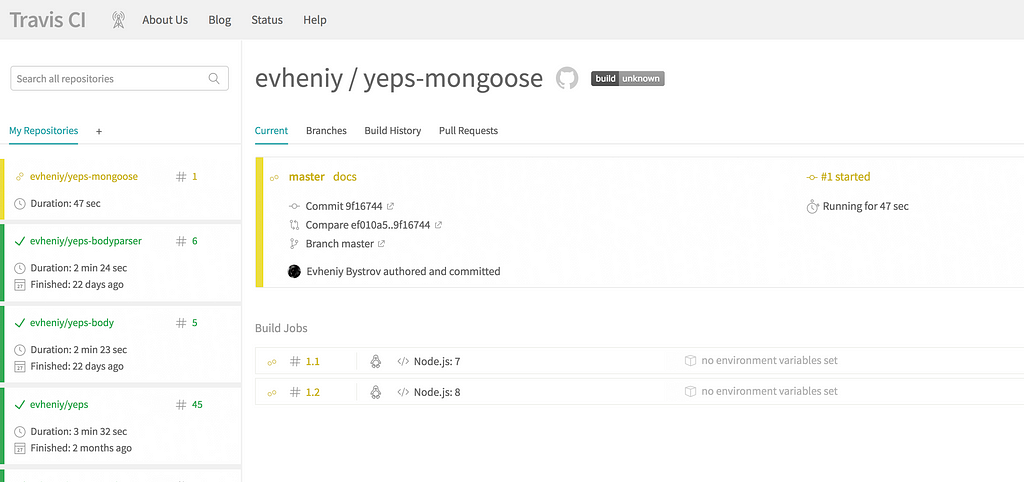
Let’s open TravisCI and check build status:
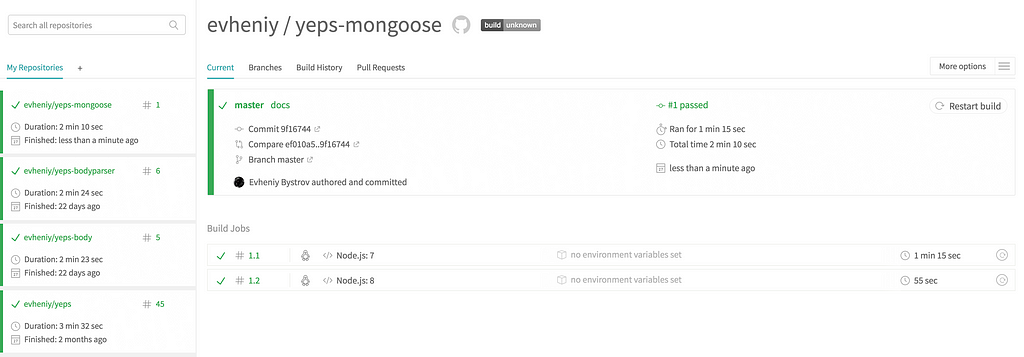
After passing all tests and checks we can see green status. Our main goal is to have it green all time:
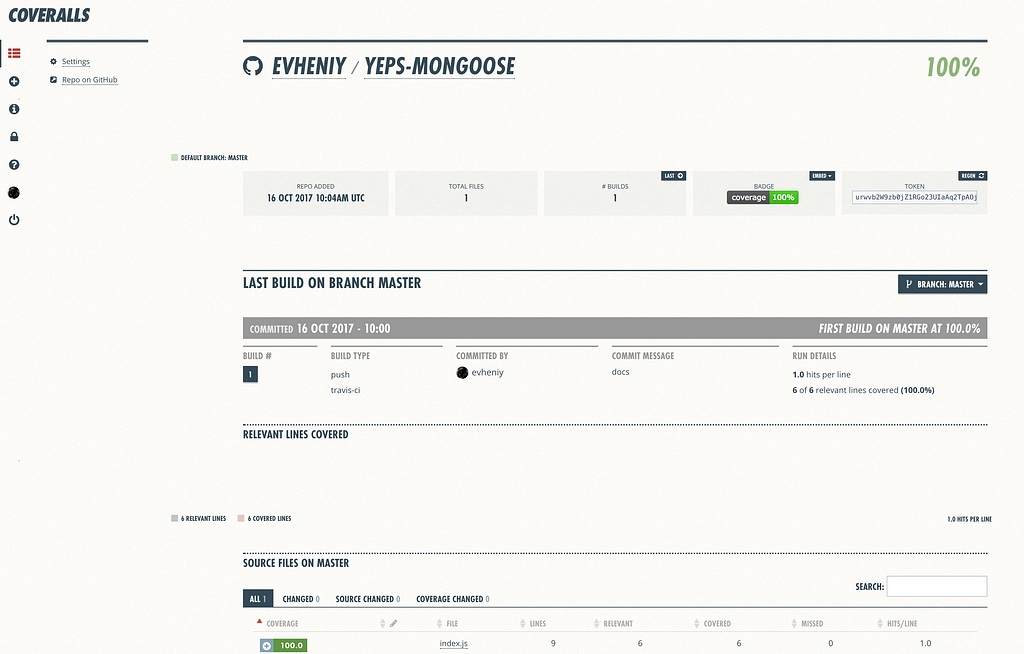
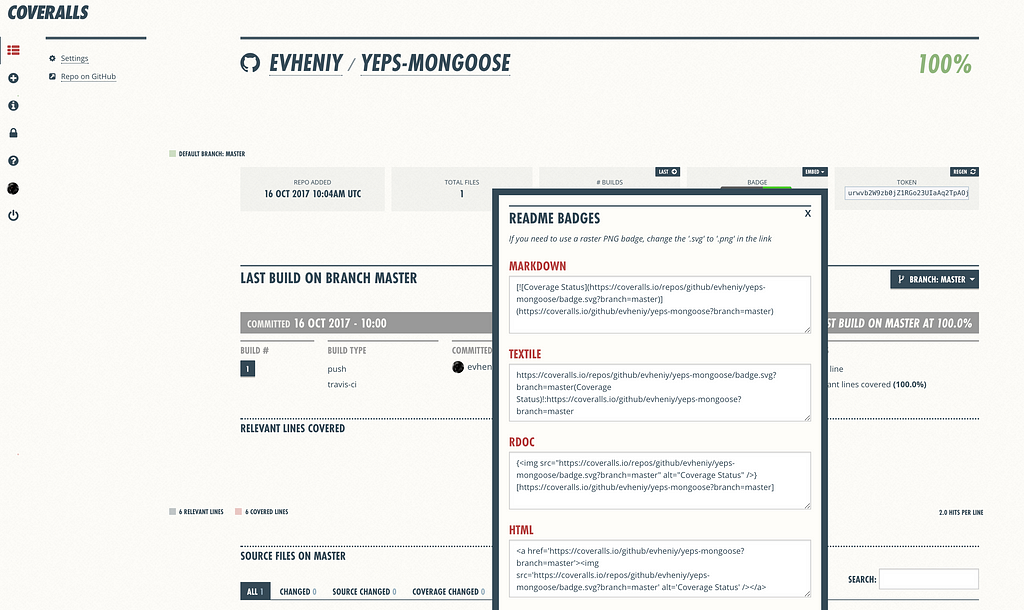
Open Coveralls and check code coverage:
We are ready to release it. Just run command npm publish and that’s all. If npm asks to log in just put login and password of your npm account (don’t forget to create it):
And we can see updated statuses in our github:
And npm:
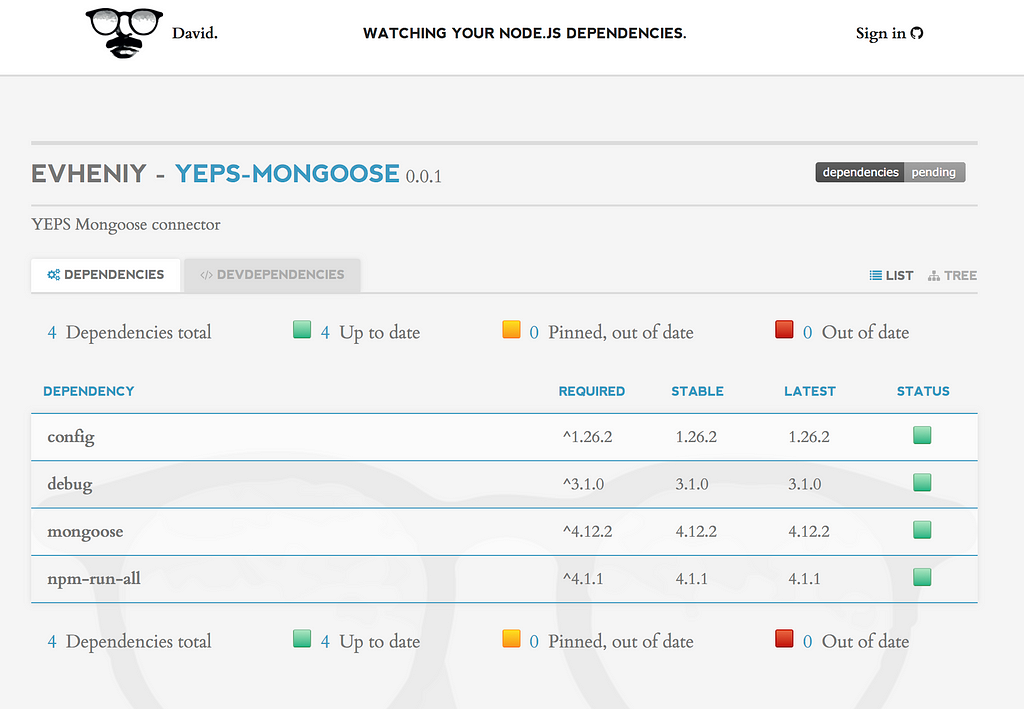
So it’s almost done. We need to check dependencies, just click dependencies link or badge:
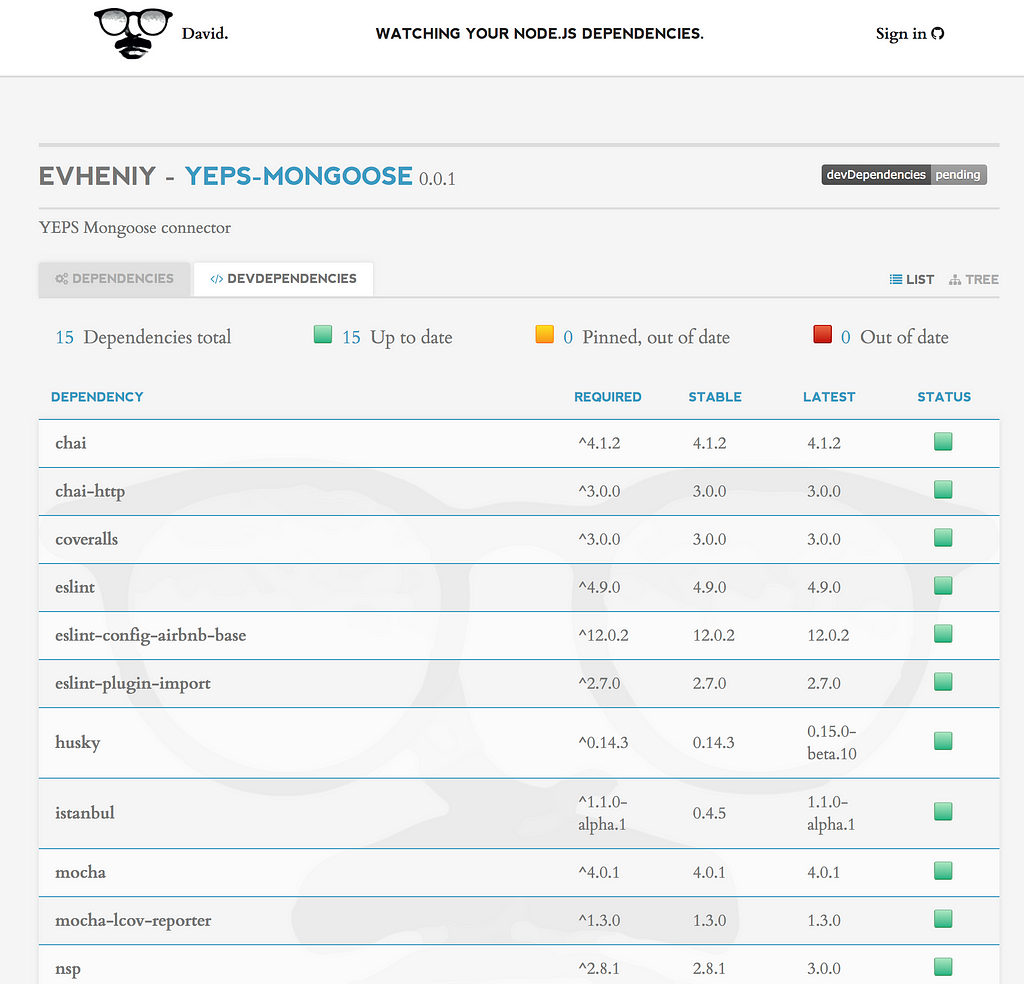
And devDependencies:
So it’s up to date. Don’t forget to support it and update if it’s needed.
And don’t forget to add badges. Each service like TravisCI or Coveralls has own badges or there are aggregate services like http://shields.io/.
But they can be cached so after at least 1 day they will be updated.
And some simple rules which are the best practices: how to organize your code. Split your monolith project into small single responsibility packages. Store code and tests in github or bitbucket.
But only source code. If you need to build it with webpack or gulp for example compile typescript or flow to js files, sass/less to css, make it before saving to npm. And store your production ready code in npm or private storage.
Npm package should be easy imported in any project without preparing, compiling, packing...
That’s all. Now you can see how easy it is to contribute to open source.
Open source node.js package from scratch was originally published in Hacker Noon on Medium, where people are continuing the conversation by highlighting and responding to this story.
Disclaimer
The views and opinions expressed in this article are solely those of the authors and do not reflect the views of Bitcoin Insider. Every investment and trading move involves risk - this is especially true for cryptocurrencies given their volatility. We strongly advise our readers to conduct their own research when making a decision.
