Latest news about Bitcoin and all cryptocurrencies. Your daily crypto news habit.
I want to touch on how to set up apollo-link-state to allow for support of multiple stores without interfering with one another.
In my last post we went over how to setup apollo-link-state for basic use:
Storing Local State in React with apollo-link-state
Now in this tutorial this is the moon we’re shooting for:
- Moving withClientState to its own file
- Moving specific resolvers and mutations to their own files
- Writting an elegant way to merge together multiple stores.
- Adding a new Notes feature to the previous demo
Lets Dive in! 🚀🌙
My biggest problem when using apollo-link-state
To kick this off I want to talk about the problem we are trying to solve.
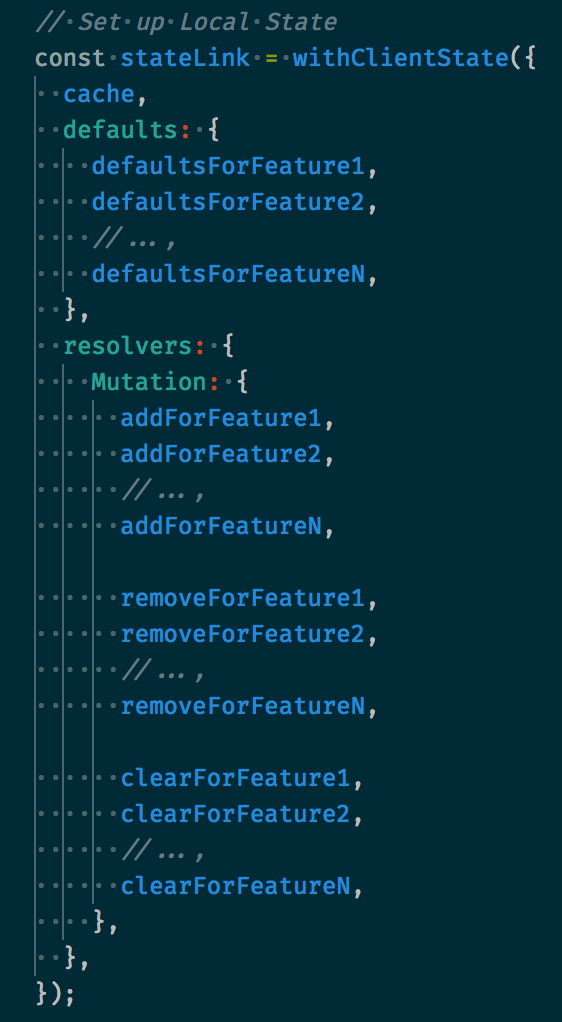
It boils down to that CreateClientState expects only one value for defaults and one value for Mutations.resolvers which is incompatible if you have more than 1 object you want to store.
It’s incompatible because it forces us to keep the resolvers and defaults for multiple logically separate features in one place. OR if forces us to explicitly reference a resolver/default from a separate file every time we create one.
This is bad and in a medium to large app is a great way to make your logic hard to track.
How can we solve this
Thankfully the solution to this is really easy! It involves the following:
1. Move CreateClientStore out of our client.js file
Move the configuration of your client store to its own file to help highlight that this is a very specific and a very important piece in our application.
Our new client.js should look like this:
2. Move our defaults, resolvers, and @client queries to their own file
Break out the defaults and resolvers for a specific area of functionality into their own “store” files to help ensure as the application grows code is logically co-located.
3. Tie it together with some lodash magic 🧙
Finally we use some helpers from lodash to merge the export of each store file into one. This allows us to define resolvers and defaults in separate files and bring them back together during configuration.
Look at the mergeGet function specifically to see how this occurs.
Adding another feature is as easy as
Now that we have the above infrastructure in place adding a second feature is just as easy as adding the 100th feature.
Lets test out this statement by adding a Freeform notes field to the application.
1. Create the Notes Store
Nearly identical to the Todo Store above.
2. Hook up the new Store
Import the new store into CreateClientStore.js and add it to our STORES.
3. Create the Note Component
Now that we have the store created and wired in it’s time to put it all to use.
4. Add to app.js
Finally add our new component to our <App/> container.
See it in action!
You should now be able to run the update demo and see our new note’s feature in action. Simple.
Wrap up
I wanted to put this out because I think this Apollo’s version of maintaining local state has some real potential and as a young project the more support it gets the more we should see if grow and thrive.
Part of supporting a project is learning how to use it and learning how to improve on it. I hope this helps do both!
Happy coding!
🧞 This demo is open source! you can find it here on github:
Setting up apollo-link-state for Multiple Stores was originally published in Hacker Noon on Medium, where people are continuing the conversation by highlighting and responding to this story.
Disclaimer
The views and opinions expressed in this article are solely those of the authors and do not reflect the views of Bitcoin Insider. Every investment and trading move involves risk - this is especially true for cryptocurrencies given their volatility. We strongly advise our readers to conduct their own research when making a decision.


