Latest news about Bitcoin and all cryptocurrencies. Your daily crypto news habit.

Whether you like it or not car insurance companies access your driving records in order to provide you with the updated insurance rates. If you are moving from one state to other your driving records may follow depending on the rules and regulations of the new state. Usually, the driving records are stored in old government systems which are vulnerable and open for cyber attacks.
In this post I will implement a Blockchain in iOS using Swift language, which will be responsible for storing the driving records of users. Next, I will expose the Blockchain as a Web API using Vapor, server side Swift framework. Finally, I will create a simple interface which will communicate with the API to fetch and display driving history of a particular user by their driving license number.
The complete code can be downloaded here.
I also provide training workshops on ARKit, iOS, React and Redux development. If you or your company is interested in the workshops then please feel free to contact me.Implementing Models
Let’s start by implementing the domain models used in the application. In order to implement a Blockchain we will need the following models:
- Blockchain
- Block
- Transaction
Blockchain and Block are self explanatory. The Transaction model represents the Driving Record of a user. If you don’t like the name “Transaction” then you can change it to “DrivingRecord”. In this post I will be using “Transaction”, which will represent the driving record of a user.
Transaction:
The Transaction class consists of properties related to driving record. This includes the following:
- drivingLicenseNumber
- voilationType
- noOfVoilations
- isDrivingLicenseSuspended
Obiviously, you can add more properties to store more information related to the driving records.
Block:
The Block class is responsible for storing the transactions. Each block has to be mined by miners and later added to the Blockchain. The implementation of the Block class is shown below:
The property “key” of the Block class is a computed property which depends on the transactions data, previous hash, nonce and index of the block in the Blockchain.
Blockchain:
Finally, the Blockchain class is responsible for maintaining and adding blocks to the blockchain. The implementation of the Blockchain class is shown below:
Exposing Blockchain as Web API:
In one of my previous post I discussed how to expose Blockchain as a Web API using server side Swift framework, Vapor. You can read the post here. The Web API consists of the BlockchainController which is responsible for managing the Blockchain.
The route “blockchain” is responsible for returning the Blockchain as JSON format. The implementation is shown below:
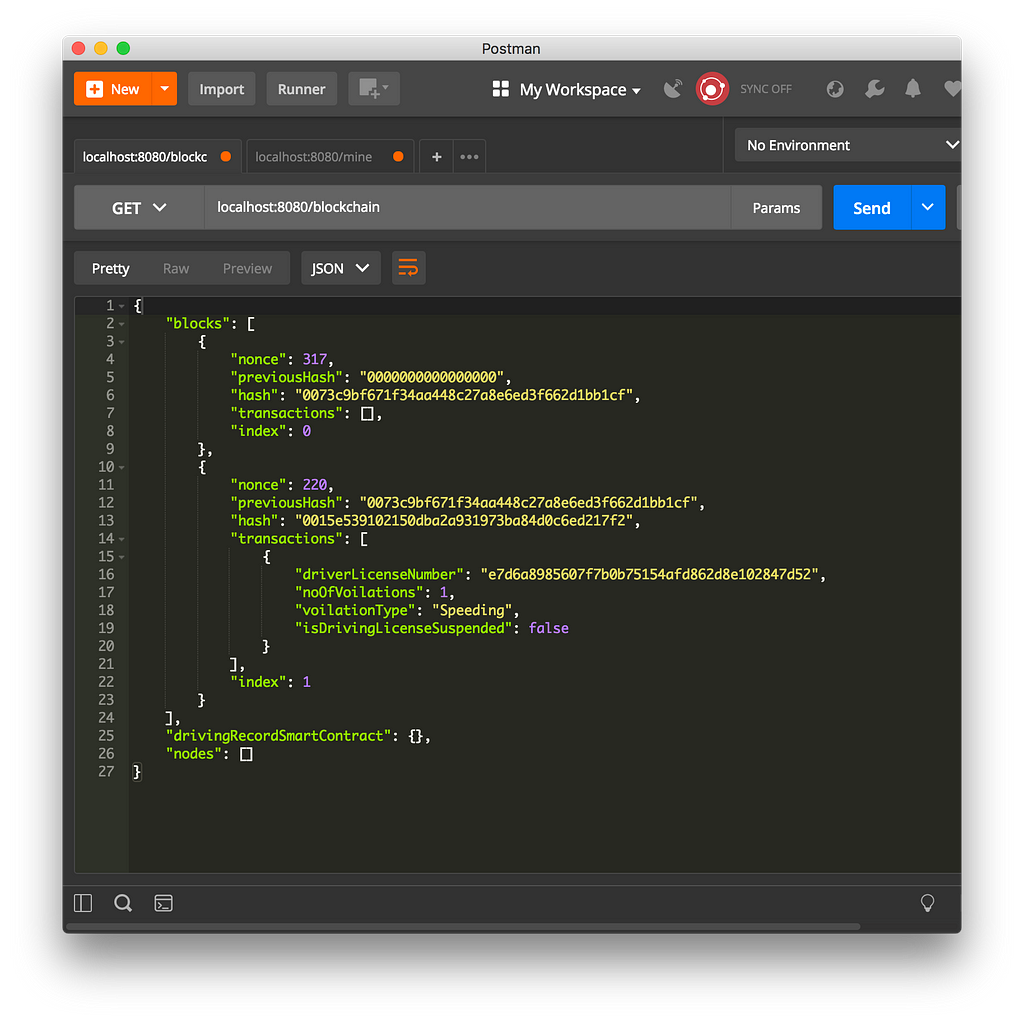
If you use Postman to invoke the “blockchain” route you will get the following result:
The screenshot shows the blockchain being returned consist of a single block. This block is created automatically and it is called the “Genesis Block”.
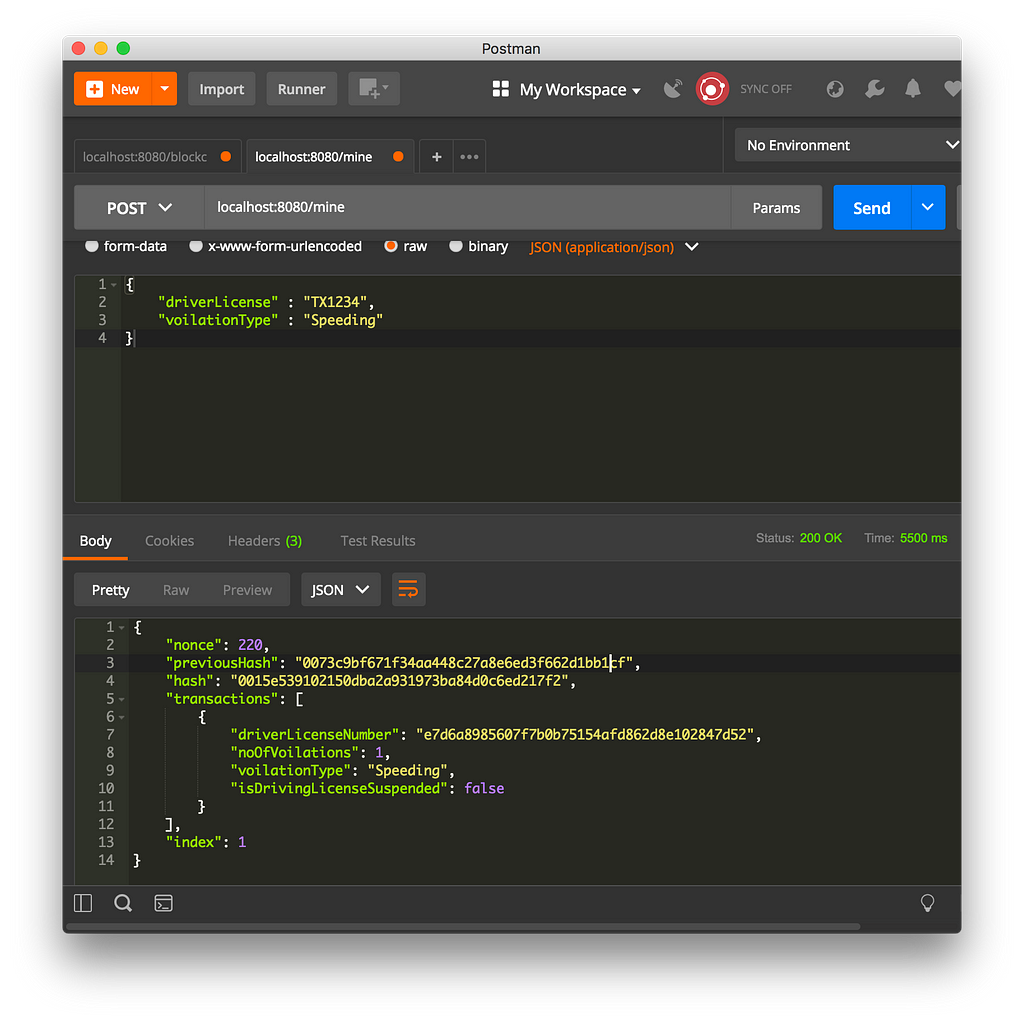
The “mine” route of BlockchainController is responsible for mining the block and adding the transactions to the mined block. If you use Postman to invoke the “mine” route you will get the following result:
You can fetch the blockchain again to verify that the block with the driving record was added to the blockchain. Simply, visit the “blockchain” route using Postman or your browser to see the JSON response.
This ensures that our driving records are being added to the blockchain successfully. Please note that the driverLicenseNumber is hashed and not stored as a plain driver license number in the blockchain.
I have added a single transaction to a block in this example. In reality a single block consists of several transactions, depending on the size of the block.
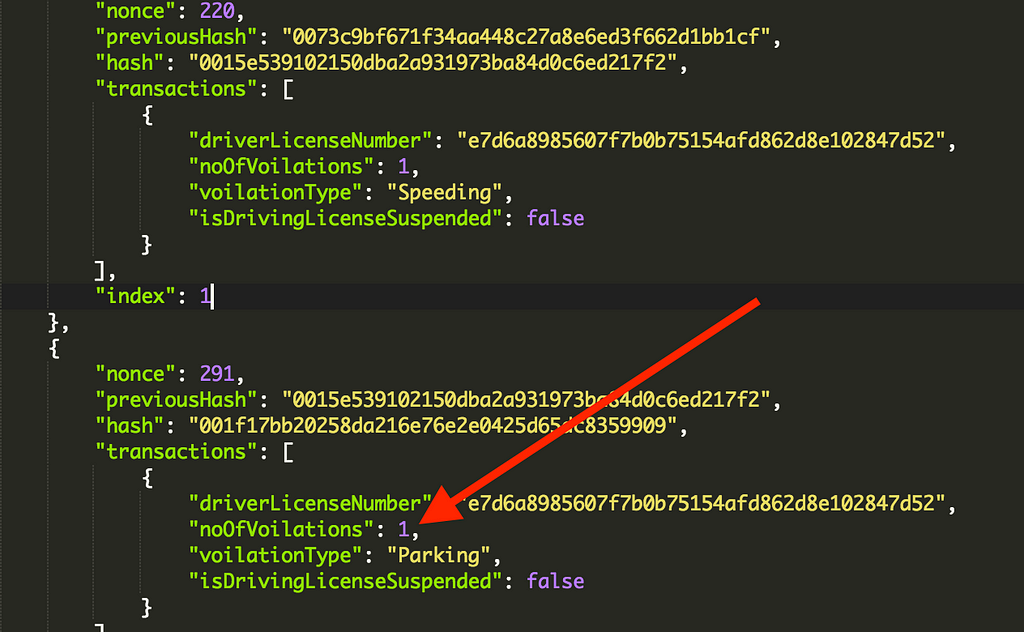
At this point if you add another violation for the same driving license number you will immediately see the problem.
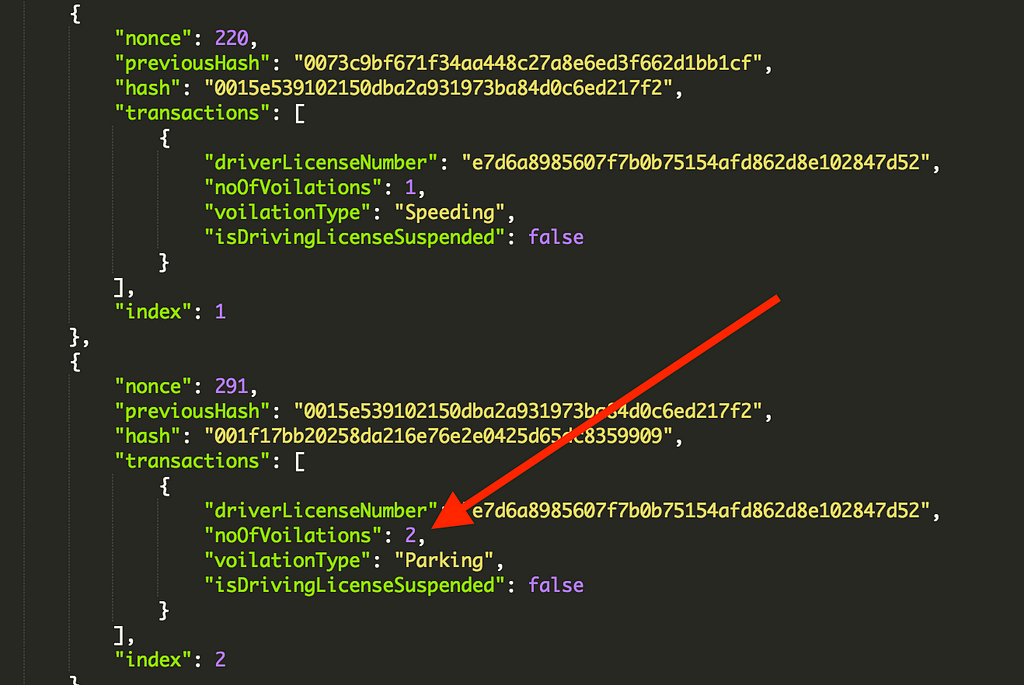
Even though the person has two violations, the blockchain still says 1. We cannot go and update the original transaction and increment the violation to 2 since blocks in the blockchain are immutable and cannot be changed. We have to dynamically change the transaction based on some logic before adding it to the blockchain. This sounds like a perfect job for Smart Contracts.
Implementing Smart Contracts:
Smart Contract is a block of code which lives on the blockchain and is capable of executing custom logic. We can use this custom logic to update the transaction before it gets added to the block. The implementation of DrivingRecordSmartContract is shown below:
DrivingRecordSmartContract consists of a single function called “apply”. The apply function goes through each block in the blockchain and finds the transactions associated with the driver license number. Once, it finds the driver license number it updates the number of violations count for that transaction. If the number of violations are more than 5 then the driver license is suspended.
The Blockchain class is updated to support smart contracts as shown below:
Inside the getNextBlock function we invoke the smart contract and pass the transaction and a reference to the blocks to it.
Now, if you access the blockchain you will get the updated transaction as shown below:
 Accessing Driving Records Using Web Interface:
Now, that our blockchain implementation is complete lets see how we can access the blockchain records using a web interface. First, we need to create a route where we can pass the driving license number. Based on the driving license number, the blockchain service is going to return the appropriate results.
The implementation below shows the BlockchainController route, which can be used to pass the driving license number:
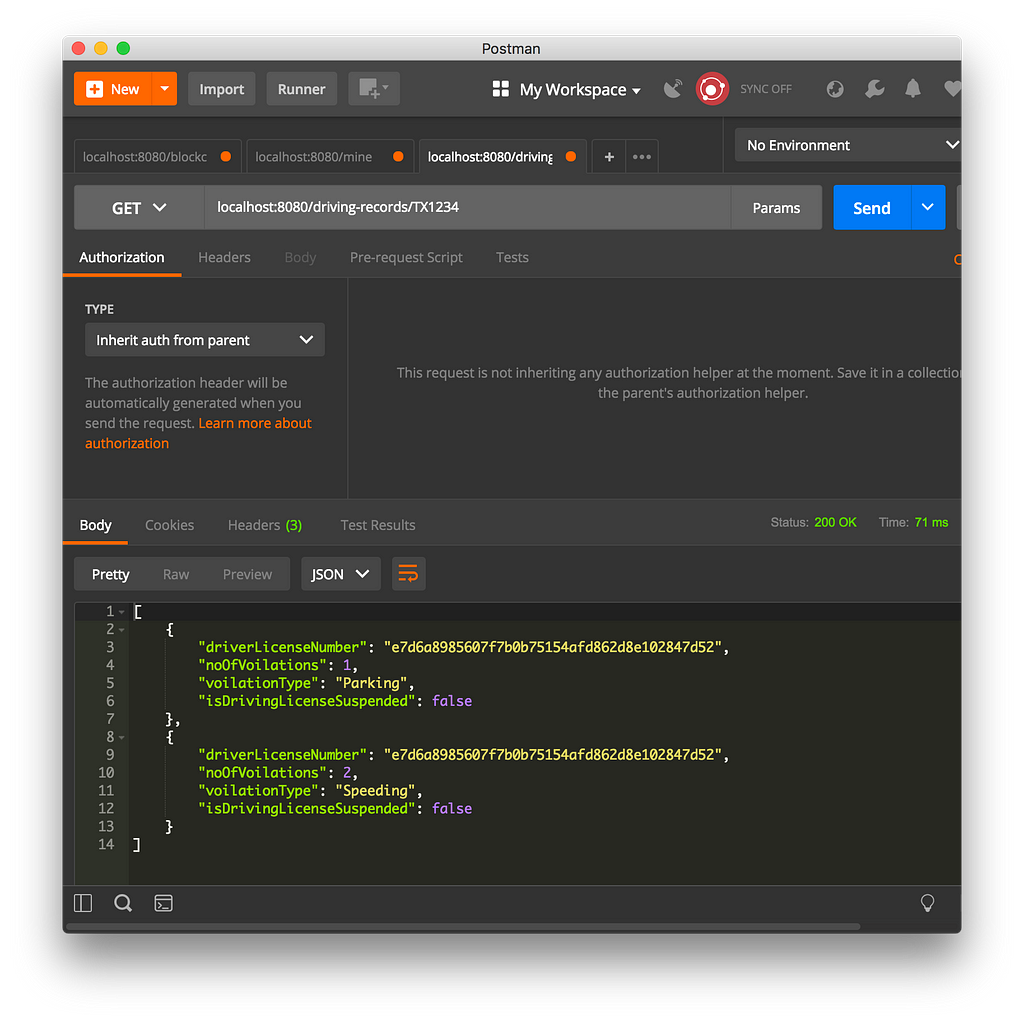
The Blockchain class has been updated to include the transactionsBy function which returns the transactions based on the driving license number.
The screenshot below shows the JSON result:
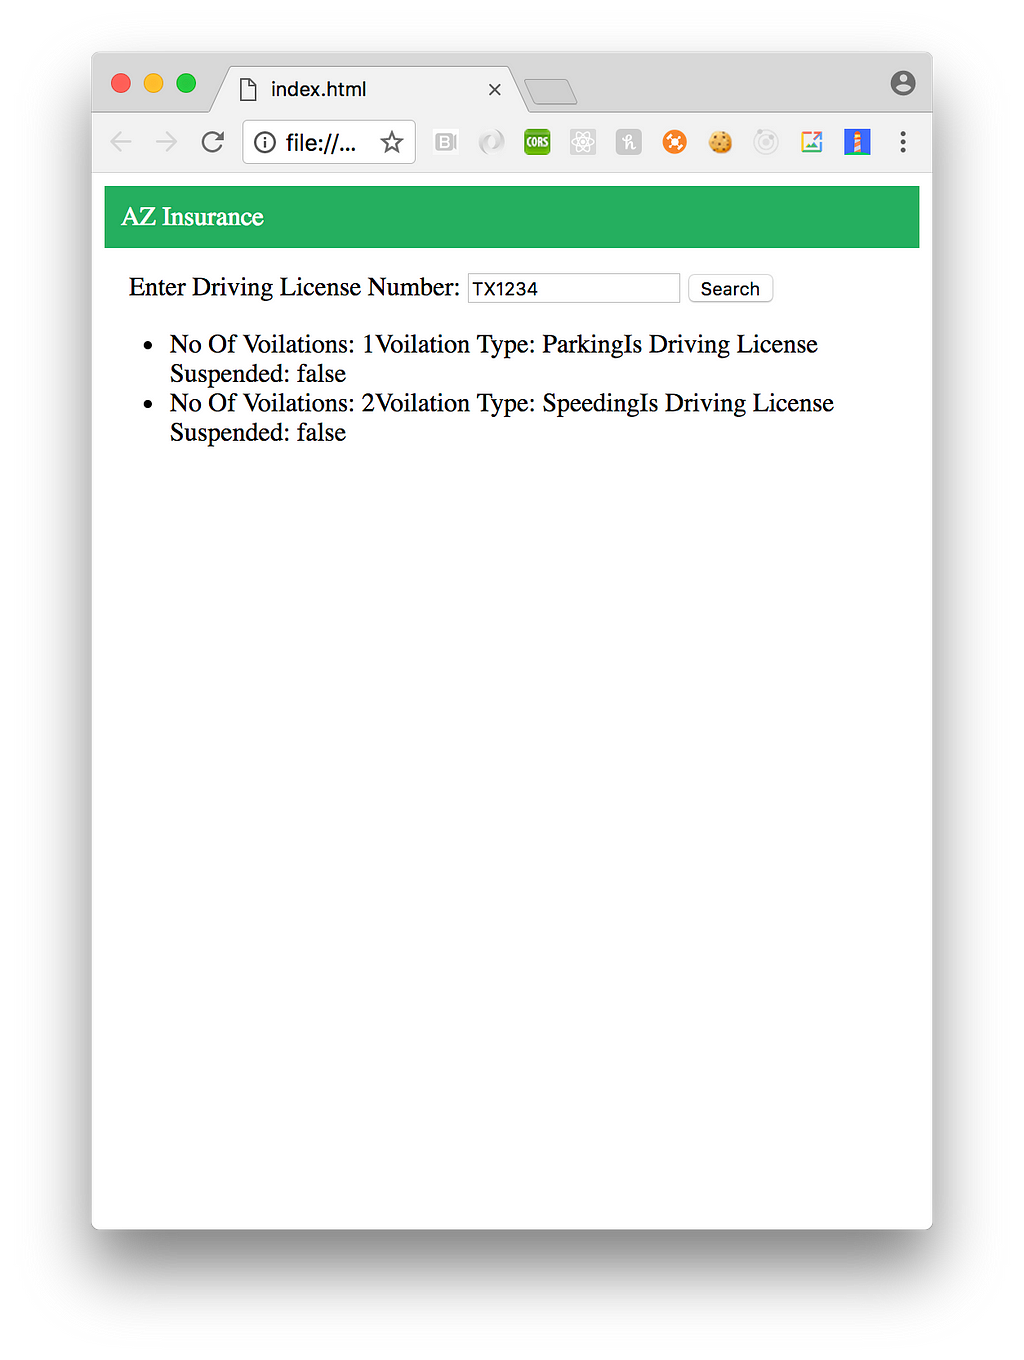
When accessed through the web app the result is shown below:
If you are interested in learning more about Blockchain then check out my Udemy courses below:
Thank you very much and happy coding!
Implementing Driving Records Blockchain in iOS Using Swift was originally published in Hacker Noon on Medium, where people are continuing the conversation by highlighting and responding to this story.
Disclaimer
The views and opinions expressed in this article are solely those of the authors and do not reflect the views of Bitcoin Insider. Every investment and trading move involves risk - this is especially true for cryptocurrencies given their volatility. We strongly advise our readers to conduct their own research when making a decision.

