Latest news about Bitcoin and all cryptocurrencies. Your daily crypto news habit.
React Router Authentication Flow & Adding TOTP MFA
In Part 1, we looked at how to wire up a React application with with an identity provider. In this part, we will use React Router to add a routing and auth flow that will only allow logged in users to view the application while redirecting users who are not logged in back to the sign up / sign in page.
In Part 1 we used Amazon Cognito with AWS Amplify to set up our authentication. The techniques we will be covering here in part two will work with any authentication provider and are not limited to Amazon Cognito.
We will continue from Part 1 with a React project that has an authentication service already added and continue from there.
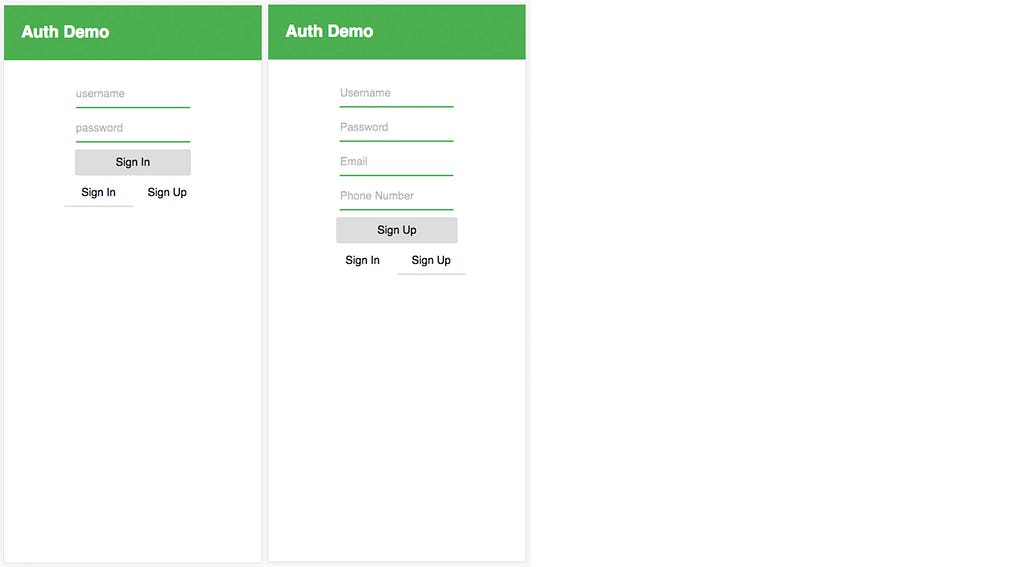
Our application will have a main Authenticator route which hold forms for both user sign up and sign in.
The application routes that need user authentication before being allowed to view will be private route components (taken from the React Router documentation).
The PrivateRoute component we will end up using will look like this:
The private route will either allow the user to continue to the component, or redirect to auth if the user is not logged in. Here is how this will look once we implement it:
The component that we will be rendering will not need to know anything about what is going on with Authentication, all of this logic will be handled by the PrivateRoute component.
Let’s put this all together now into a working application.
To see the final project code, check out this repoCreating additional project files
First, let’s go ahead and create all of the files we will be needing in the next steps.
touch Authenticator.js SignIn.js SignUp.js Router.js Home.js Header.js
Now that these files are created, we will walk through them one by one implementing the authentication flow.
Authenticator component
We will be needing a component to handle both the Sign In & Sign up states of the app, Authenticator.js.
When the user is not logged in, we will automatically redirect them to this component.
This component will have a showSignIn state that will be toggled to either show the SignIn or SignUp component that we will be creating shortly.
This is a pretty basic component that allows us to encapsulate both the Sign In and Sign Up forms in one route. This could also be broken up into two different routes, but I’ve found this approach to be a little nicer and more concise.
Header.js
Let’s create a basic reusable header with some styling that we can use as the application header.
Protected Routes
Next, we need to create a couple of routes that we will be using as generic protected routes. We’ll encapsulate these two routes in a single file, Home.js.
These routes will only be available when the user is logged in. You will notice that we do not have any logic here that looks to see if the user is logged in, all of the logic will be handled by the router implementation.
Both of the two routes we create are wrapped with the withRouter higher order component that we import from React Router. This is because we want to have access to the history prop from React Router in case we need it, which we will if we want to programmatically send the user to another route.
Home — Home is a component with only two real pieces of functionality: a componentDidMount method that calls the Auth.currentUserInfo method to get and store the user’s username so we will be able to greet the user by name, and a Link component that links us to another route.
Route1 — This is a basic component that only has a single piece of functionality, a signOut method that calls the Auth.signOut method. When the user successfully signs out, we also reroute the user to the auth route that we will create in just a moment.
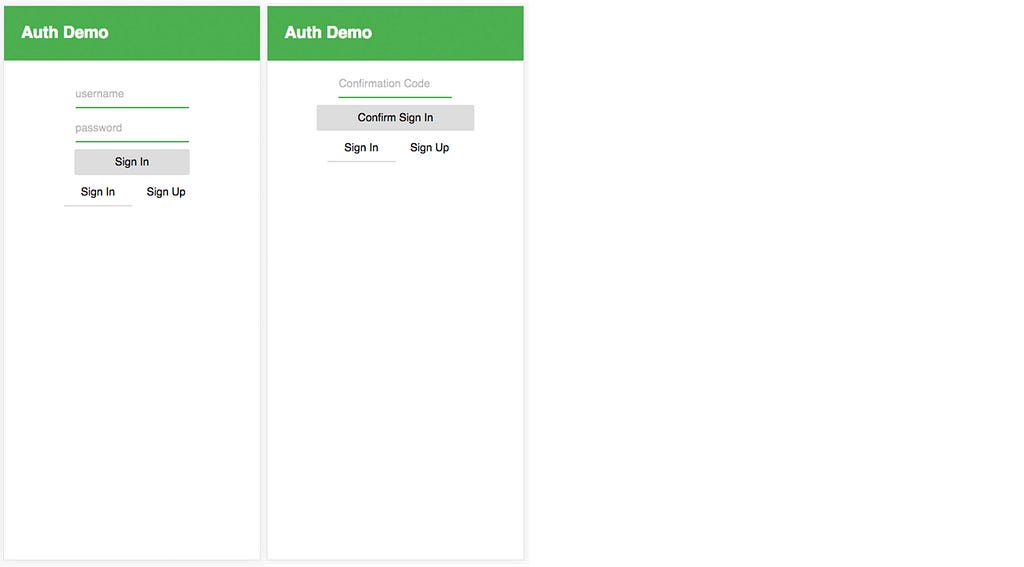
We looked briefly at this Sign In functionality in part 1, and here we will be implementing almost exactly the same functionality with one difference: We will hide the confirmation code screen until the user successfully signs in with username and password. We do this to provide a better user experience.
This component uses two main methods of the Auth class: signIn and signUp. One interesting thing to note is that we are using the user object that is returned from signIn and storing it in the state, and then calling the confirmSignIn method with the user object as the first argument.
If confirmSignIn is successful, we redirect them to the Home route using the history prop that was provided to us by withRouter from React Router.
history.push('/')If the API call is unsuccessful, we log out the error message.
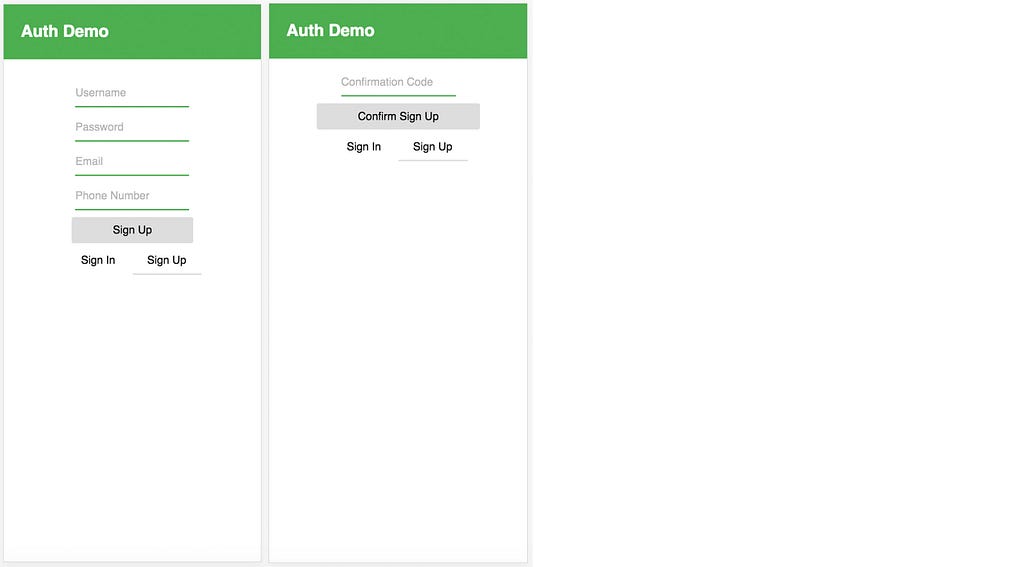
We also implemented this exact functionality in Part 1 as far as signing up and confirming the sign up of a user. The main difference here is that we are also adding some logic / UI to only show the confirmation form if fHomethe user has successfully signed up.
Finally, we have made our way to the bread and butter of the functionality of this application, the router.
There is quite a bit of important functionality going on in this file, so we’ll walk through it in depth.
Imports — The main import to note here is the Redirect component. Redirect will navigate the user to a new location, & will override the current location in the history stack like server-side redirects do. We’ll look at how we implement this in just a second. We also import the three main routes that our application will consist of: Authenticator, Home, and Route1.
PrivateRoute — This component will serve as our container for any routes that we want to be protected and only accessed if the user is logged in.
We are initializing a couple of pieces of state in this component: loaded & isAuthenticated which are both set to false.
componentDidMount — When the component is first loaded we want to check if the user is currently logged in, and if so allow them to see the route, and if not redirect them to the sign up page. We do this by calling the authenticate method.
authenticate — authenticate calls the Auth.currentAuthenticatedUser method which will only return successfully if there is a logged in user. If there is a user, we update the loaded state to true and the isAuthenticated state to true. If there is no currently authenticated user, we redirect the user to the Authenticator component by calling this.props.history.push('/auth').
componentDidMount — We also create a listener to call a function whenever a route changes by calling this.props.history.listen. Whenever the route changes, this function will fire and we will check if the user is currently logged in. If they are, we allow them to continue and don’t do anythin. If they are not logged in, the promise o
render — In render, we return a Route component from React Router. With the Route component you have three options to render a component, one of them being the render prop, which we are using. In the render prop, we check to see if the user is currently authenticated, and if so renders the component passed in as the component prop, and if not redirects them to the auth route.
Routes — The Routes component defines the routes using either a Route component for unprotected routes, or a PrivateRoute component for protected routes.
App.js
We are done writing the code to implement the Auth functionality and we can now clean up the App.js file to use the Header and Router we created
That’s it, you should be able to run the application and have complete sign up / sign in functionality!
About TOTP (time-based one-time passwords)
TOTP is quickly becoming the MFA of choice for many companies that place a high value on security as it is more secure than MFA with SMS.
TOTP uses apps like Authy, Google Authenticator & Duo to implement temporary access tokens that expire every 30 to 60 seconds.
Cognito and now AWS Amplify have added this feature, so let’s take a quick look at how we might extend our application to implement this.
The first thing to keep in mind when thinking about TOTP is that you should not make it the MFA type of choice unless the user specifies that they would like to use it. This is because the adoption of TOTP is still relatively small. The flow should be like this:
- User signs up, default MFA type is SMS
- User signs in, and somewhere in the application (usually in some type of settings area) we give them the option to enable TOTP.
- User enables TOTP, show them QR code, and enable TOTP with their app of choice
- Offer the option to change MFA type back to SMS if the user would like to do so.
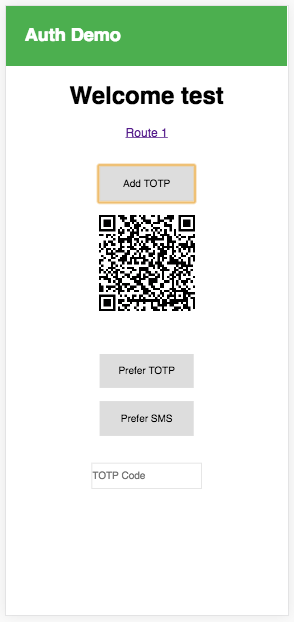
In our existing app, one place that we could place this functionality in order to demo it could be in the Home component. Once the user is signed in we will give them the option to add TOTP in this route.
The way you initially set up TOTP is with the Auth.setupTOTP method. This returns a promise that we will use to create a QR Code.
Auth.setupTOTP(user).then(code => /* create qrcode */ )
Adding TOTP to the existing app
We will use the qrcode.react package to show a QR Code:
yarn add qrcode.react
Home.js
In Home.js, import QRCode:
// somewhere below existing importsimport QRCode from 'qrcode.react'
Because setupTOTP needs access to the user object, we will need to get the user object by calling Auth.currentAuthenticatedUser in componentDidMount and adding it to the state:
componentDidMount() {Auth.currentAuthenticatedUser() .then(user => this.setState({ user })) // rest of existing code omitted}Next, we can add an addTTOP method that will set the QRCode that we will be using in the QRCode component:
addTTOP = () => { Auth.setupTOTP(this.state.user).then(code => { const authCode = "otpauth://totp/AWSCognito:" + this.state.user.username + "?secret=" + code + "&issuer=AWSCognito"; this.setState({ qrCode: authCode }) });}To learn more about how we created the authCode uri and the API behind provisioning a TOTP token, check out this link.
We also want to set the preferred MFA type to TOTP for the user. We can do this with the Auth.setPreferredMFA method. Let’s create a new class method that will capture the challenge answer from the user (we will create the input for challengeAnswer in just a moment) and change the preferred MFA type:
setPreferredMFA = (authType) => { Auth.verifyTotpToken( this.state.user, this.state.challengeAnswer ).then(() => { Auth.setPreferredMFA(this.state.user, authType) .then(data => console.log('MFA update success: ', data)) .catch(err => console.log('MFA update error: ', err)) })}Now, we can add a couple of lines showing the QRCode if it is defined, adding a form to input the TOTP code, and a couple of buttons to attach to the new methods:
render() { <div> // previous code omitted <button onClick={this.addTTOP} style={{ border: '1px solid #ddd', width: 125 }} > <p>Add TOTP</p> </button> { (this.state.qrCode !== '') && ( <div> <QRCode value={this.state.qrCode} /> </div> ) } <br /> <button onClick={() => this.setPreferredMFA('TOTP')} style={{ border: '1px solid #ddd', width: 125 }} > <p>Prefer TOTP</p> </button> <br /> <input placeholder='TOTP Code' onChange={e => this.setState({ challengeAnswer: e.target.value })} style={{ border: '1px solid #ddd', height: 35 }} /> </div>}SignIn.js
Now, in the confirmSignIn method, we need to update the signIn method to use the type of MFA that is attached to the current user. This information is available in the user object as user.challengename, which we will pass in as the third argument to Auth.confirmSignIn:
confirmSignIn = () => { const { history } = this.props Auth.confirmSignIn(this.state.user, this.state.authCode, this.state.user.challengeName) // rest of code omitted}Now, when we login we can click Add TOTP, scan the QR code and switch our authentication type to TOTP.
When we log out, we should now have to use the TOTP provider we used to scan the QR code in order to get back in.
To see the final project code, check out this repo.My Name is Nader Dabit . I am a Developer Advocate at AWS Mobile working with projects like AppSync and AWS Amplify, and the founder of React Native Training.Currently I’m specializing in GraphQL with AWS AppSync as well as authentication & authorization for JavaScript applications, so if this interests you follow me for more future info & tutorials!If you enjoyed this article, please clap n number of times and share it! Thanks for your time.
Images courtesy of Amazon Web Services, Inc
React Authentication in Depth Part 2 was originally published in Hacker Noon on Medium, where people are continuing the conversation by highlighting and responding to this story.
Disclaimer
The views and opinions expressed in this article are solely those of the authors and do not reflect the views of Bitcoin Insider. Every investment and trading move involves risk - this is especially true for cryptocurrencies given their volatility. We strongly advise our readers to conduct their own research when making a decision.


