Latest news about Bitcoin and all cryptocurrencies. Your daily crypto news habit.
Our Pushy & Pully game has some isometric view in place. If you still don’t know the game let me show you an screenshot:
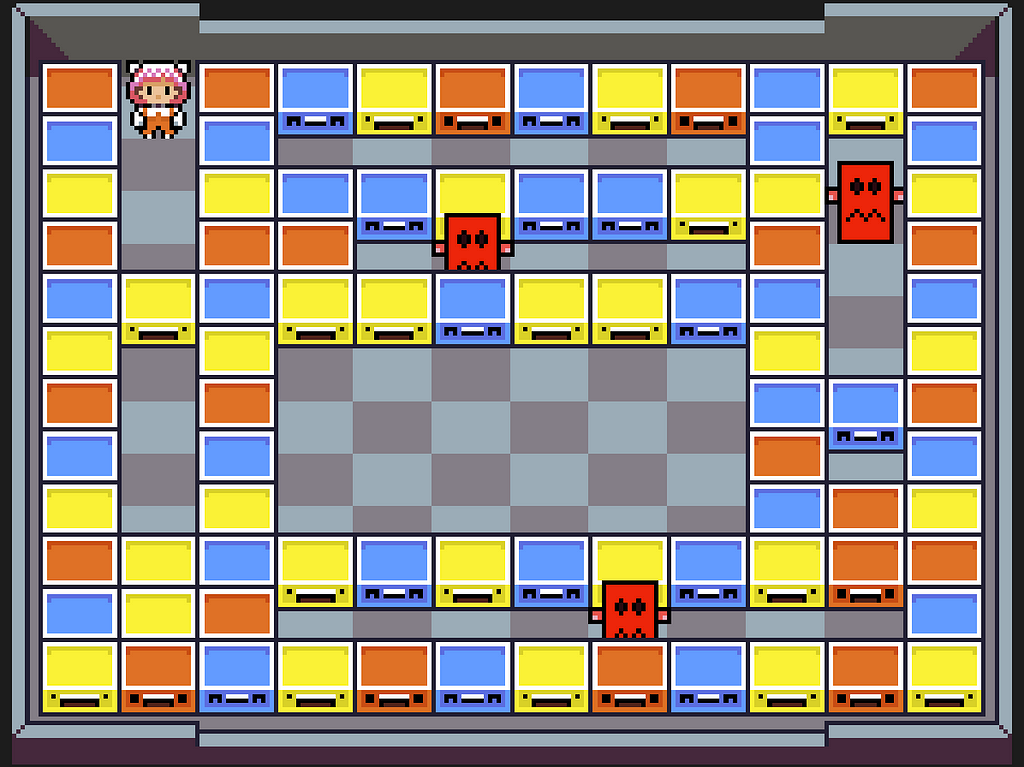 Main game area (not the final sprites)
As you can see the view is something in between top down and with a certain angle. More like a front isometric camera. But Unity for 2D only has only a “normal” ortogonal camera. There’s no way (that I know) that you can indicate to the camera that what you want is an isometric. So we had to fix this in code.
How drawing objects work
First thing to understand is that we generate the level at runtime after reading the level definition from a file. So we have to draw every object and the order matters. As a general rule in 2D games the last object you draw will be visible on top of the previous ones.
The Unity way: layers
In Unity you can define layers for your objects. You can also set the order in which your layers will be drawn. So you can have for example a layer defined for your character and another one for an enemy. And you can set it so that the enemy will be always behind the character if both overlap.
Even if you have multiple objects in the same layer (imagine different enemies or the blocks), Unity has a property that is called order in layer that solves conflicts. Imagine you instantiate the 3 blocks and at some point they overlap. Then unity will solve that issue by using the order in layer property: the one with higher number will be on top always. No matter what order you draw it.
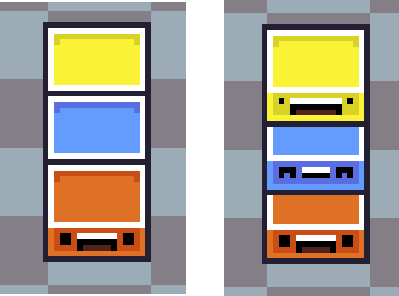 Objects in the same layer with different order in layer
But what happens when you have different layers overlapping to each other? And what about if you have a prefab (generic “class” for non-Unity people) that you will instantiate a lot of times (like for example our blocks) with the same layer and order in layer?
The overlapping solution
There are 2 possible ways to solve this. The most simple one is to change the z coordinate to every object to match who should be on top. In Unity, even if you work in 2D you still have 3 coordinates in every object. The z coordinate defines how far or close to the camera an object is. Changing the z coordinate effectively puts an object on top of another.
I didn’t really like that approach because it feels a bit messy. I am not sure either if my collision system will work fine with it. So I decided to investigate other approaches and I found another nice feature that Unity has: Sorting Groups.
What are Sorting Groups?
Imagine you have a sprite made of different parts: a head, a body, a couple of arms and legs. You want to move everything together but what should you do? Do you put them in the same layer and try to get the right order? What happens if it overlaps with another sprite made of parts too?
I’m going to ilustrate this part with images taken from the Unity manual since they are perfect to explain it (and I don’t have a multiple images sprite).
To avoid those issues Unity has this component called Sorting Group. This has two properties: layer and order in layer. Like the other ones from the sprite renderer. But with this sorting group you can group every part of your sprite in one, so even if they’re in the same layer with different order in layer property it won’t matter. The Sorting group will have preference when rendering your sprite.
This is the difference of using it or not:
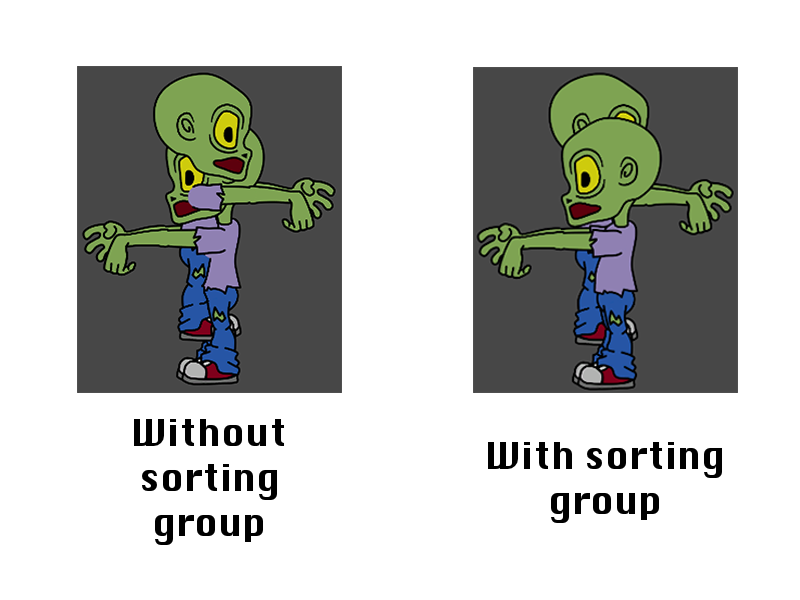 Check how the left image overlaps
Appliying Sorting Groups for our isometric view
The solution that I went for was using Sorting Groups in all my sprite objects.
Every object that I use has the Sorting Group component. They are all in the same sorting group layer (in my case I left it with the Default one since it doesn’t matter). And a script controls the order in that (sorting group) layer based on the position of the sprite.
We obviously need that to be dynamic since the player and the enemies will be moving. We need to update that order in layer at the very last moment, so we’ll do it in LateUpdate after everything has been already updated.
You can see an example of that script here:
The topMaxPosition is just a property indicating the top most position where your sprites could be. The reason why I need to substract that from my point is that my view needs to have the objects of the bottom of the screen (close to y = 0) to be on top. So we need to “reverse” our y position to use it in the sorting order.
Here it’s the code in action:
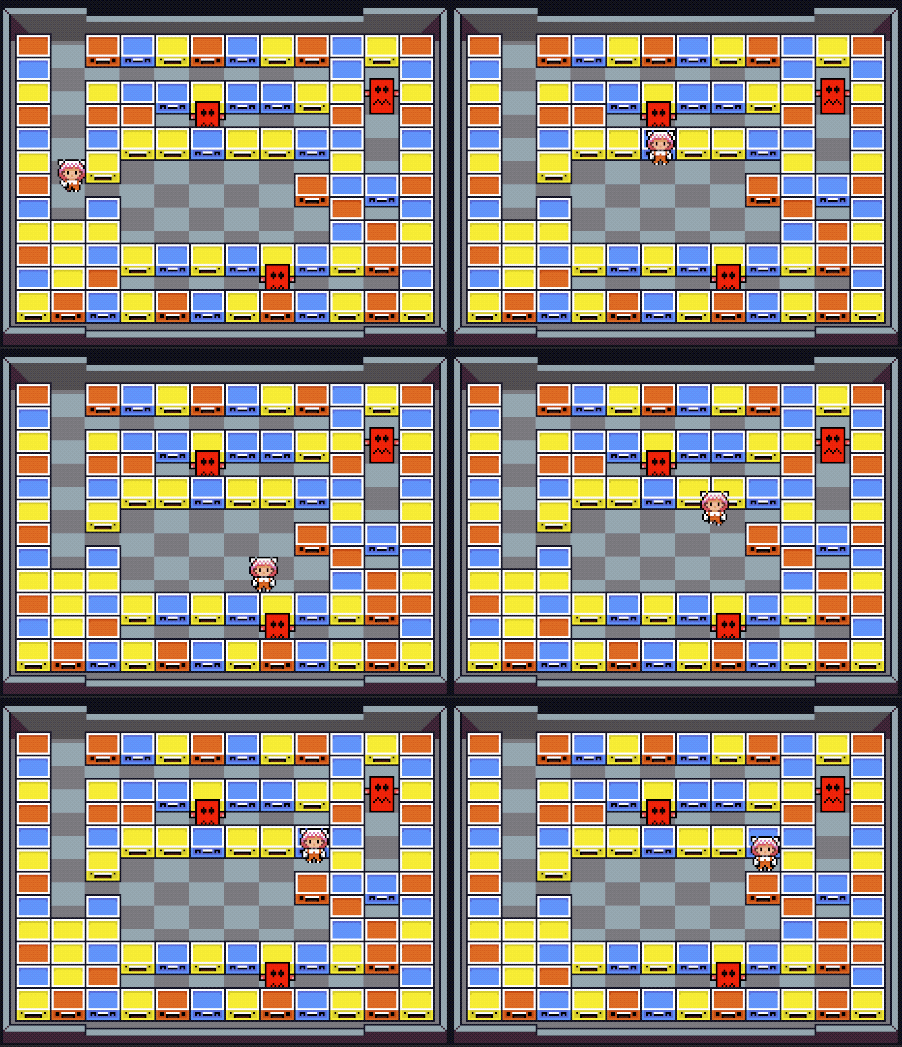 Pushy walking easily between layers of blocks
As you can see all the blocks are properly positioned and our player can walk between them. The block will stay behind when needed.
That’s all folks!
I hope this post can help somebody trying to implement something similar to our isometric view. Don’t hesitate to comment if you have any doubts.
See you next week!
How to implement 2D isometric view in Unity was originally published in Hacker Noon on Medium, where people are continuing the conversation by highlighting and responding to this story.
Disclaimer
The views and opinions expressed in this article are solely those of the authors and do not reflect the views of Bitcoin Insider. Every investment and trading move involves risk - this is especially true for cryptocurrencies given their volatility. We strongly advise our readers to conduct their own research when making a decision.
