Latest news about Bitcoin and all cryptocurrencies. Your daily crypto news habit.
This article is part three in a weekly series on building a blog with React and is an extension of the code created in previous parts.
The React Blog Series
Part One: Building a website with React and BulmaPart Two: Building a Blog with React and ContentfulPart Three: Import your Medium Feed into ReactPart Four: Adding a Redux to a React BlogPart Five: (In Progress) Replacing Redux Thunks with Redux Sagas
If your not blogging on medium yet, you should. It’s so easy.
This week we are going to add a feed to our website so we have a kind of alternative blog.
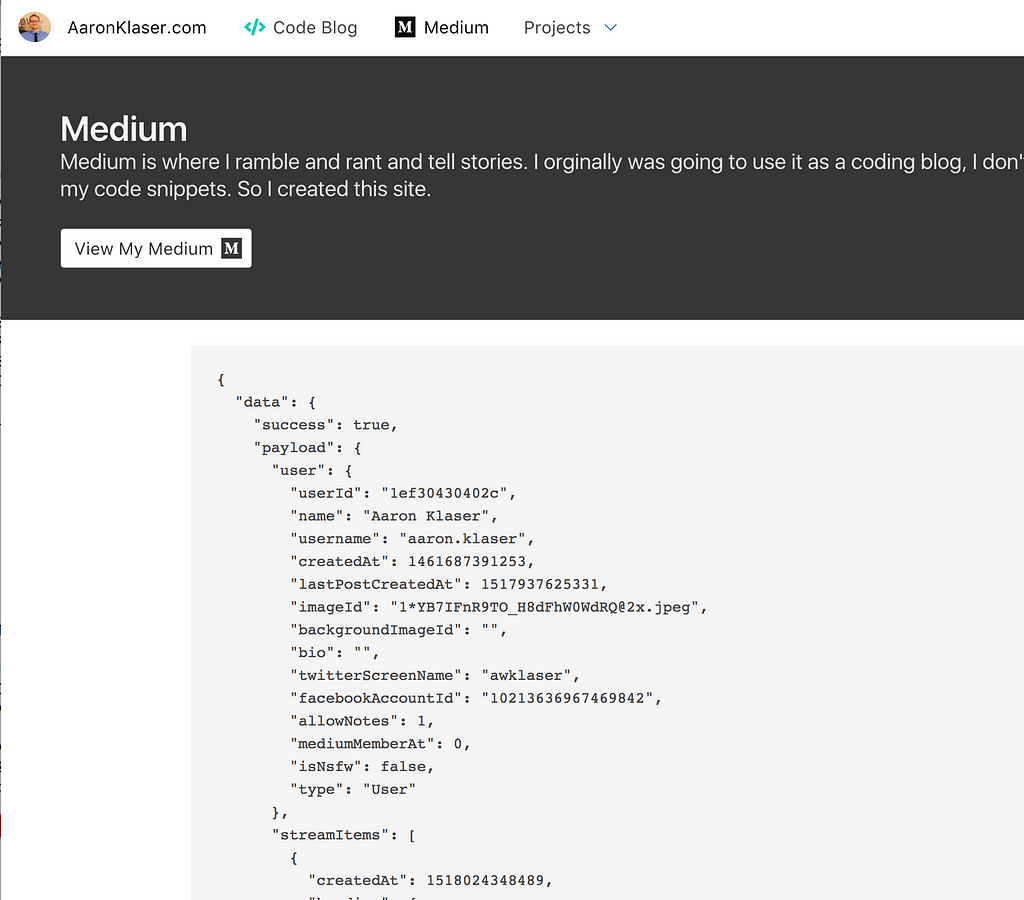
First let’s look at what a medium feed looks like. We can and medium content back in JSON format by adding ?format=json to the end of the url. Here is my feed.
https://medium.com/@aaron.klaser/latest?format=json
This will return a massive chunk of JSON, but we only care about payload.references.Post
I think it’s fair to note that this is not actually a “feed”, this is basically the content that Medium uses to display previews of my latest post on my Medium profile, not the complete posts themselves. Medium provides an RSS feed for which does contain more information like a traditional blog feed, however it can not be returned any JSON, only XML. I like the idea of this just being previews with links back to my Medium articles, on Medium, and it’s a bonus to not have to parse XML. But, if you would like to use the actual Medium feed these concepts are almost identical and you would use the url https://medium.com/feed/@aaron.klaser
But we need a page to put it on. I already have a tab for it in the Nav we just need to create a page to put it on. The basic set up follows a lot of the steps in my last article, so I’m going move quickly though the basic page setup.
In the app folder, create a file called Medium.js
import React from 'react'import PageHeader from './components/PageHeader'import PageContent from './components/PageContent'import axios from 'axios'
class Medium extends React.Component { state = { posts: [] } componentDidMount() { this.fetchPosts().then(this.setPosts) }fetchPosts = () => axios.get(`https://cors.now.sh/https://us-central1-aaronklaser-1.cloudfunctions.net/medium?username=@aaron.klaser`)
setPosts = response => { this.setState({ posts: response }) } render() { return ( <div> <PageHeader color="is-dark" title="Medium"> Medium is where I ramble and rant and tell stories. I orginally was going to use it as a coding blog, I don't like having to use Gist for all my code snippets. So I created this site. <br /><br /> <a className="button is-inverted is-outlined" href="https://medium.com/@aaron.klaser" target="_blank"> View My Medium <span className="icon" style={{ marginLeft: 5 }}> <i className="fab fa-lg fa-medium"></i> </span> </a> </PageHeader> <PageContent> <pre>{JSON.stringify(this.state.posts, null, 2)}</pre> </PageContent> </div> ) }}export default Medium
Then set up the routing for this page and update the item for Medium to point to this page.
This was not easy to figure out
So as we are building this locally Medium blocks localhost for cors. You can tell fetch to run no cors mode but then you get an opaque response with no data. I found that I could get around this by running everything through an express server but I don’t want my site to need a back end. I also tryied running it through something like cors-anywhere and cors.now. They where just blocked, and for good reasons honestly.
Serverless Architecture to the Rescue
I was able to fix this using Firebase Cloud Functions to make the call for me. However, firebase still throw cors errors but they where not blocked by cors.now.
My function looks like this, it’s ugly but I got it working and I’m moving on.
Medium returns a weird prefix ])}while(1);</x> to prevent JSON Hacking (:P) so we’ll just remove that and return our data.
const functions = require('firebase-functions');var request = require('request');exports.medium = functions.https.onRequest((req, res) => { if(!req.query.username) { return res.status(400).send('Error: You need to include query param ?username=@yourUsername'); } const url = `https://medium.com/${req.query.username}/latest?format=json`; return request(url,(error, response, body) => { const prefix = `])}while(1);</x>` const strip = payload => payload.replace(prefix, ``) res.send(JSON.parse(strip(body))); });})I have set up and endpoint in firebase functions that you can use or you can try to create your own. I might even create an article on it because it turns out its pretty cool.
https://cors.now.sh/https://us-central1-aaronklaser-1.cloudfunctions.net/medium?username=@yourUsername
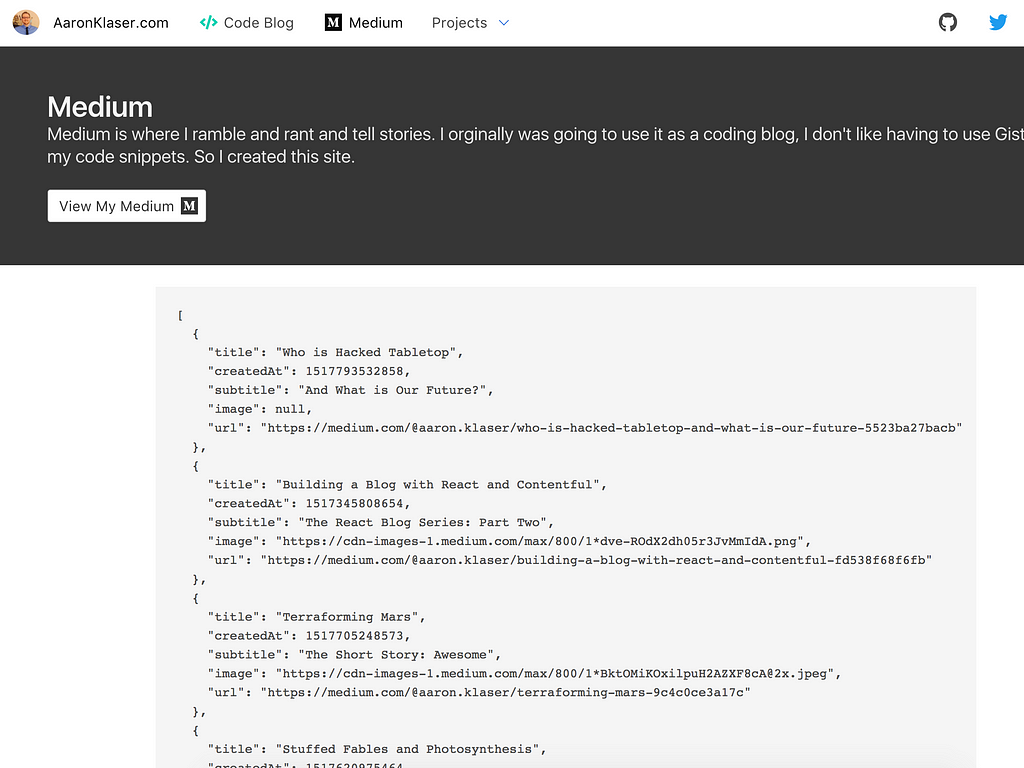
Just update your username and you should see your json in the pre block.
Extracting the Data For Our Posts
There is an easy way but its dirty, then there is a hard(ish) way but it’s clean.
The Easy Way:
Use Object.values() to convert the Posts node to an array of objects. This gets use our data but its ALL our date and we wont be able to spread that out over our MediumItem (we will build shortly)
setPosts = ({data}) => { this.setState({ posts: Object.values(data.payload.references.Post) })}But when you run the app you will see the pre blocks have the extracted Post data, but that also have a mountain of data you don’t need. The hard way solves this.
The Hard Way:
(Recommended) Let’s extract the only data we need in our post. That would be: createdAt, image, title, subtitle, description, and the url back to the post on Medium.
setPosts = ({data}) => { const { Post } = data.payload.references const posts = Object.values(Post).map(({ id, title, createdAt, virtuals, uniqueSlug }) => Object.assign({},{ title, createdAt, subtitle: virtuals.subtitle, image: virtuals.previewImage.imageId ? `https://cdn-images-1.medium.com/max/800/${virtuals.previewImage.imageId}` : null, url: `https://medium.com/@aaron.klaser/${uniqueSlug}` }) ) this.setState({ posts })}Now when we run our app, it should only print out the five fields we need from the giant blob of JSON, all ready to be spread out in our MediumItem object which we will build…
Now!
Building the MediumItem Component
In our app folder, create a medium folder and inside that create MediumItem.js
This will look similar to our blog Item, but since medium doesn’t give us the content, we won’t need a MediumPost like we did with the Blog, so we wont have any shared items and we will just put it all in this one component.
import React from 'react'import moment from 'moment'
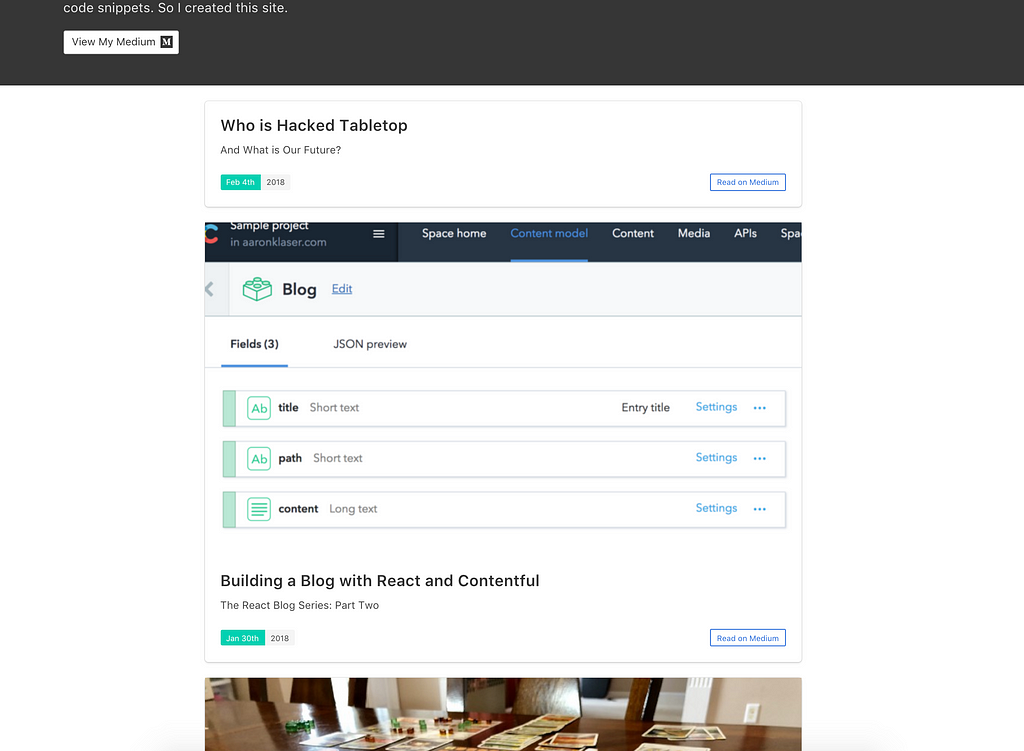
const MediumItem = ({title, createdAt, subtitle, image, url}) => ( <div className="box is-paddingless card"> { image ? (<div className="card-image"> <figure className="image"> <img src={image} /> </figure> </div>) : "" } <div className="card-content"> <div className="media"> <div className="media-content" style={{ overflow: 'inherit' }}> <p className="title is-4">{title}</p> </div> </div> <div className="content"> { subtitle } </div> <nav className="level"> <div className="level-left"> <div className="tags has-addons"> <span className="tag is-primary">{moment(createdAt).format('MMM Do')}</span> <span className="tag">{moment(createdAt).format('YYYY')}</span> </div> </div> <div className="level-right"> <a className="button is-small is-link is-outlined" target="_blank" href={url}> Read on Medium </a> </div> </nav> </div></div>)export default MediumItem
It should look something like this
And there you have it kids! You now have a Medium feed in your Blog that links back to your Medium posts. Start clapping!!
Let’s Review
- We set up a page for our Medium Feed
- We linked to Serverless Function to retrieve our Medium feed
- We extracted the data we need from our Medium content
- We set up a simple MediumItem component.
Next — Adding a Redux to a React Blog
Import your Medium Feed into React was originally published in Hacker Noon on Medium, where people are continuing the conversation by highlighting and responding to this story.
Disclaimer
The views and opinions expressed in this article are solely those of the authors and do not reflect the views of Bitcoin Insider. Every investment and trading move involves risk - this is especially true for cryptocurrencies given their volatility. We strongly advise our readers to conduct their own research when making a decision.


