Latest news about Bitcoin and all cryptocurrencies. Your daily crypto news habit.
 The ‘Welcome’ section of my personal site. I pull current weather data from the Aeris Weather API to get that neat icon situation. Other icons courtesy of FontAwesome.
A few weeks ago, I realized that it was becoming increasingly difficult to share my work with others. My email signature, LinkedIn, resume, GitHub, everything, had at least 4 or 5 links to my work and information — this was not sustainable! Nobody wants to go through 5 different links just to see what the heck I’m working on.
And thus my personal site was born. Honestly, I was a little afraid to start the site…
What if it doesn’t work?What if everyone hates it?WHAT IF I REALIZE I’M A FRAUD?!
But I bit the bullet and decided to make a React app for my personal site using create-react-app. This is by far the simplest way to get an app or website up and running quickly and painlessly. If you’ve never used the create-react-app my-app-name command before you are missing out! It streamlines the app setup process and allows you to make a single page app or site without any configuration! 🎉! According to the documentation, “Create React App uses both webpack and Babel under the hood. The console output is tuned to be minimal to help you focus on the problems [and] ESLint is also integrated so lint warnings are displayed right in the console.”
After running create-react-app you will see a folder has been created with all of the base components, style sheets and html.
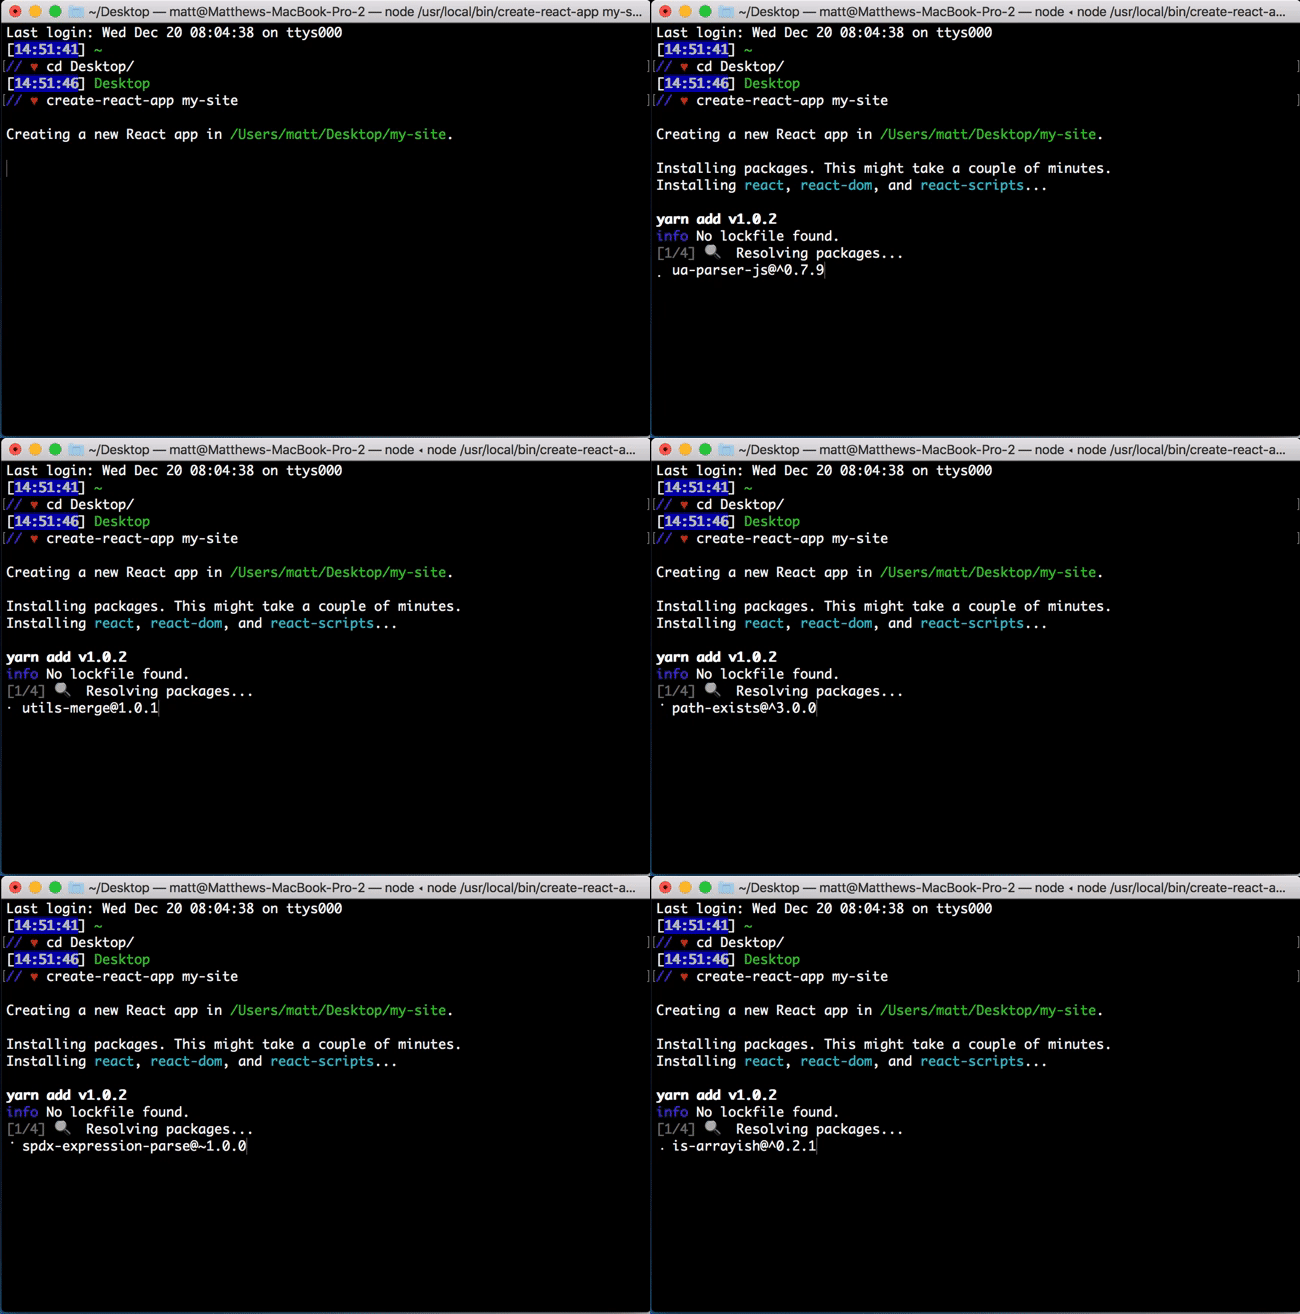
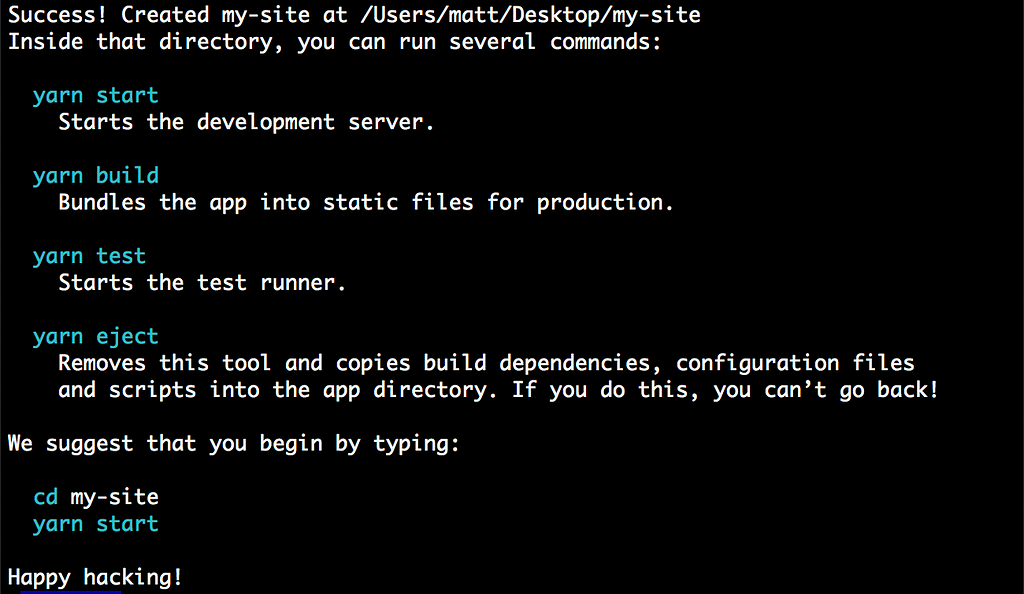 The left is me running create-react-app and the right is what you see when you’re done.
 Here the screenshot on the left shows the default React app. The right shows my completed site.
Adding in Components
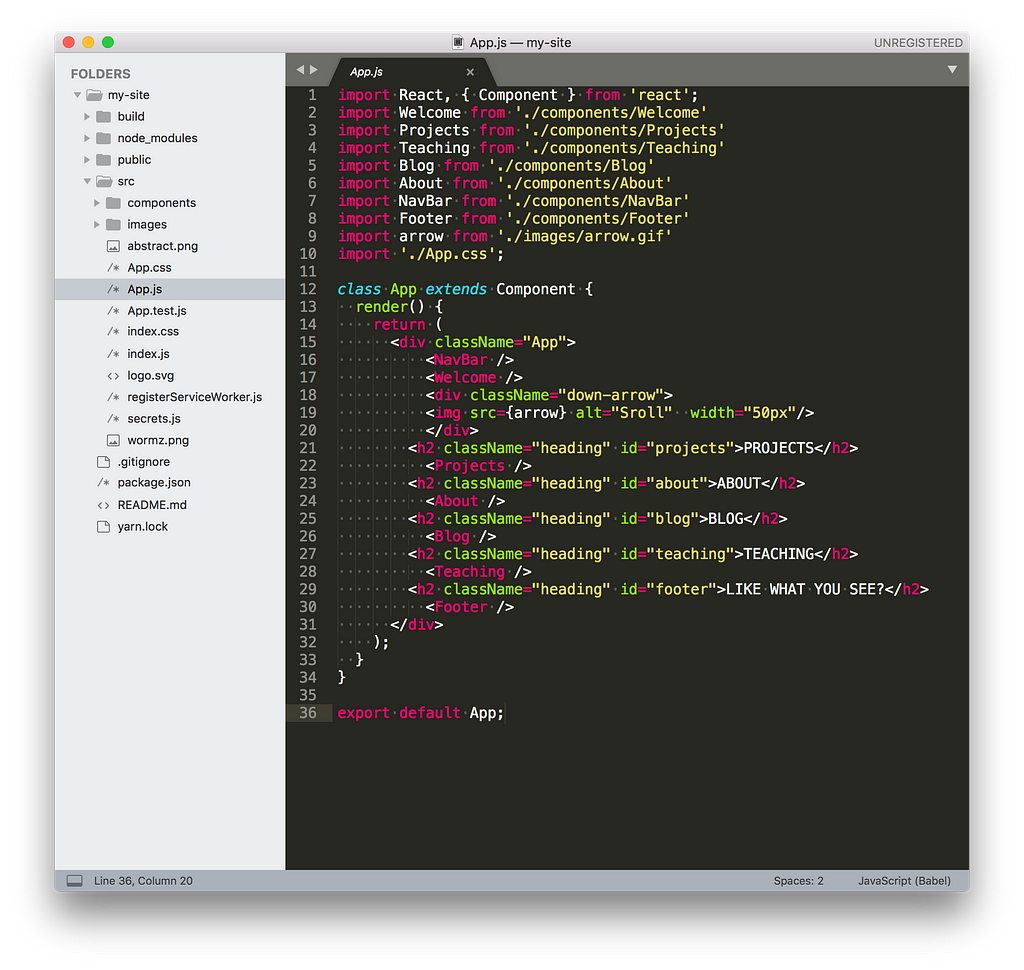
Now that you’ve got your app running, you need to add in your own components. Components in React are just what they sound like: the parts that make up your app. I only had seven components for my site and decided against routing. I wanted one single page that a user could casually scroll through to see what I’m up to.
In order for a component to show up on your page, it must be connected to the App.js parent component. This is the component that gets appended to the DOM when the page is rendered. The children then get appended, grandchildren, etc. If your component is off on it’s own, it will not show up on the page.
Since my app is fairly simple, each component is a child of the App parent and none of them have children. A small family!
To add a component to App.js you must import the component from wherever you have saved it. I generally create a components folder within the src folder, which is where all your code lives. To import you would write the following: import [NAME YOU WANT TO REFER TO] from '[FILE LOCATION]'
For me this was import Welcome from './components/Welcome' Let’s break it down:- import tells the page to find something- Welcome is the name I am going to refer to it as in this file. Best practice to use a name that makes sense so you don’t forget what it is down the road.- from is a keyword that indicates an address is coming- './components/Welcome' here the ./ means In the same folder, don’t leave the folder, components means go into the components folder, then Welcome means find the file named Welcome.js and import that into App.js.
Now when I refer to <Welcome /> in my App.js, it knows that I’m really referring to the Welcome.js component in the components folder.
My seven components are: Welcome, Projects, Blog, About, Teaching, NavBar, and Footer. I felt like this was a good amount of information to give a nice snapshot of who I am as a person and developer. You should decide what works best for you, but remember: quality over quantity!
Adding information to Components
Adding a component to App.js is useless unless you actually do something with the component you imported.
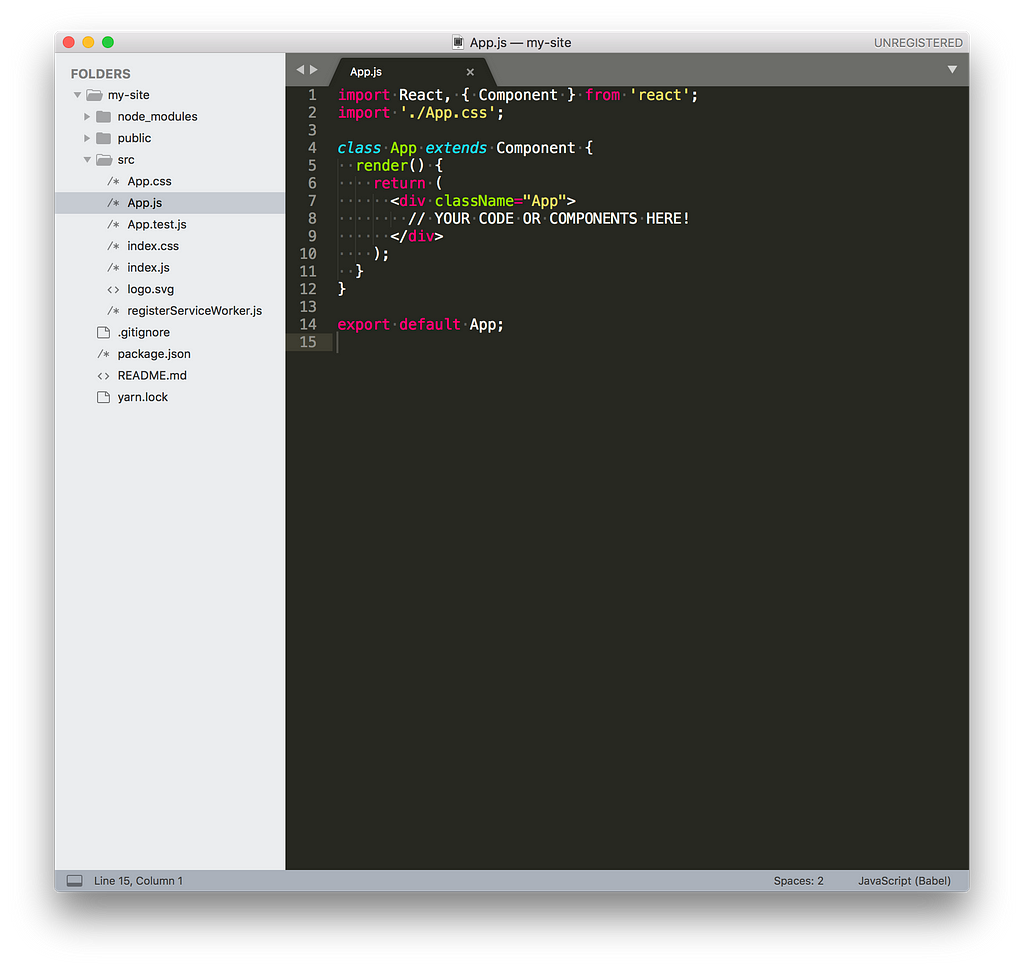
The basic setup for any React component requires, at a minimum, the following:
import React, { Component } from 'react';class NAME extends Component { render() { return ( <div className="NAME"> // YOUR CODE OR COMPONENTS HERE! </div> ); }}export default NAME;
You must import React, { Component } from 'react' because this is how you are able to use the functionality built into React. If you don’t import React, you can’t use React! 🤦🏽
Then you create a class with a name that makes sense for your component. It must extends Component because then you can inherit from the React Component parent class. Also very important! Then you must export default your component, otherwise you cannot import it elsewhere in your app.
You also need a render function that returns HTML. This is what gets rendered on the page! So inside the return statement is where you’ll be writing all your HTML code.
I also give a className to each of my components because it makes it easier for styling, etc. Important: in React, you must use className instead of class when writing HTML! class still works, but React will keep hassling you about it in the console and terminal 🤷🏽
Pictures in React
React can be a little funny with pictures. In order to have images from your computer, not a URL, appear on the page you must import them in the same way you would a component:
// Importingimport earthquakes from '../images/earthquakes.png'
// HTML<img src={earthquakes} className="thumb"/>Here you can see that instead of adding a URL as the source, you are inserting your image which you imported using curly braces.
IFrames in React
You can utilize IFrames (or Inline Frames) right in your HTML. I did this for my resume and pieces of work from my teaching days because I have them on my Google Drive.
To get these onto my site, all I had to do was use standard IFrame syntax:
<div className="item"> <h3>Earth Science Curriculum Map 🌏</h3> <iframe src="https://drive.google.com/file/d/0B-qIerDc7L8XUmlqczFTaUgxY0U/preview" width="100%" height="400"></iframe></div>
The src is the embed link from whatever you’d like to put in the IFrame (YouTube video, map, Google Drive file, etc). Super easy! Then I can have my entire Earth Science Curriculum come up on the page and users can scroll through if they’d like.
Deployment
The last step, and most important, is getting your site out there! Luckily, I have a unique last name so I was able to snag thorry.io from Google Domains for my personal site address. Google Domains is really great for finding available domains and I strongly recommend it is you are going the unique URL route.
After committing my project to GitHub (repo here), I decided to use Netlify to host my site. Again, it was pretty easy to set up!
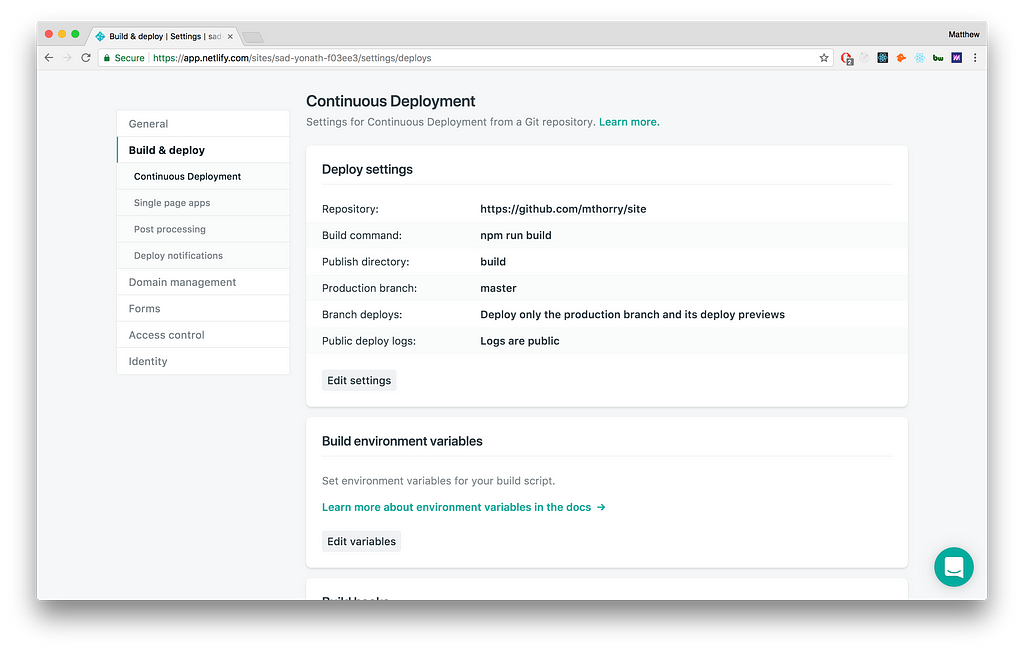
Normally to prepare an app for deployment, you would run npm run build and then manually push your build up. With Netlify, you just specify the build command you use (it depends on the language and framework) and hook it up to your GitHub repo.
Now any time you push changes to the GitHub repo, Netlify automatically runs the build you tell it to and which directory is the one to publish! Pretty awesome!
Click deploy on Netlify after getting your settings like shown above and BOOM 💥 your site is up and running!!
And that’s it! That’s a quick intro on how to get YOUR personal site up and running quickly using React. Good luck! If you enjoyed, let me know in the comments or by giving me a clap 👏🏽
Further Reading on using React, Netlify and some inspiration:
- Create Apps with No Configuration - React Blog
- 18 Personal Websites to Inspire Your Own
- Docs | Netlify
How to make a personal site with React and JavaScript ⚛️ was originally published in Hacker Noon on Medium, where people are continuing the conversation by highlighting and responding to this story.
Disclaimer
The views and opinions expressed in this article are solely those of the authors and do not reflect the views of Bitcoin Insider. Every investment and trading move involves risk - this is especially true for cryptocurrencies given their volatility. We strongly advise our readers to conduct their own research when making a decision.


