Latest news about Bitcoin and all cryptocurrencies. Your daily crypto news habit.
ERC-20 tokens are a key part of transacting on EVM-compatible blockchains and layer 2s. In this tutorial, you’ll learn how to create an ERC-20 token on Polygon, a layer-2 EVM blockchain that’s lower cost than deploying directly on Ethereum mainnet.
What Are ERC-20 Tokens?
ERC-20 tokens are representations of “something” on a blockchain. They are fungible, which means they are interchangeable: You don’t care which token you have since they’re all the same, just how many tokens you have. This contrasts with non-fungible tokens (NFTs), which are unique and therefore not interchangeable: You care about which token you own, not necessarily how many.
Building on Polygon
As networks like Ethereum become busier, gas prices increase and transactions take longer. To avoid these issues, developers can deploy their dApps to scaling solutions like the Polygon PoS Network. Let’s look at Polygon, why you might want to use it, and how to get started.
What Is Polygon?
References to “Polygon” often refer to the Polygon PoS chain, but Polygon is bigger than the chain on which we will be focusing. Developers are working to expand Polygon to become more than just the Polygon PoS chain, aiming to turn it into a protocol and framework for building and connecting Ethereum-compatible blockchain networks. For instance, Polygon Hermez is a ZK rollup currently live for payments.
Additionally, Polygon was previously called Matic. A remnant of this name change is the token used within the Polygon PoS Chain: MATIC.
Is Polygon PoS a Layer 2?
Often, people refer to Polygon PoS as a layer-2 chain. While it provides some of the main benefits of a layer 2, it is in fact a side chain that adds an additional feature: The ability to create checkpoints on the Ethereum main chain. While this sounds similar to an optimistic rollup since it adds transactions checkpoints to the main chain, it’s essential to understand that Polygon PoS is a separate chain with its own security and trust guarantees.
Advantages of Polygon PoS
Polygon PoS is an EVM-compatible chain. This means you can deploy the same contracts on the Polygon PoS as you do on Ethereum. Polygon PoS is also fast: It has a theoretical maximum of 65,000 transactions per second. Compared to Ethereum’s current 15 transactions per section, that’s a massive difference in speed. Polygon PoS also has much lower gas fees than Ethereum.
A Bridge Between Chains
To transfer assets from Ethereum to Polygon PoS you will need to interact with the Polygon Bridge. This is a contract that will take custody of your assets on the Ethereum side and, after around 7-8 minutes, create a wrapped version of that asset on the Polygon side.
This is a little like using tokens in an arcade. You give the arcade employee (bridge contract) your money (ETH) and in turn, they create tokens (POS-WETH, Proof of Stake Wrapped ETH) to use within the arcade (Polygon PoS). From there, you can use the tokens (POS-ETH) to play games in the arcade. If you would like to leave, you can give your tokens (POS-WETH) back to the employee (bridge contract) and they take the tokens (POS-WETH) and give you back money in exchange (ETH for POS-WETH).
The Tutorial
Now, let’s get started. Follow the steps below, or code along with this video.
Requirements
To get started, you need essentially the same set of tools you use to build on Ethereum. That’s one advantage of EVM-compatible chains: They often don’t require you to switch toolsets. For this tutorial, we will be using:
Remix—a web-based solidity IDE
Brave Wallet—a crypto wallet similar to Metamask
Openzeppelin—a secure standard for blockchain contracts
Polygon Mumbai—Polygon’s test network
Polygon Faucet—a great place to obtain testnet ETH
Connect to Polygon Mumbai Testnet
The first step in building an application on the Mumbai testnet is to calibrate your wallet to work with it. You will need to setup your wallet first. Chainlist is a good tool, enabling you to simply connect your wallet and add chains from there. If you want to add it yourself, you can find the following information in the Polygon Docs.
Network Name: Polygon Mumbai Testnet
New RPC URL: https://rpc-mumbai.maticvigil.com
ChainID: 80001
Symbol: MATIC
Block Explorer URL: https://mumbai.polygonscan.com/=
Obtain Mumbai MATIC
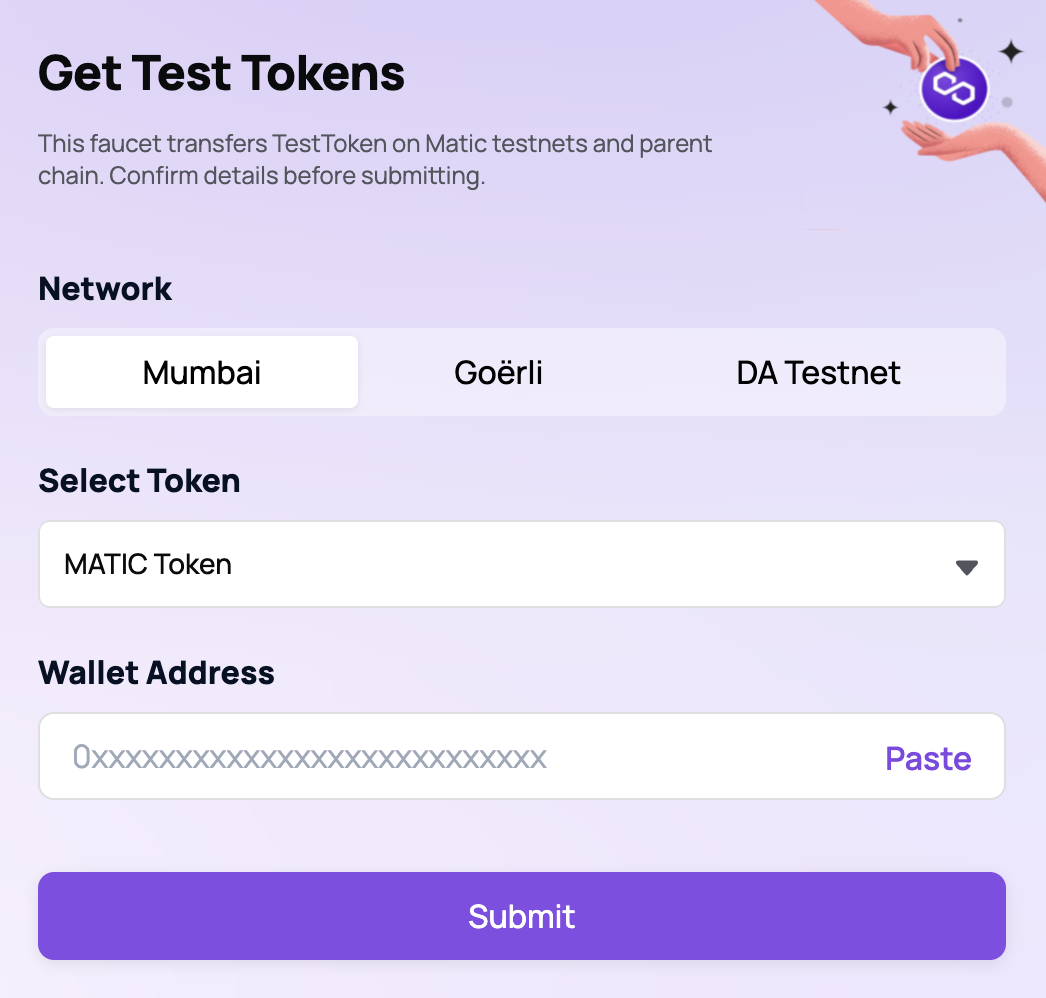
MATIC is the native token of the Mumbai testnet. To deploy and interact with contracts, we will need some. Head on over to the Polygon Faucet to obtain some testnet MATIC. You will need to supply your wallet address and click “Submit”.
Using OpenZeppelin—A Web3 Standard
OpenZeppelin provides developers with a set of contracts and libraries that are becoming a standard within the Web3 industry. We will be using their ERC-20 contracts to define our token. Using standardized contracts will help ensure that the tokens we create are reliable. If you would like to learn more about the contracts OpenZeppelin provides, check out its getting started page.
Building the Contract
Let’s head over to the Remix IDE to get started.
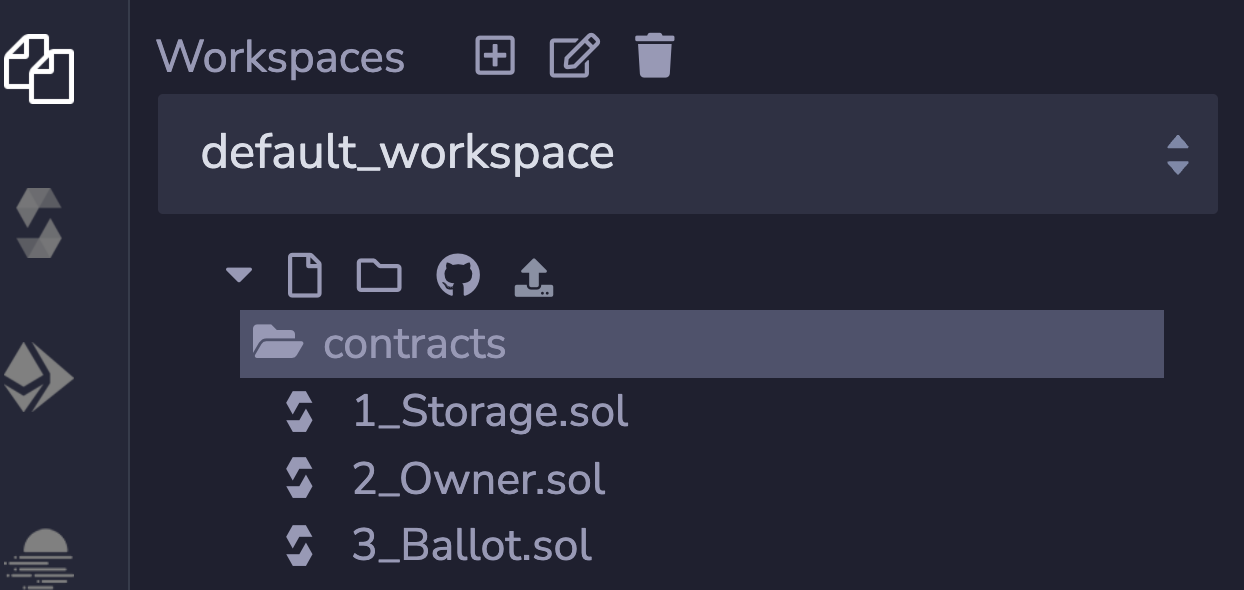
Remix provides a few sample contracts. We can ignore these for now.
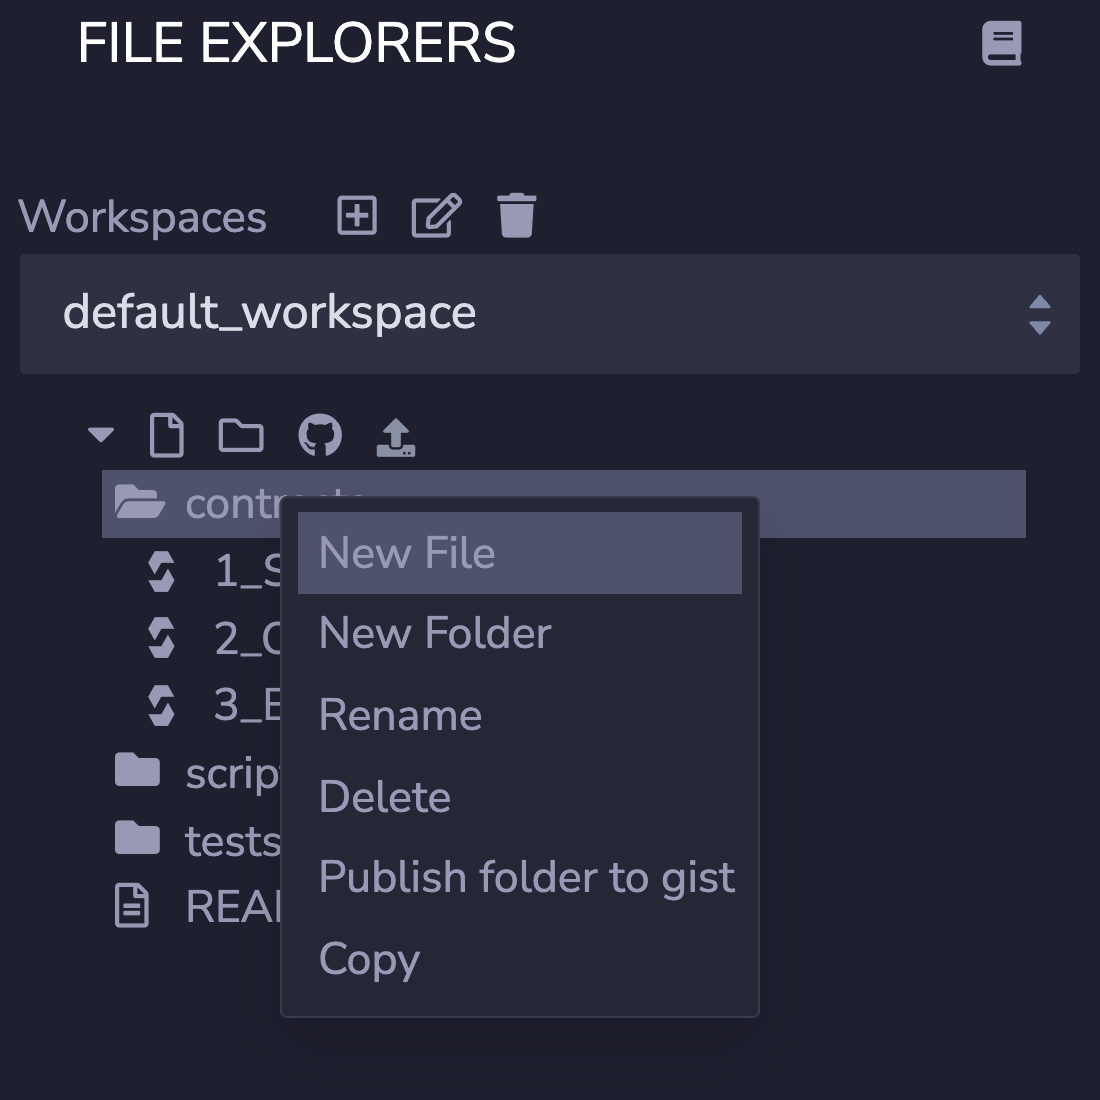
Create a new contract in the contracts directory.
Let’s name it PolyCoin.sol
// SPDX-License-Identifier: MIT
pragma solidity ^0.8.2;
import "@openzeppelin/contracts/token/ERC20/ERC20.sol";
contract PolyCoin is ERC20 {
    constructor() ERC20("PolyCoin", "PLYCN") {
        _mint(msg.sender, 1000 * 10 ** decimals());
    }
}
A Note On Decimals
Solidity doesn’t use decimals. This means any time we want to deal with less than whole numbers, we need to use fixed-point arithmetic. Essentially, we are storing a fixed number of decimals in the value. In this case, decimals() is 18, which means we are multiplying the number of tokens we mint by 10^18.
Deploying
You now have a fully functional ERC-20 token! Let’s get it deployed to the Polygon Mumbai Network.
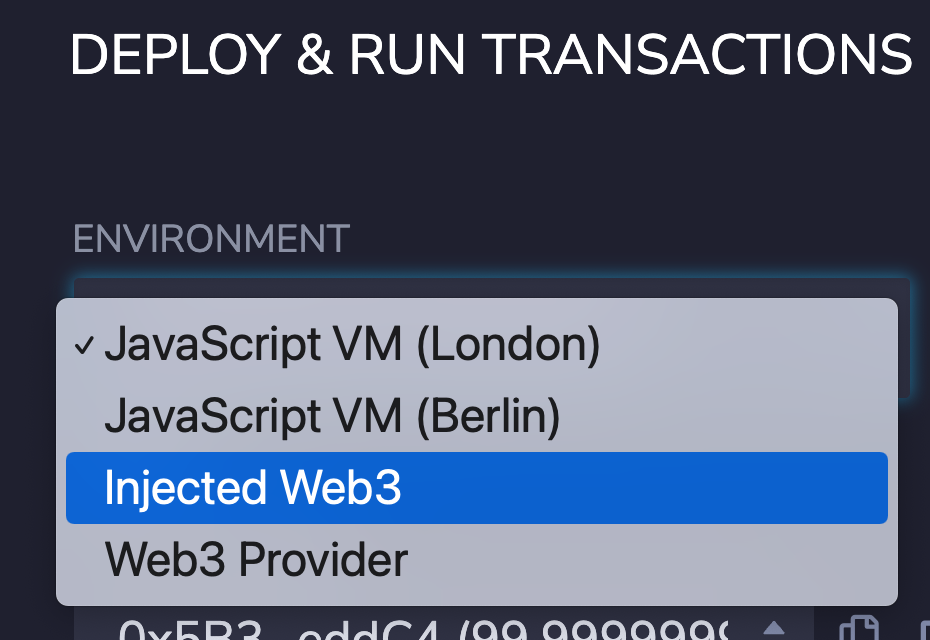
The first thing you will need to do is change the Environment to Injected Web3. This will enable Remix to interact with an actual blockchain via your wallet.
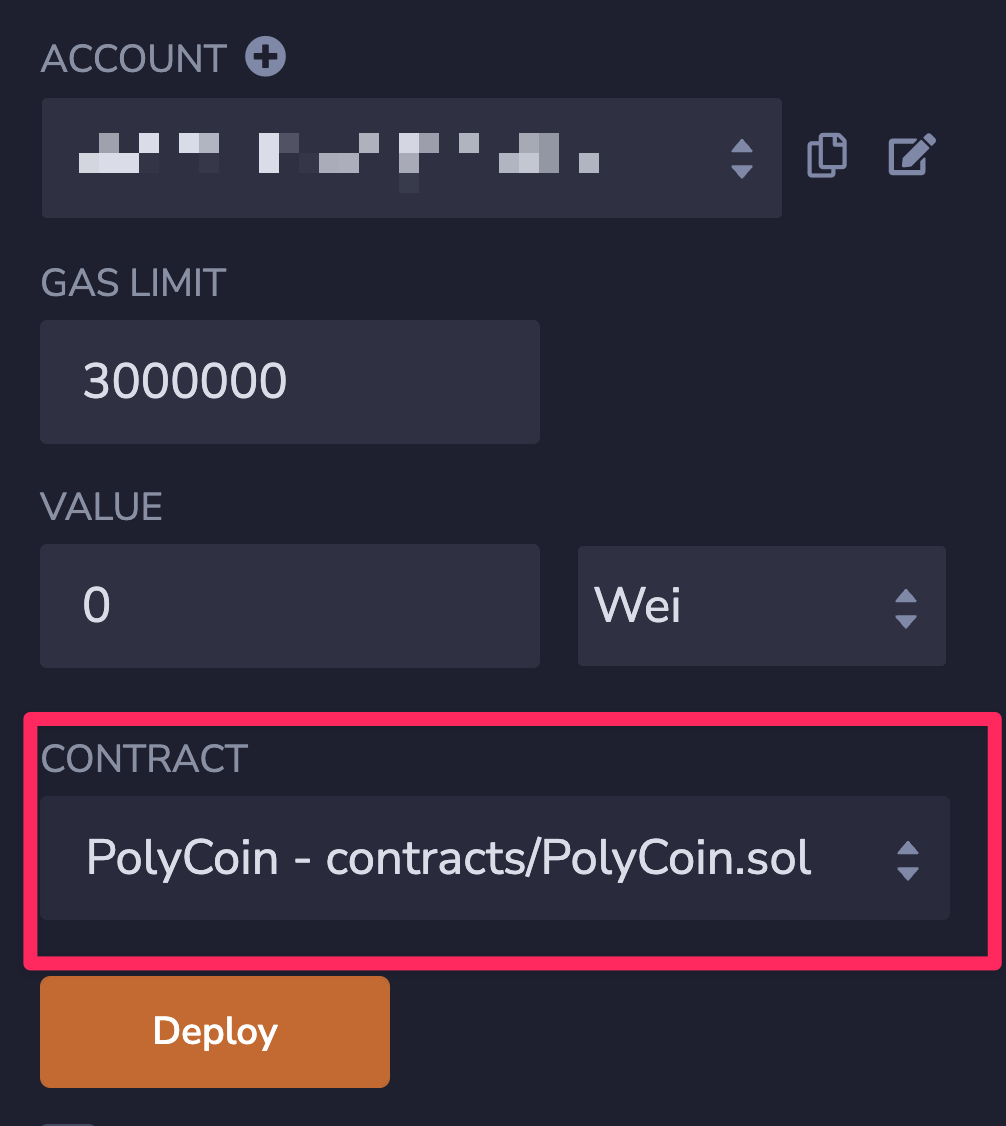
Next, ensure you have the correct contract selected. We named our contract PolyCoin in this example.
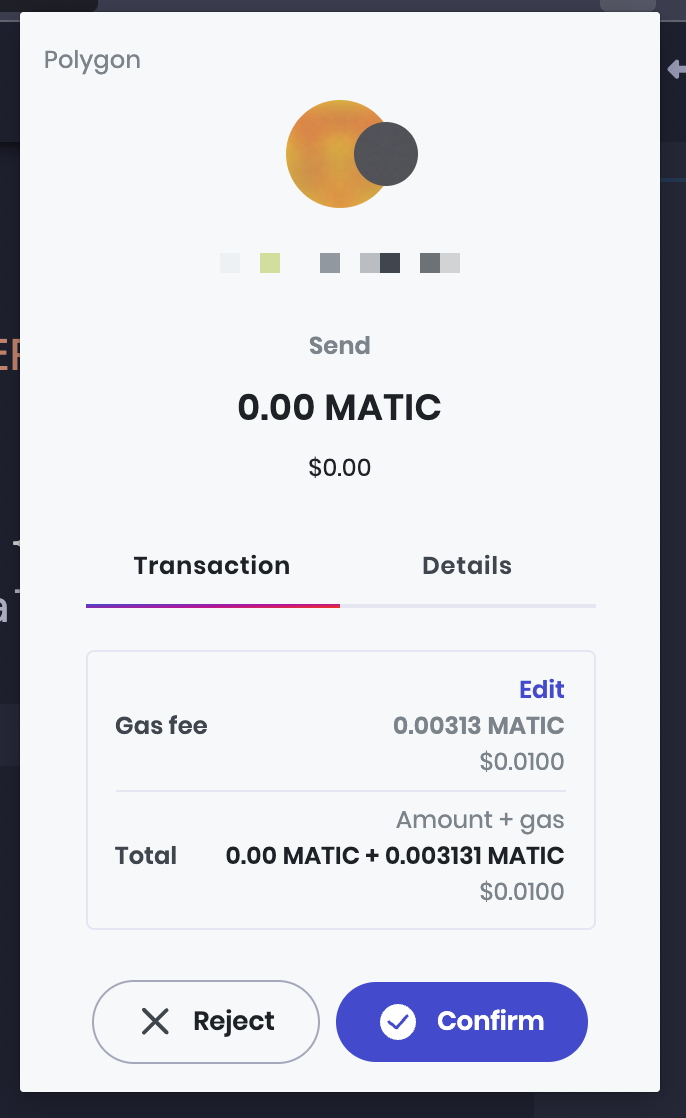
Click on the “Deploy” button and you should see a confirmation button. We are deploying to a live blockchain, so a gas fee will be involved.
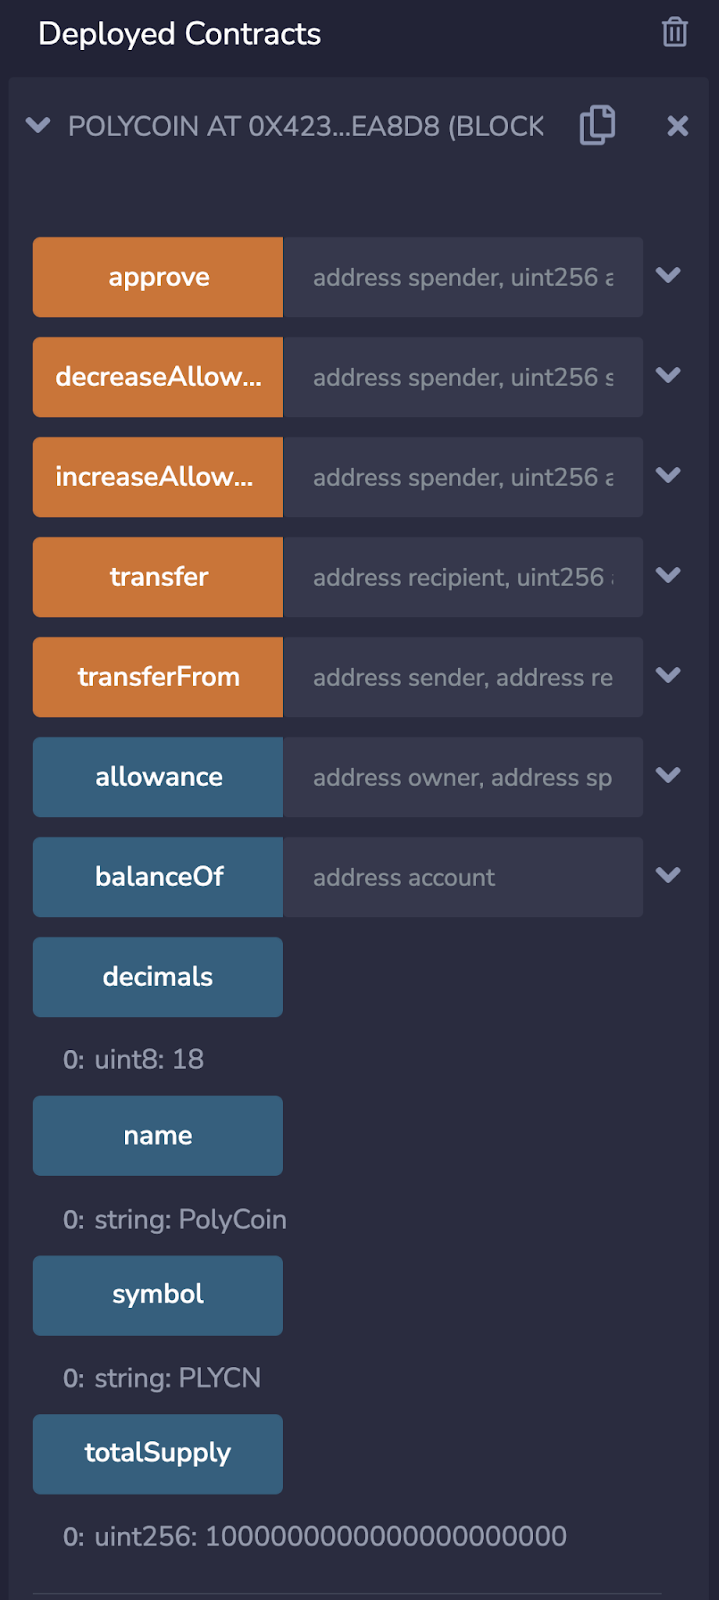
It may take a moment for the contract to be fully deployed. Once it is, you will see it under Deployed Contracts. You can also see all of the functions available in the contract. The OpenZeppelin contract import also includes these functions.
Verifying
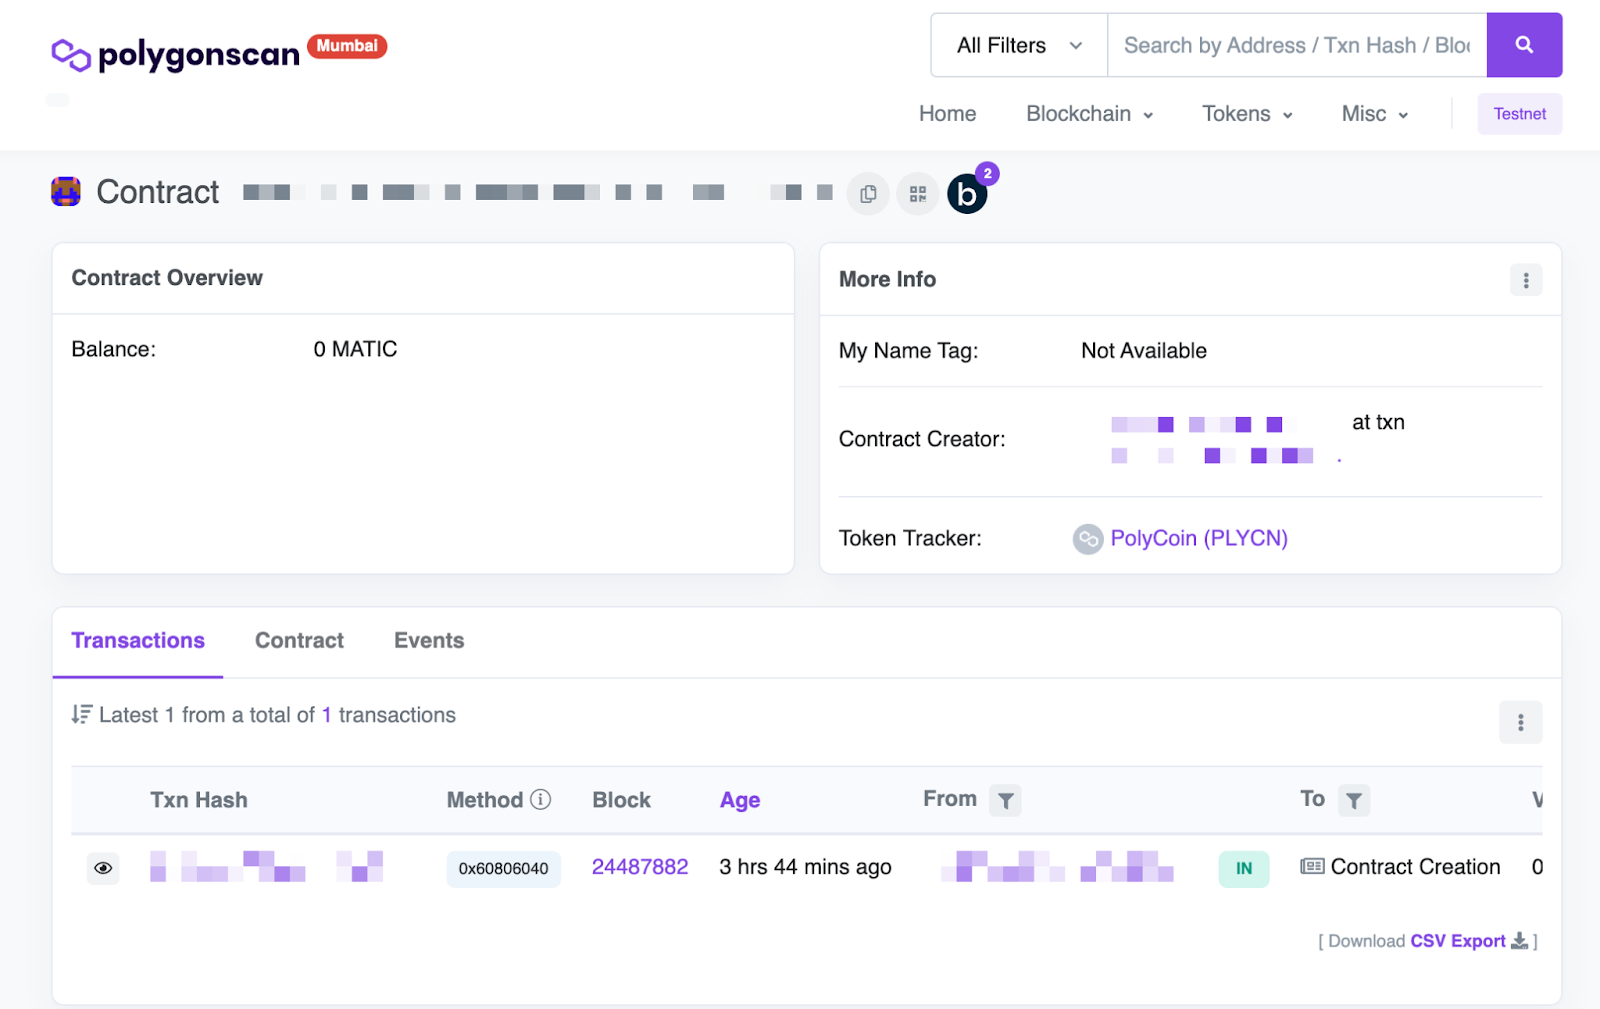
After deploying the contract, we can double-check that it’s showing up on the Mumbai network.
Copy the contract address and head to PolygonScan.
Enter the contract address and search for it.
You should see the contract and token.
You’ve created an ERC-20 Token and deployed it to the Polygon test network!
Next Steps
From here, you could take your token to Polygon mainnet or any other EVM-compatible blockchain. That’s one of the great things about Solidity—numerous chains support EVM-compatible contracts.
You could also add more functionality to your token. The OpenZeppelin contracts support additional minting, burning, voting, and more. Check out the OpenZeppelin docs for complete details.
The ability to create your own ERC-20 tokens opens up many new opportunities, from facilitating protocol governance to interacting with DeFi applications. Further down the line, you could even launch a Chainlink Price Feed for your new token, enabling it to be used across a wide range of DeFi protocols.
To learn more, visit chain.link, subscribe to the Chainlink newsletter, and follow Chainlink on Twitter, YouTube, and Reddit.
The post How to Create an ERC-20 Token on Polygon appeared first on Chainlink Blog.
Disclaimer
The views and opinions expressed in this article are solely those of the authors and do not reflect the views of Bitcoin Insider. Every investment and trading move involves risk - this is especially true for cryptocurrencies given their volatility. We strongly advise our readers to conduct their own research when making a decision.
