Latest news about Bitcoin and all cryptocurrencies. Your daily crypto news habit.
 [Note: This is a series of episodes so if details are missing, please look back at the blogs of the series. This series is noted as [Final Project Week]. Also note, that this is for the teams’ reference and not specifically targeted for perfect guidance on how to do this]
One would never think that an MVP would take long to execute given how simple the MVP has to be. However, when one is learning nine different technologies to try execute an MVP, it’s a longer hike than one expects.
Normally, one could get the MVP done in a day. Makers advise to get the MVP done in one and half days. Our team has surpassed that advise and although it’s stressful to know that we don’t have many days for feature building yet, it’s venture to try get MAPBOX to integrate with REACT.
One of us suffered immensely staring at the screen the whole day without getting anything done. It took an evening of beers to get us on our feet again. Let’s reflect on how simple but big our MVP is.
- A user can see a map on the page
- A user can add a pin on the page
- A user can save a pin on the page
- A user can load up a pin on the page
That sounds fairly simple, right?
One of the biggest challenges was getting around our heads of how Map-box interacts with React using React MapBoxGL. This was two days’ worth of struggle to simply get a point on the screen. Parts of the reason why it was so difficult was that although MapBox was written in pure javascript, it has a different format or syntax for when we write in React with the MapBoxGL package.
The second is testing. Remembering from the last projects, we never even gotten close to testing a component in React. Lord save us for Mocha, Chai and Sinon as these were tools used to help us have a familiar testing framework that we knew. Things such as “describes” and “its” were nice to see working in our testing framework.
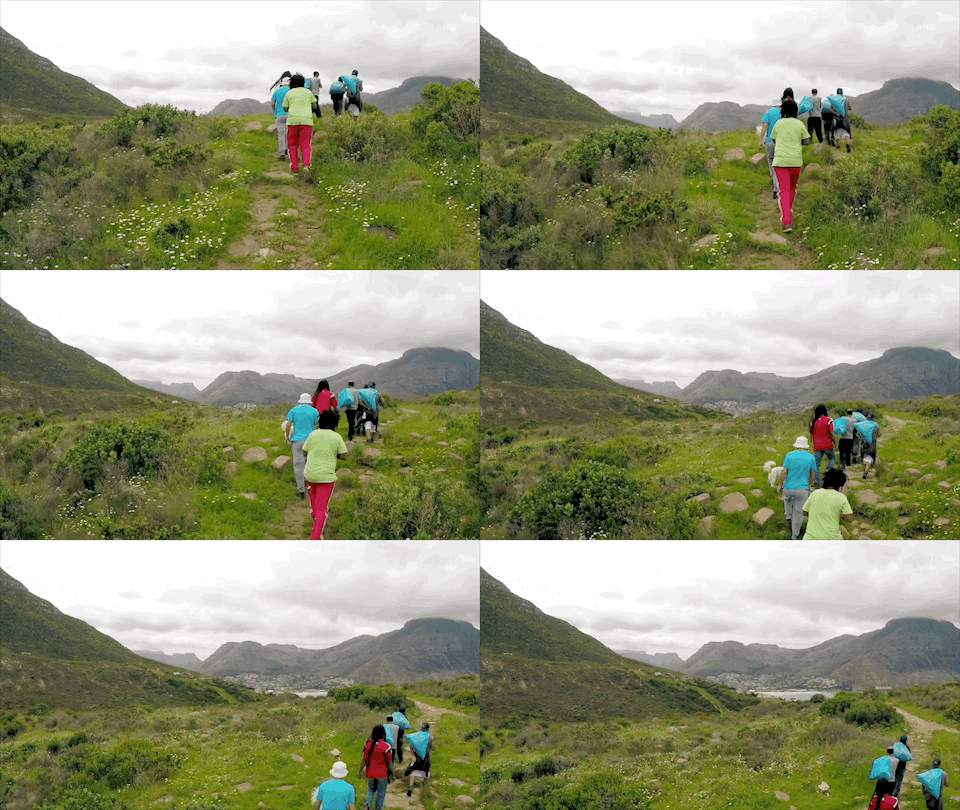
Nonetheless, this blog is a mark for our journey given that we managed to achieve our MVP. If I could describe this journey, it’s almost as if we all decided to go on a journey and didn’t realise how long the hike would be. We somehow remembered to take all our overnight gear, and start trekking over the hills for 48 hours. We had to camp out because we needed to recover our energy to get back up on our feet again.
I won’t go into how long or how exactly we spend our time figuring out how to do things. That would take way too many minutes for a Medium blog. What I will do instead is go through the code we’ve written. Today, we’ll be looking at the front-end React and testing, both for the front-end and the back-end.
Front End:
Our front-end of React manages to add a pin on the map, save that pin into the database and load the pin again based on the coordinates saved in the database. Let’s go line by line:
Let’s start with the first thing that loads our Map. This is our file called Map.js
We first import react. Then, we import React Dom, which is a package that connects React to the Document Model Object. Then we import our actual file (App.js) with all the components. Then, we impor reactMapboxGl which allows us to import our Feature, and Layer from the package react-mapbox-gl.
We, then have our access key which you need to get permission to the mapbox data and methods.
Below, we are rendering the feature, layer and map from our App class into our element “root” in our HTMl file (index.html).
Now, if we go into our App.js file…
We import React, along with the components from React. We then import axios which is a package that allows us to make get and post request.
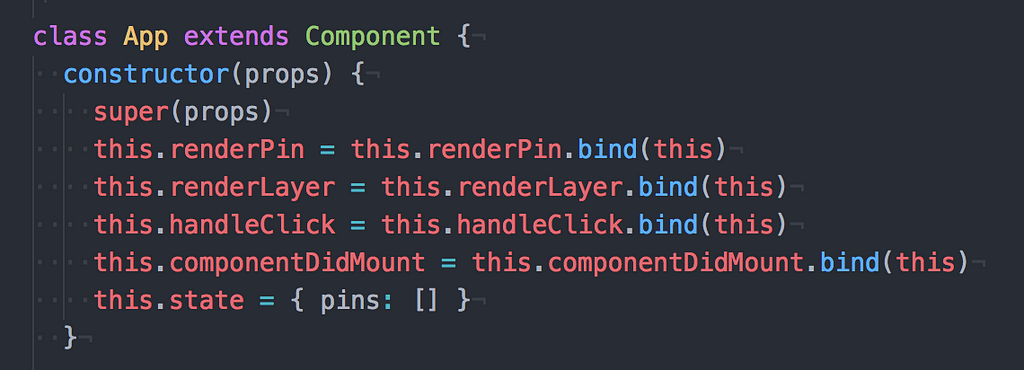
We then have our App Component, which binds all our methods to call. I suppose you could think this constructor works as when you initialise a class, it comes with all the values in it. Unlike javascript, you have to also initialise or what react calls “BIND” your methods when you call the App. We are also setting a state, pins as an empty array.
What gets rendered first is componentDidMount, which is I believe a React syntax. Then, we are making a copy of the state and setting it to a variable called pins array. This is because we do not want to change the original state when the component has been has been rendered. Hence, we want to make a copy of it and alter that one, so we save the original one.
Then, here we are making a get request to all our pins (if there are any in the database) by iterating over the array of pin objects, and setting the values of coordinates to the right keys. After that, you are setting the result of the iteration of the copied pins array to the actual state known as pins.
Whilst this get request is running, the computer reads through the rest of our code till it hits the bottom. Given that none of our methods render the map except the last one, our computer will go straight to the bottom where the render method is.
So, imagine that the next image is the last/bottom part of the code and parts of the content required are the methods written above it.
Our last part of the function is to If there’s an error, the error will be printed.
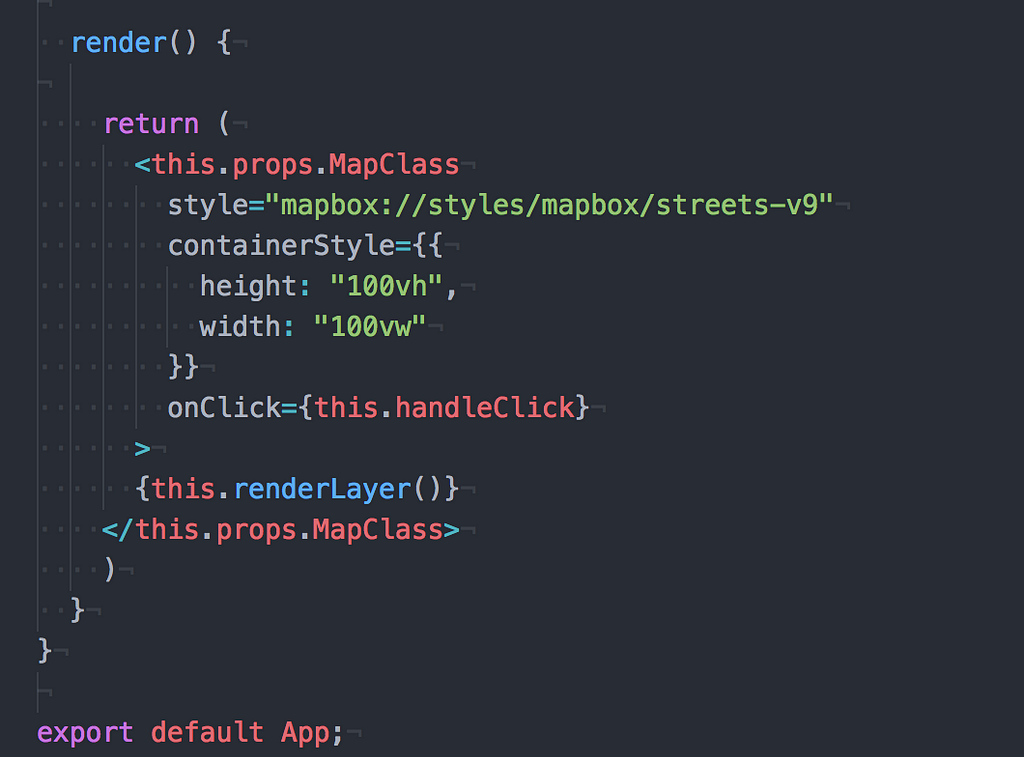
As I said earlier, this is the render method that is responsible for printing out the map. You have a prop class, which contains the Mapbox style and container Style. Container is where the map lives. We are then calling two other methods.
- One is when you click on the map (which calls the handleClick, a method that post requests the coordinates to the database)
- Then you are calling renderLayer (which renders a layer of pins on the map)
Given handleClick is called first, let’s reference this method.
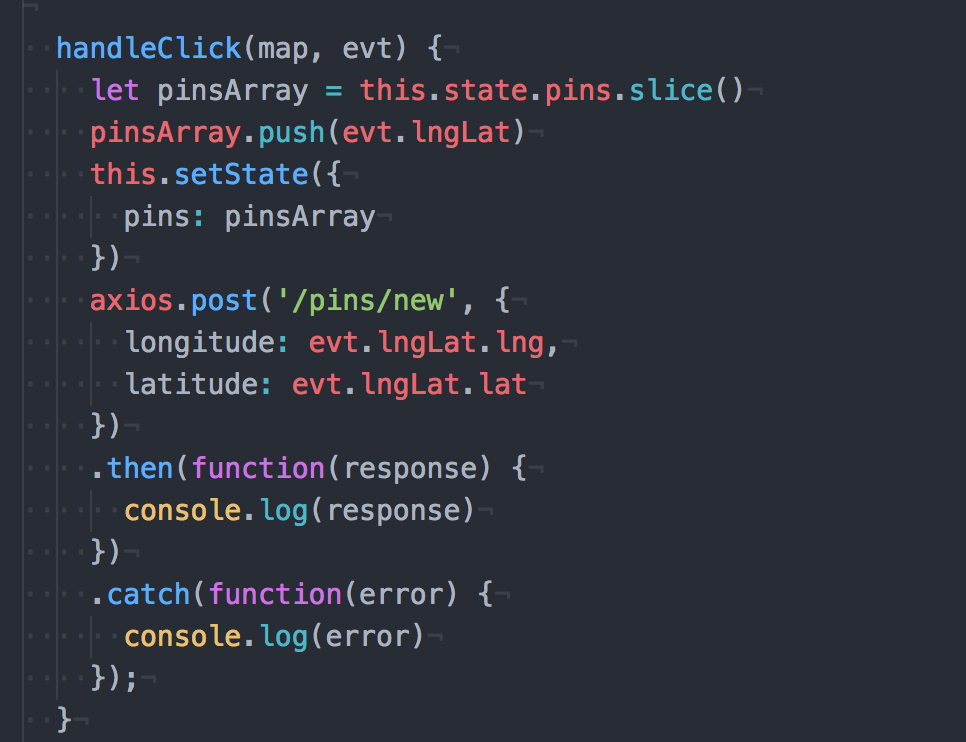
Our handleClick method is responsible for the post request. This is where, when one pin is made on the map, the coordinates are extracted and saved into our MongoDB database.
We are first creating a copy of pins array, as we do not want to change our original one we mentioned earlier.
We are then pushing the two coordinates (longitude and latitude) into the Array. After that, we set the change copied array to the actual state we initialised, which is pins!
Axios then makes a post request to the link, to set the longitude and latitude to the right keys. These keys refer to the table headings in our database which if you are working in a team, you will have to make a database, and have a table which has both longitude and latitude rows. The post request is what saves it to the dabatase.
You then have two functions, one is familiar to you already. One reads out the error message and one reads out the response message if your code breaks. Unlike normal code, you have to implement these features if you want to try fix bugs or see what the response is giving you for your post request.
If we recall what render does, it calls two methods, the second method it calls is render Layer.
In render Layer, this is where our styled dot is put on our coordinate. In other words, this is how our coordinate is shown on the map based on the coordinates its given. Whether a new pin is being clicked or old ones are being loaded up, this is how the dot is being made on the map.
So, we’ve done in it a Layer where we’ve set the symbol to be a marker, and style it to be a brown dot. Given, we can have a multiple of coordinates…
this.state.pins is an array of pin objects. In a pin object, is a hash with longitude and latitude as keys, with its values as coordinate numbers. Given we can have multiple coordinates (as I was saying), we need to iterate over this array of pin objects, to give out the longitude, latitude and surprisingly the index number. By giving it the index number, this allows us to have multiple points with different coordinates on the map.
But wait! What is renderPin! renderPin is a method! What is this method doing! Well, let’s go into that.
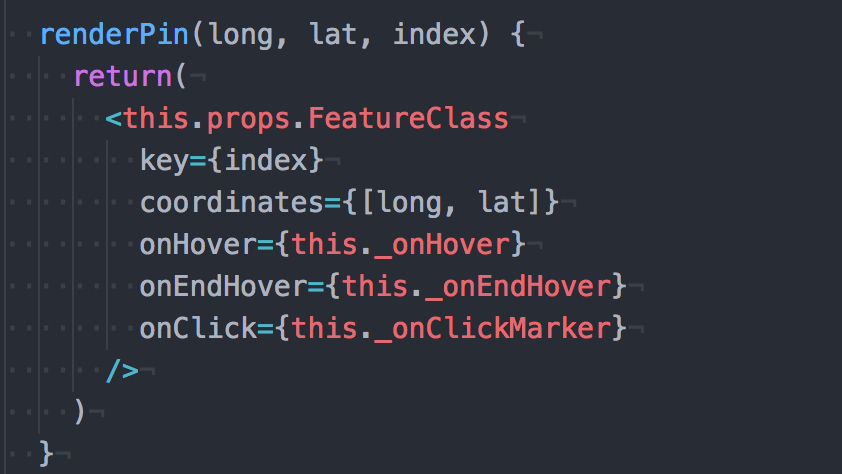
Render pin is what defines the coordinates so that Mapbox can insert it onto the map. The Feature layer is where we define either actions or objects so that it can rendered on the map after it’s called.
Hence, our render pin takes a longitude, latitude and index. It then sets the coordinates to an array consisting of longitude and latitude, which is what helps the iteration in renderLayer get the coordinates out.
All of that, for a pin to be added on a map, saved on a map and loaded on a map when you refresh the page.
Testing React (so Far)
Boy, we had more progress testing React than we ever did the first time we attempted it. We realised how other packages with different matchers could help us achieve this, rather than Jest.
Note: We are not sure whether this is the best or right way to do it. We have looked, if you have any suggestions, comment down below. We understand its not practical given the file can grow or change. However, it got the syntax up and running for passing tests.
Given a lot of our code does not give back the same values on the time, we had to make a double of the entire file. For instance, what if someone had one point saved but the other had ten, and wrote the tests to have ten points. That’s not an effective test. Hence, we made a double of the entire file so that this double could be represented in the test environment. This is also because, given we are testing App but have all these other components such as Map, feature and double, you would have to make the double given that they are all part of our React file. Perhaps for isolation, not sure at the moment.
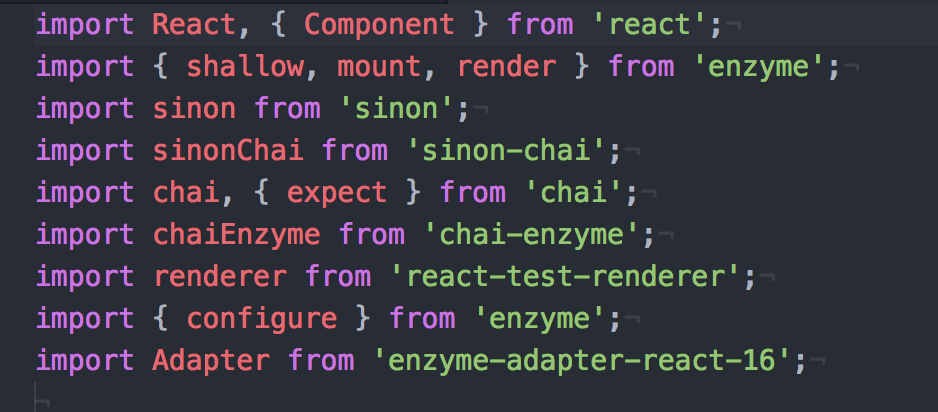
If we go to our test file, for our App, so something along the lines of App.test.js, we’ll have to import the following packages.
These are either all matchers, packages or adapters to help render the tests and frameworks. I’ve explained it in my previous blogpost (Episode 33) if you want to have a look there. Briefly, not really in detailed.
You then you the adapter and matchers, that adapts the frameworks and import all the doubles into the test file for use. Below, we have the following tests. If you have done javascript testing before, this may look familiar.
Here we are testing whether pins is an empty array pins. Everything should be recognisable except for shallow. You make think shallow acts like the double given it calls the Double but it doesn’t. In fact, it still has some functionality of the original methods. However, shallow calls the instance of the component without having to worry about the behaviour of other components. I suppose it isolates that component to be tested, and makes sure that is the component that is instantiated or rendered.
Here, we are checking whether render pin returns a component
Here, we are testing whether the component returns the layer double
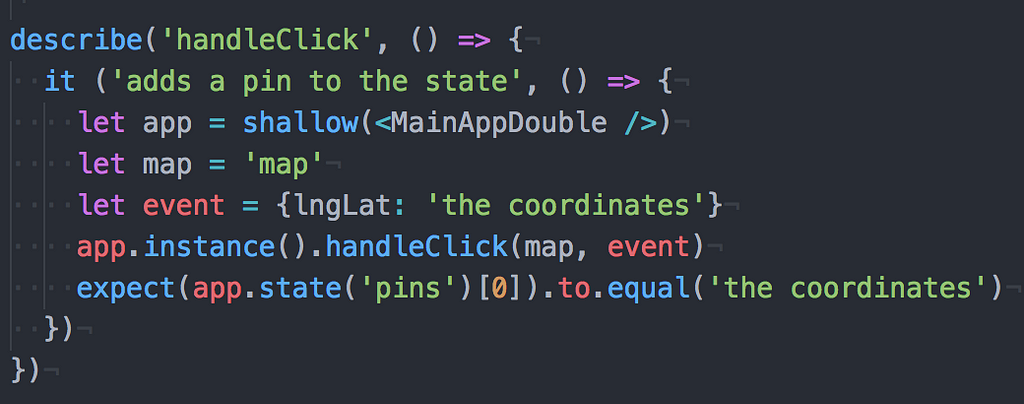
Lastly, we are testing whether the handling click method adds a pin to the state. To run all these tests, you just run npm tests in the command line.
We also have some testing for the back-end. However, they were much simpler to execute given that you were not dealing with testing another framework that modifies its javascript. I believe because we are testing two different syntaxes and formats, it’s tougher to get your head around React.
And all this while, we thought Jest was the answer. Although! Jest is currently running but we are simply using Mocha and Chai features instead of the Jest ones. If that makes sense.
The CampOuts:
We experienced two different nights when we took the time to reflect over what we had done. It’s quite crazy how one day could be a hurricane storm whilst the other was a breezy night.
Our first retro we had listed all the rough patches of what we could not figure out. Half of us, otherwise a pair of us got some progress with the back-end testing. Those with React got nowhere, whether it was testing or integrating MapBox with React. A good way I suggested to categorise our struggles and some successes was to do a venn diagram with sticky notes. Our struggles were the outside circle whilst the inside was the sucesses.
This was a good way to gauge what people understood or found difficult. It shined a light on how we were achieving the idea of “getting everyone on the same page.” Plus, it also showed that even if it felt like we didn’t get stuff done, we still are doing some things which as great such as team communication, support and understanding the frameworks better than yesterday.
The second retro, the calm breezy night in other words, was much more exciting and refreshing to wake up to. The goals to be proud of were successful and the venture to rotate in pairs to categorise the tasks we could tackle for the next set of user stories.
No matter what the rough and tough times the team are going through, it’s always important to stick together and beat out the storm together. Whatever come, whatever may, another exciting day awaits.
Fun fact of the Day:
It’s hard to believe when someone looks at you and says all these nice things, especially when they are things that you doubt about yourself. Perhaps, what they are seeing is a figment of how they perceive you. However, perhaps it also could be something that you’ve just not found out yet, or sometimes have put a blind eye to. Shout out to Dad advice inspired by Jamie LeMercier
Episode 44: The MVP climb [Final Project Week ] was originally published in Hacker Noon on Medium, where people are continuing the conversation by highlighting and responding to this story.
Disclaimer
The views and opinions expressed in this article are solely those of the authors and do not reflect the views of Bitcoin Insider. Every investment and trading move involves risk - this is especially true for cryptocurrencies given their volatility. We strongly advise our readers to conduct their own research when making a decision.


